Do It Yourself

7733 readers
1 users here now

Make it, Fix it, Renovate it, Rehabilitate it - as long as you’ve done some part of it yourself, share!

Especially for gardening related or specific do-it-yourself projects, see also the Nature and Gardening community. For more creative-minded projects, see also the Creative community.


This community's icon was made by Aaron Schneider, under the CC-BY-NC-SA 4.0 license.

founded 2 years ago
MODERATORS
51
54
Made a table (slrpnk.net)
submitted 1 year ago by CadeJohnson@slrpnk.net to c/diy


Table top is four 50-pound bags of ready-mix grout concrete (no stone, just sand), 3m of 1m wide 1x2inch fence mesh.

Chairs were solid white upholstery. We bought them in a second-hand store and painted with diluted acrylic (to hide old stains). Waiting 30 days before I apply sealer to the concrete.

52


Yes, now it looks like frankenshelf. Adds character. What do you think?

53


cross-posted from: https://midwest.social/post/4040473

Every once in a while, the heating element seems to break on my Gaggenau EB 378 610 oven. Other than that, it works fine.

This time though, I am unable to find a replacement part since the manufacturer discontinued it. I searched everywhere online and on eBay, but was still unable to find it.

I would rather not buy a new oven since that would be very expensive and I like this one. Does anyone have any ideas about where I can find a replacement heating element? Or am I out of luck?

It's a convection element, part #00098494, 100L

54


Hi everyone,

As the title says, recently purchased my first house (yay), but while I initially noticed these stains in the floor during a daytime walkthrough, I realize now they're a lot more bothersome when it isn't super bright inside. Images in the attached link

I'm not moving in for a few weeks, so wondering if I can fix this beforehand (I know for a fact it won't happen at all if I wait until after I've moved in...). It's mainly this one section in the hallway and one of the bedrooms, as shown in the pics.

I did some initial research and it seems that they're likely going to need to be completely refinished, and I had a few questions about doing that myself (or would love to hear if there are other options!).

  1. How easy of a task is this for a beginner to woodworking etc.? Most of my DIY has been in the realm of tech, so I don't have any experience or needed tools. Maybe I'm in over my head here and it isn't something I can do myself.
  2. What tools/equipment do I need? I believe just a sander (any recommendations would be nice), wood stain, and sealant. Plus brushes to actually spread the stain/sealant.
  3. Can I just refinish the areas that are stained, or will it look horribly uneven if I do that? Do I need to refinish all of the flooring if I do some? (80% of the floor is this hardwood floor throughout the house, there's not a break in it or separate sections)
  4. Given the answer to 3., about how long would such a task take? I assume there's a lot of passive time waiting on stain, restaining, sealing, etc.

Thanks for any help, really appreciate any advice!

55


I need to build one that can be used outdoors.

Where can I find the schematics for this kind of circuits?

56
57


Let’s hear all about your progress. Don’t disappoint your judgmental internet buddies!

58


I have an unfinished basement. It would be a great place for a workshop but some hobbies don't do well in a dusty environment. Would setting up an air purifier help? Even then I'm concerned it wouldn't get the entire volume of air.

One idea is to just cover the area in a tarp (or something more permanent) while not in use.

I hate to tidy up and will very likely forget even if I don't get lazy and I don't want to have stuff get dusty because it's laying out for a while.

I assume the dust is coming from the rafters when we walk around upstairs but I'm not certain.

The hobbies are pretty varied. Electronics (like Arduinos), sewing, painting, etc. Nothing crazy like woodworking or metalworking which create their own dust though. The dust is just the normal dust you see in basements lol.

59
19
submitted 1 year ago* (last edited 1 year ago) by Rambler@lemm.ee to c/diy


I've had this Vax upright for about 5 years. Recently it's started to cut off when I'm using it. I feel the base - and it's hot. Any ideas for anything that I can do to fix it?

I'm not technically minded but I will have a go - if it will save me having to buy a new vacuum.

Edit: many thanks for all the replies and advice.

60


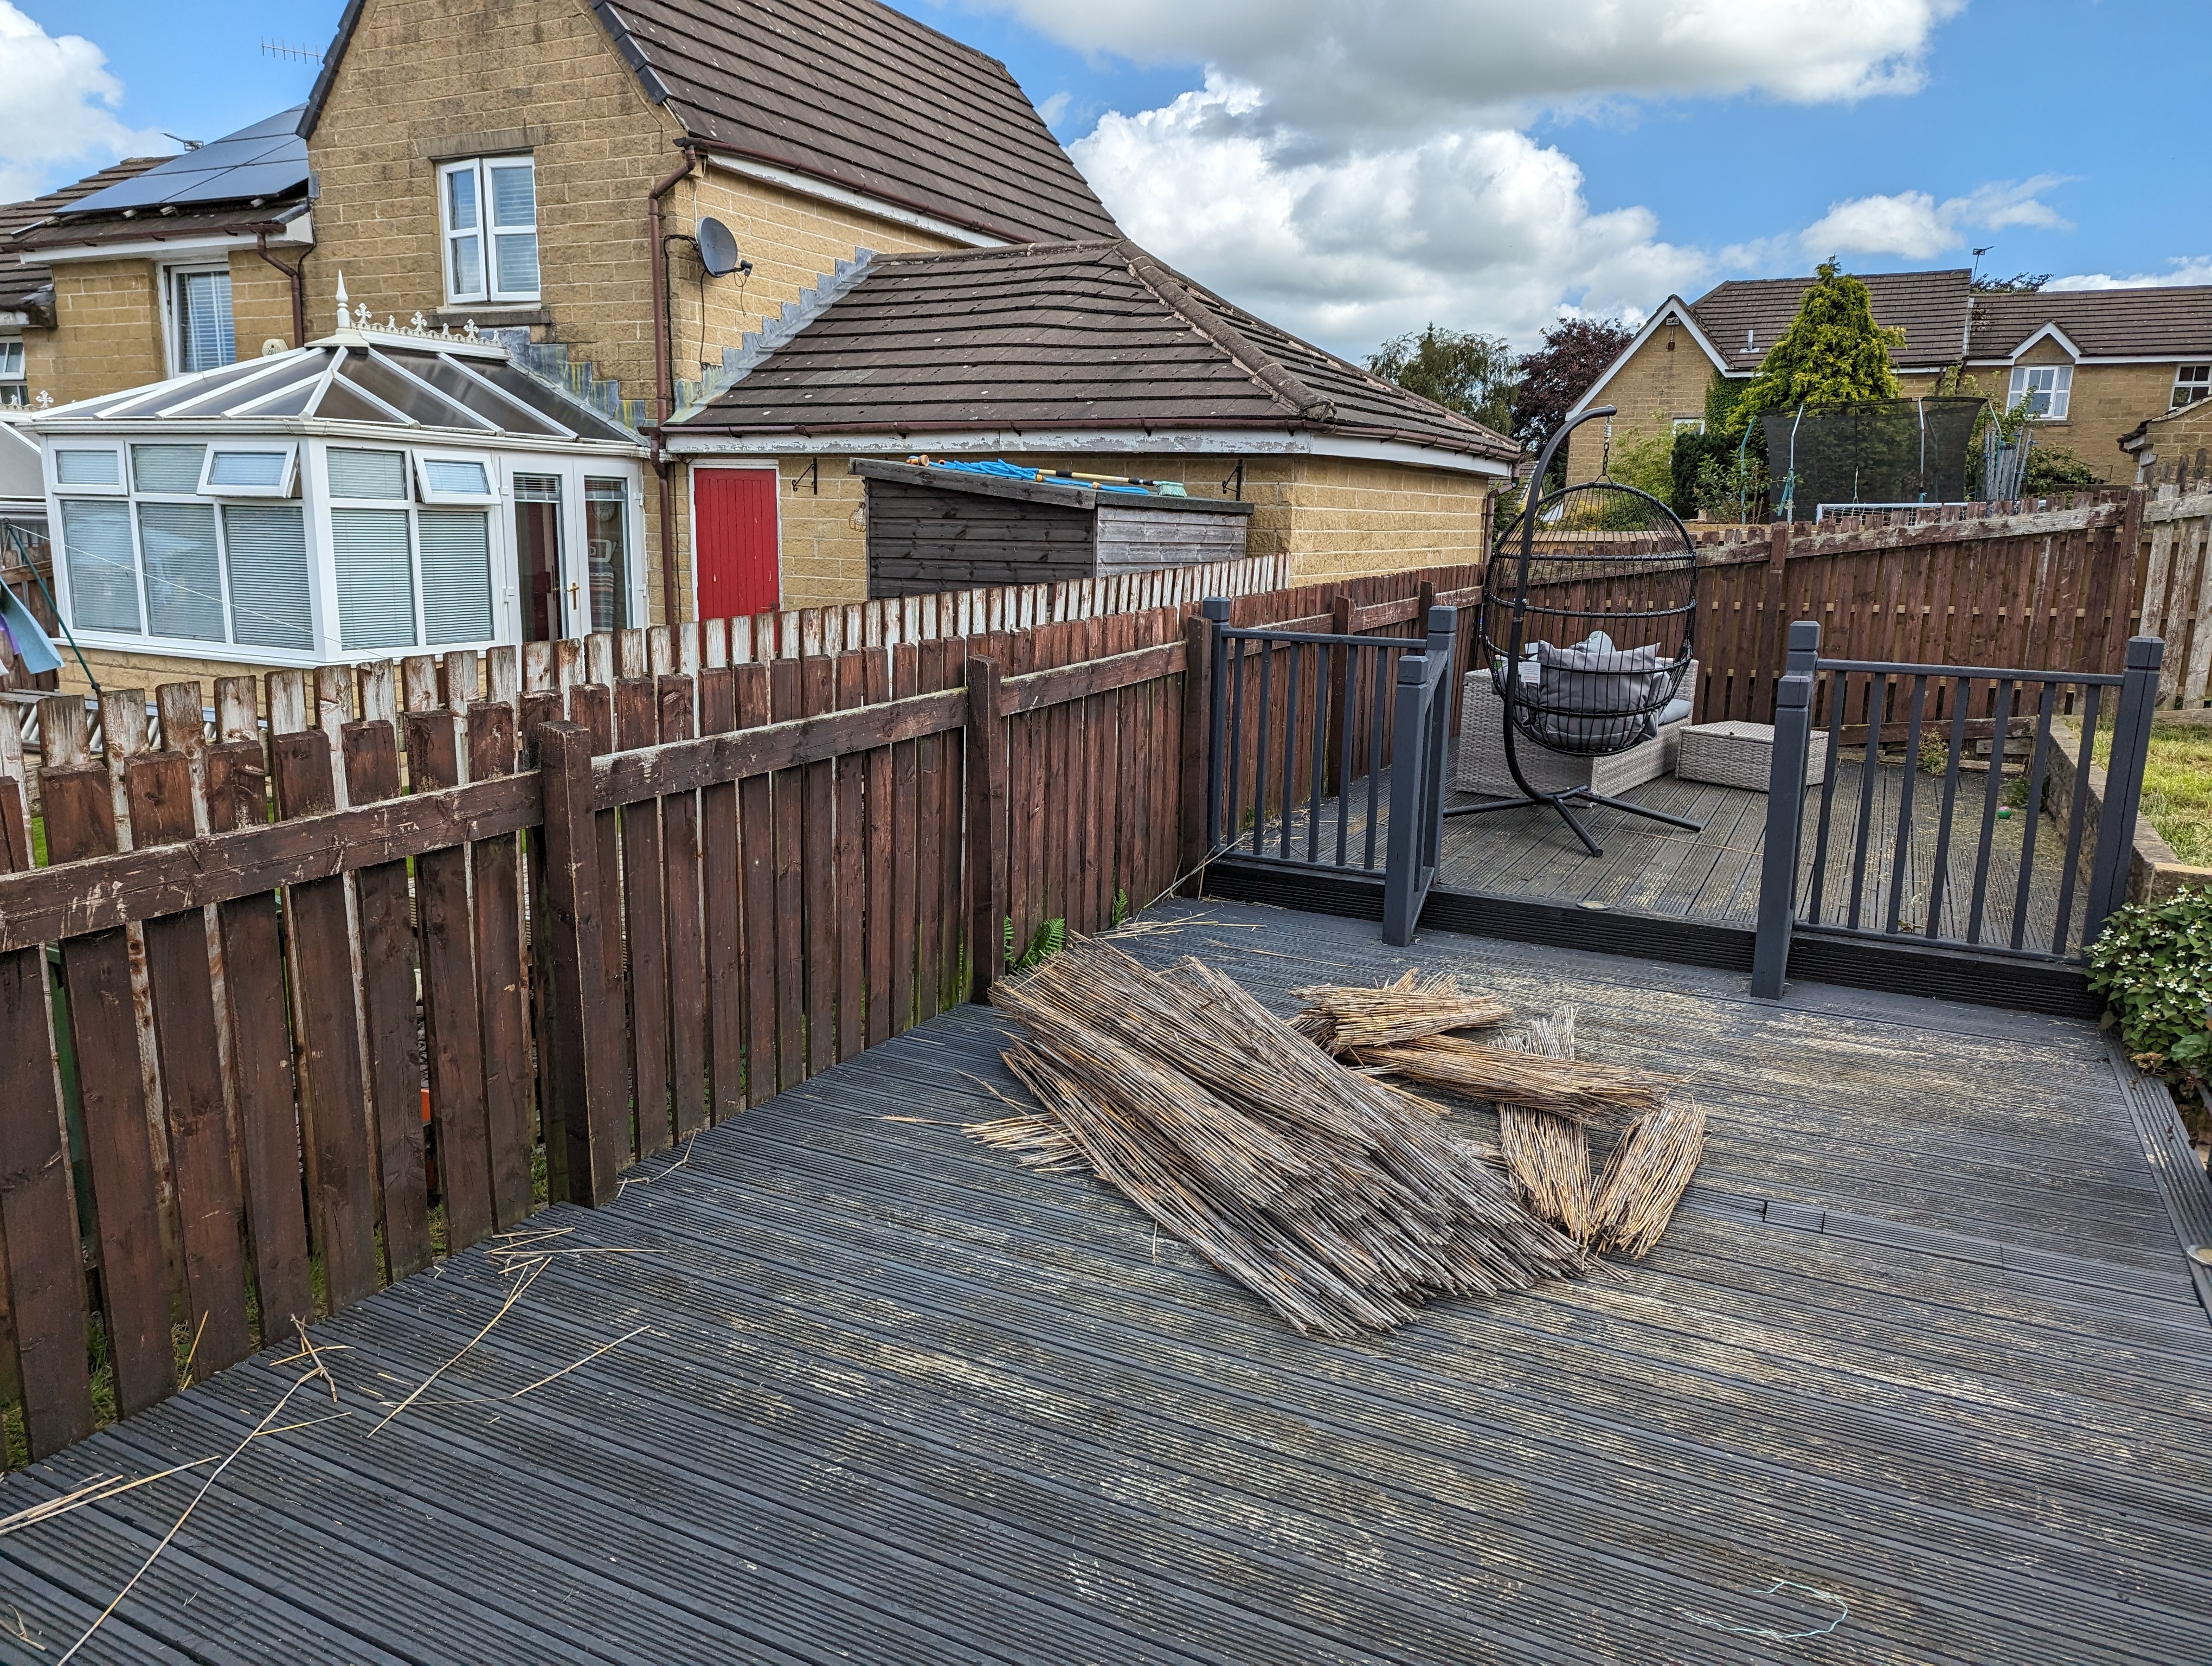
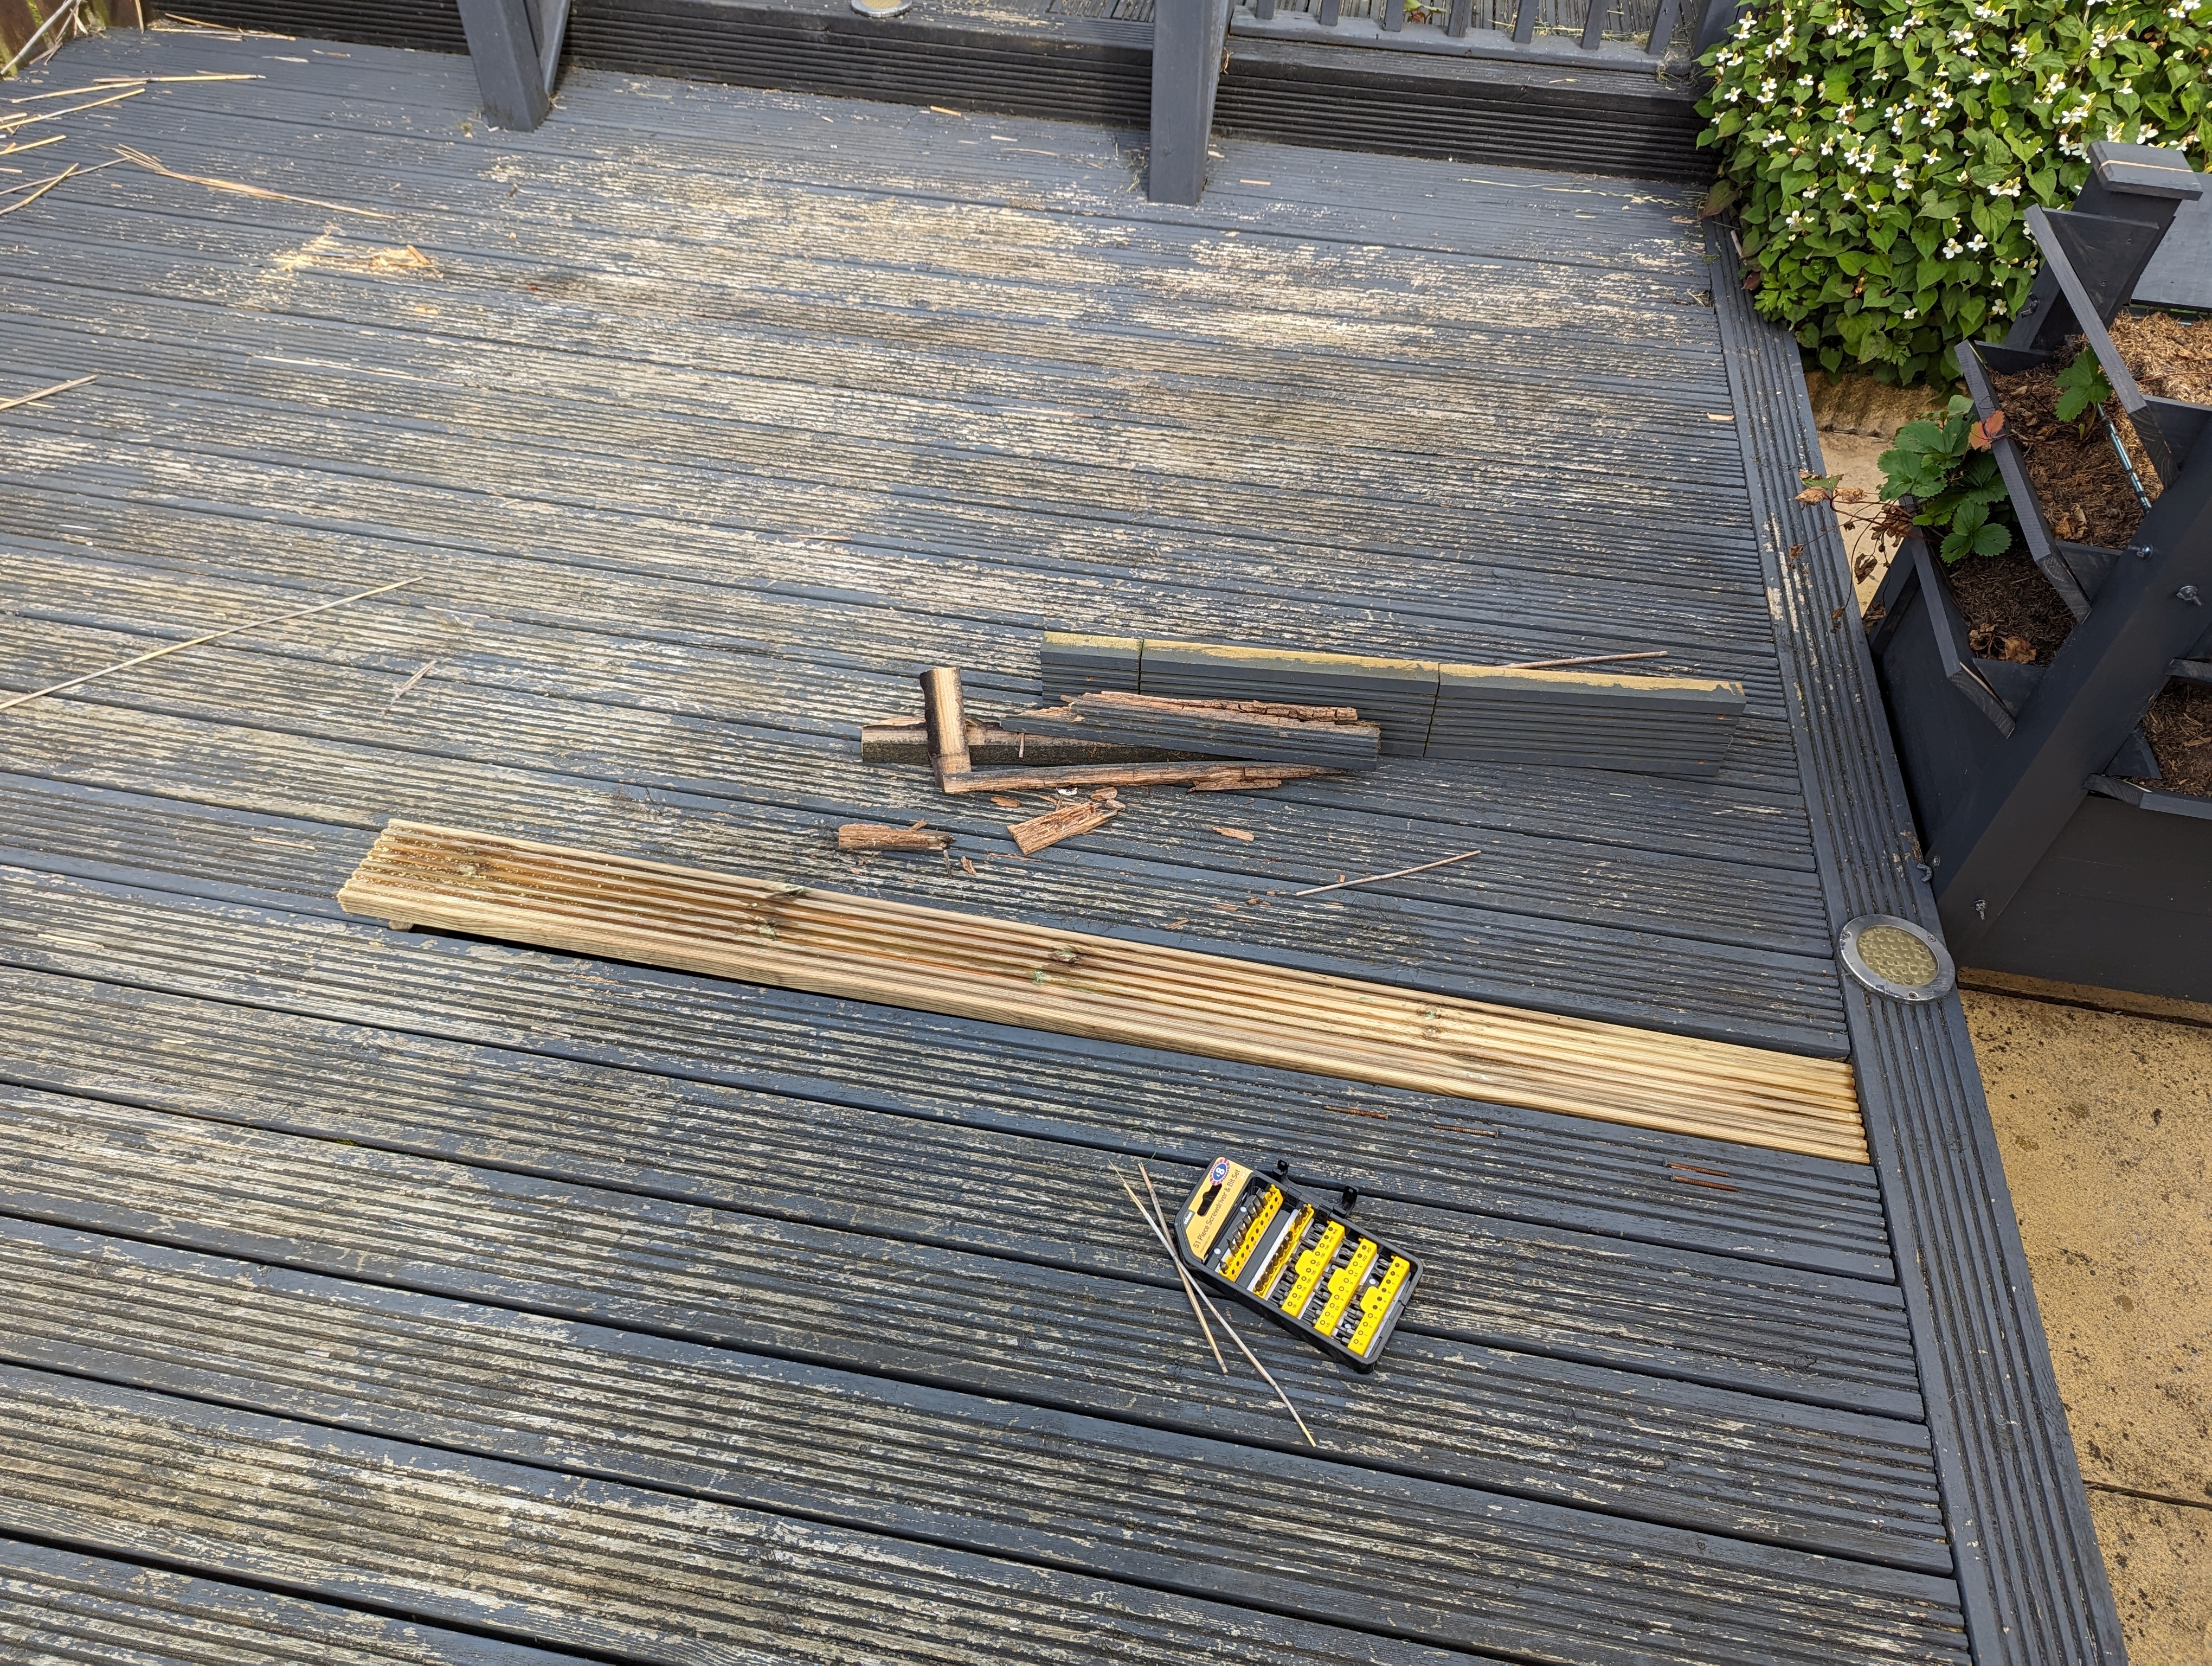
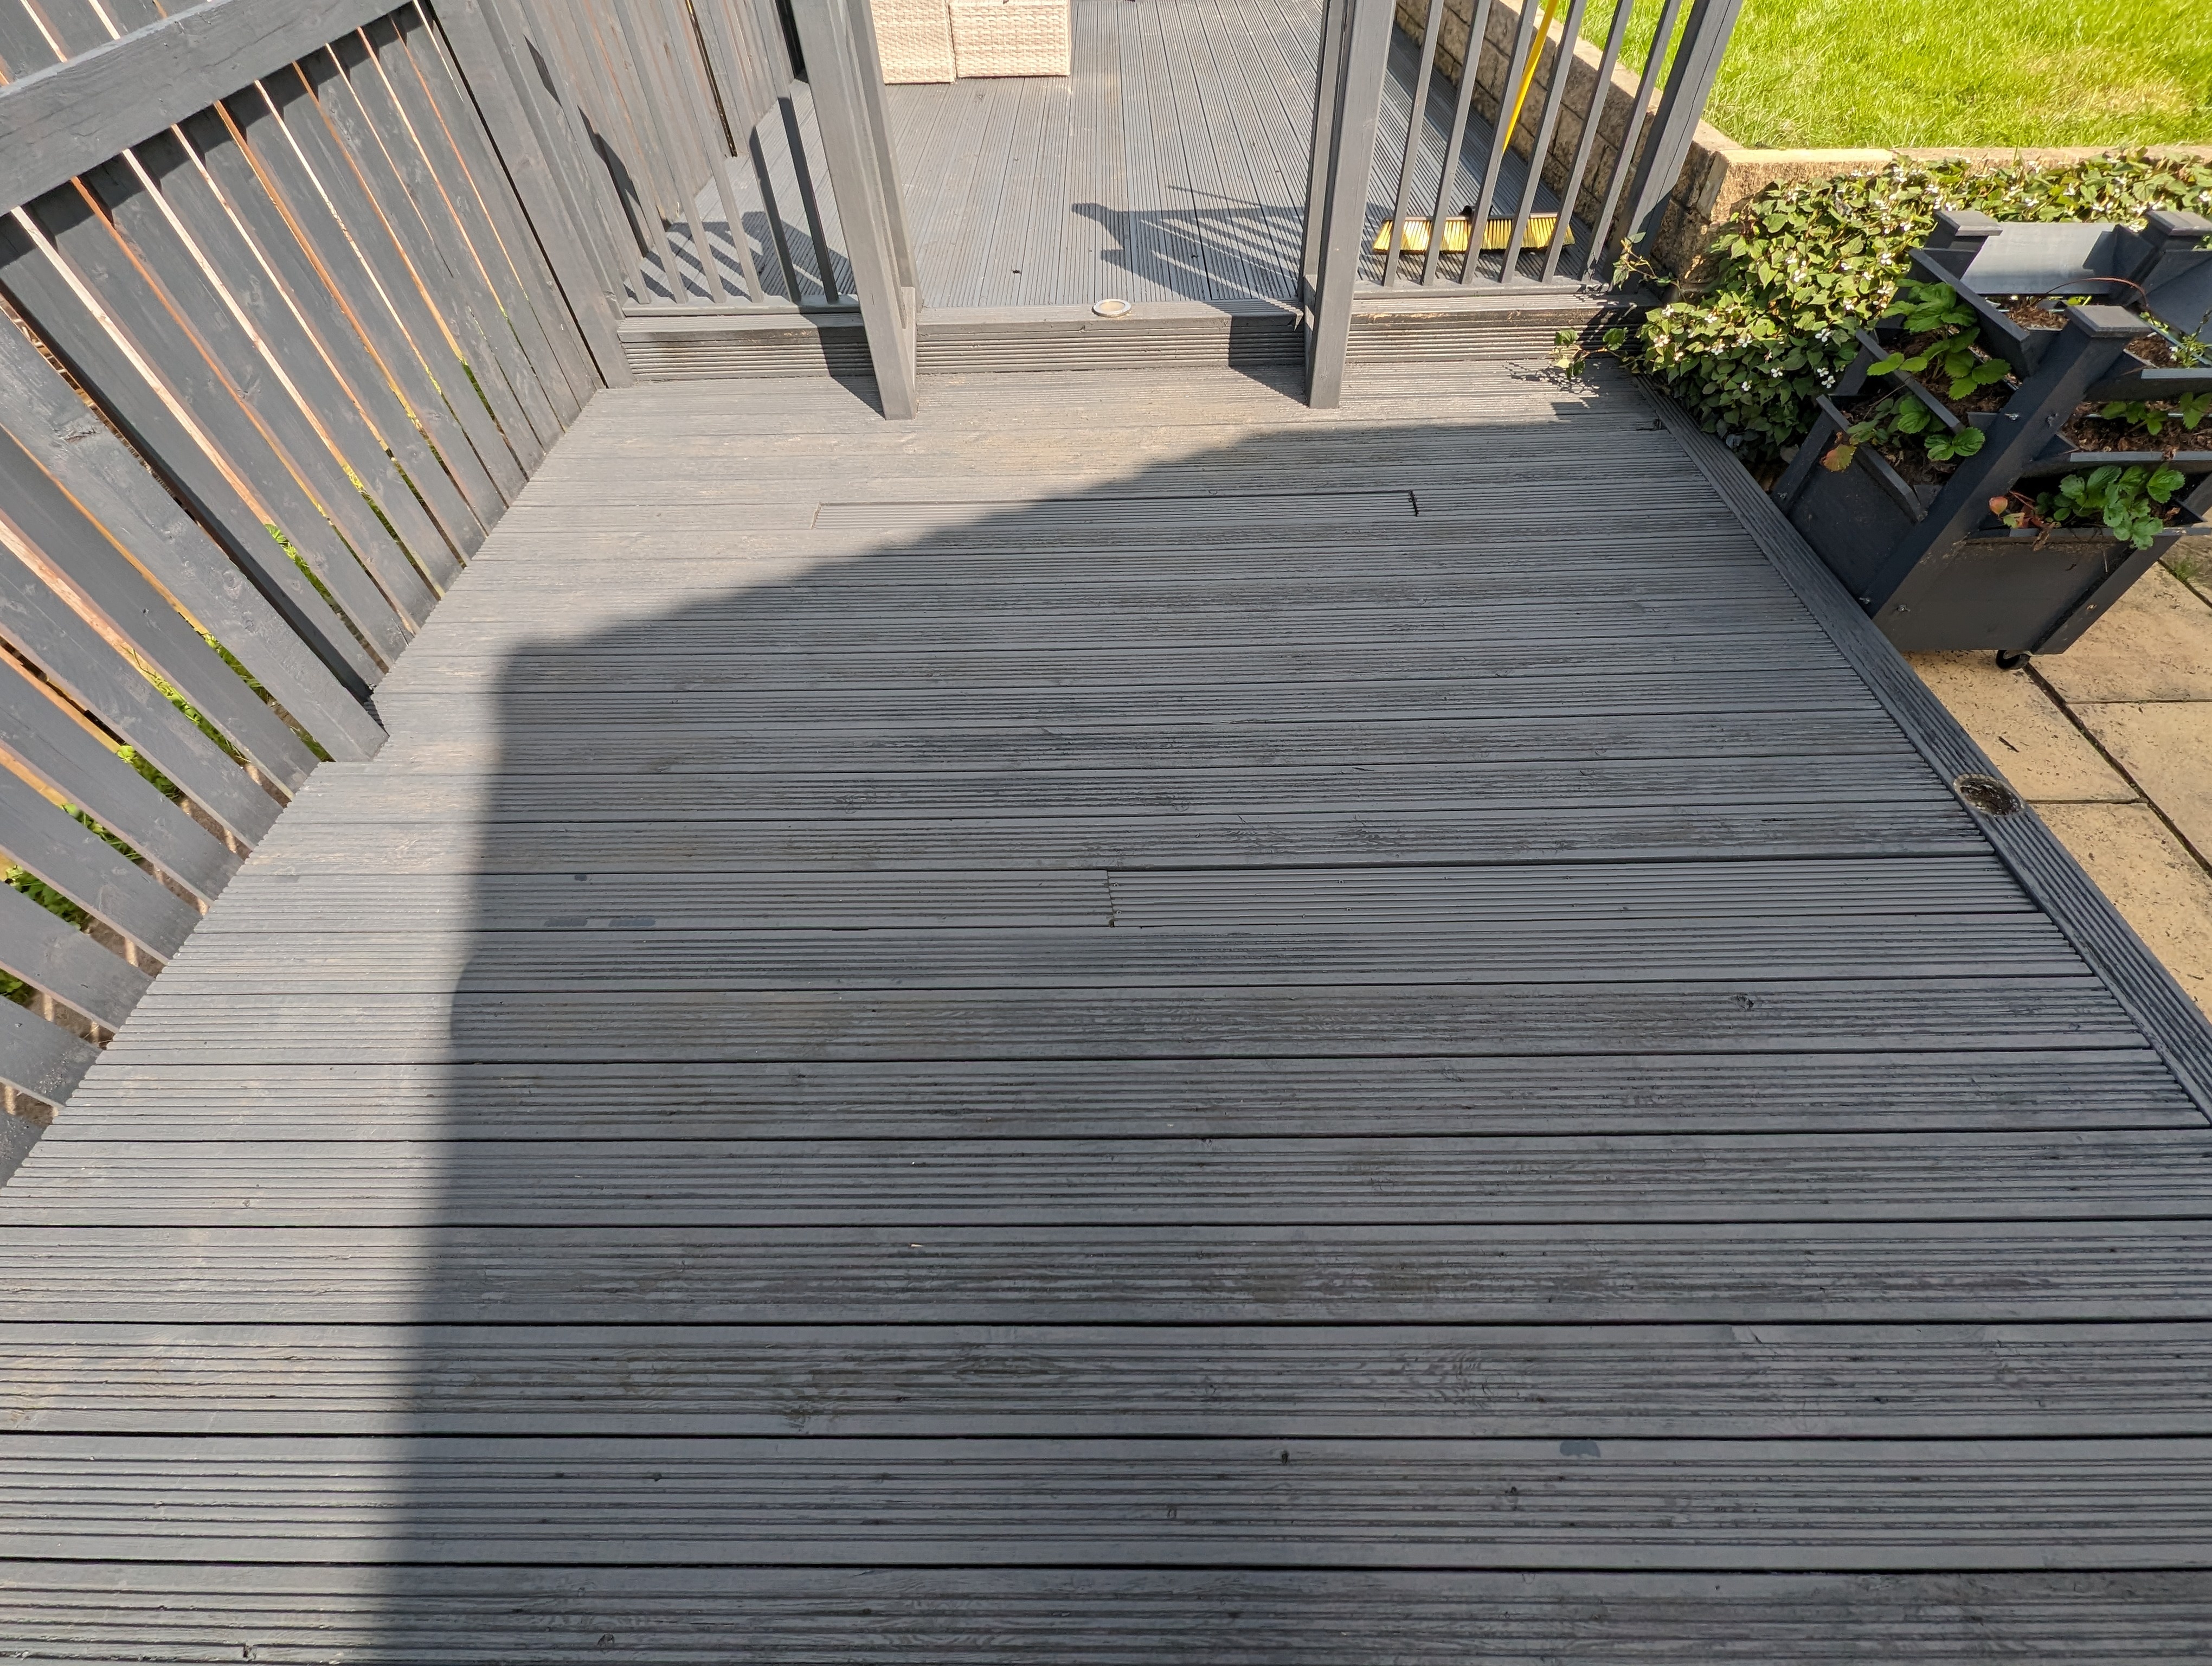
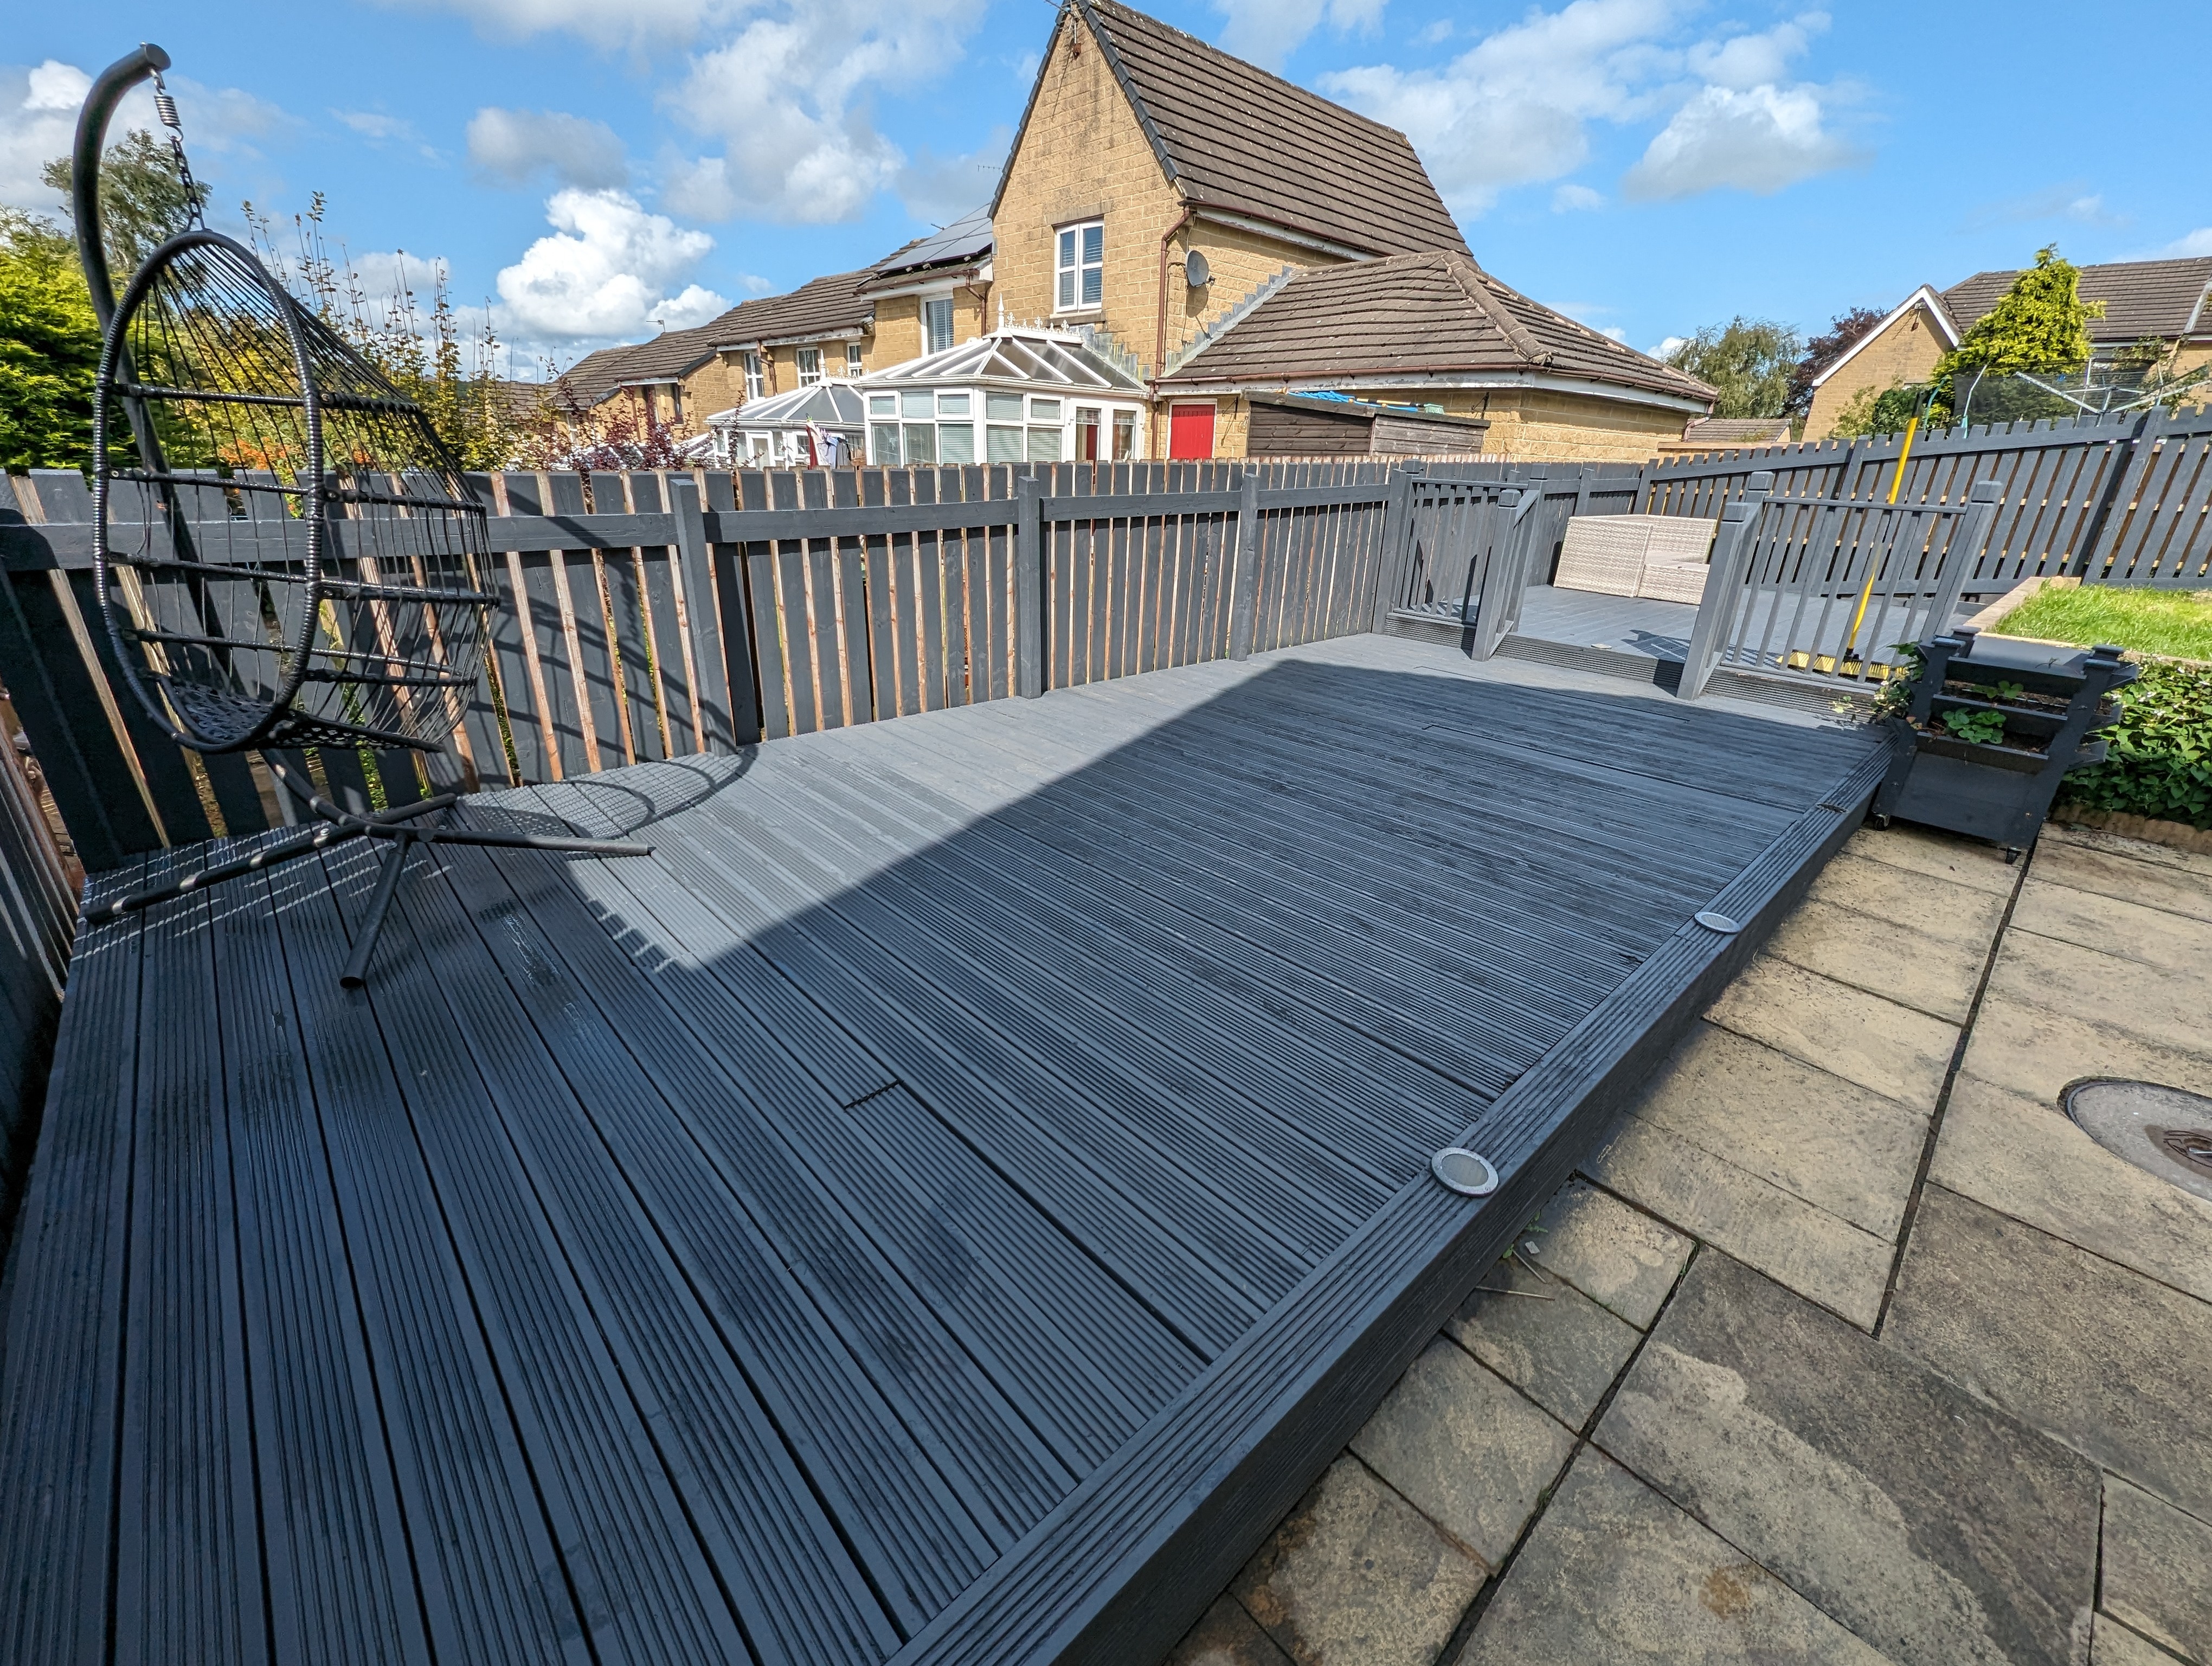
Removed the awful decaying bamboo screening, and replaced rotten sections of decking boards. I wasn't able to get an exact match, so the thickness and groove pattern are slightly different. I'll probably use some spacers to level them out.

The fence I went round the other side and reattached any loose boards with decking screws.

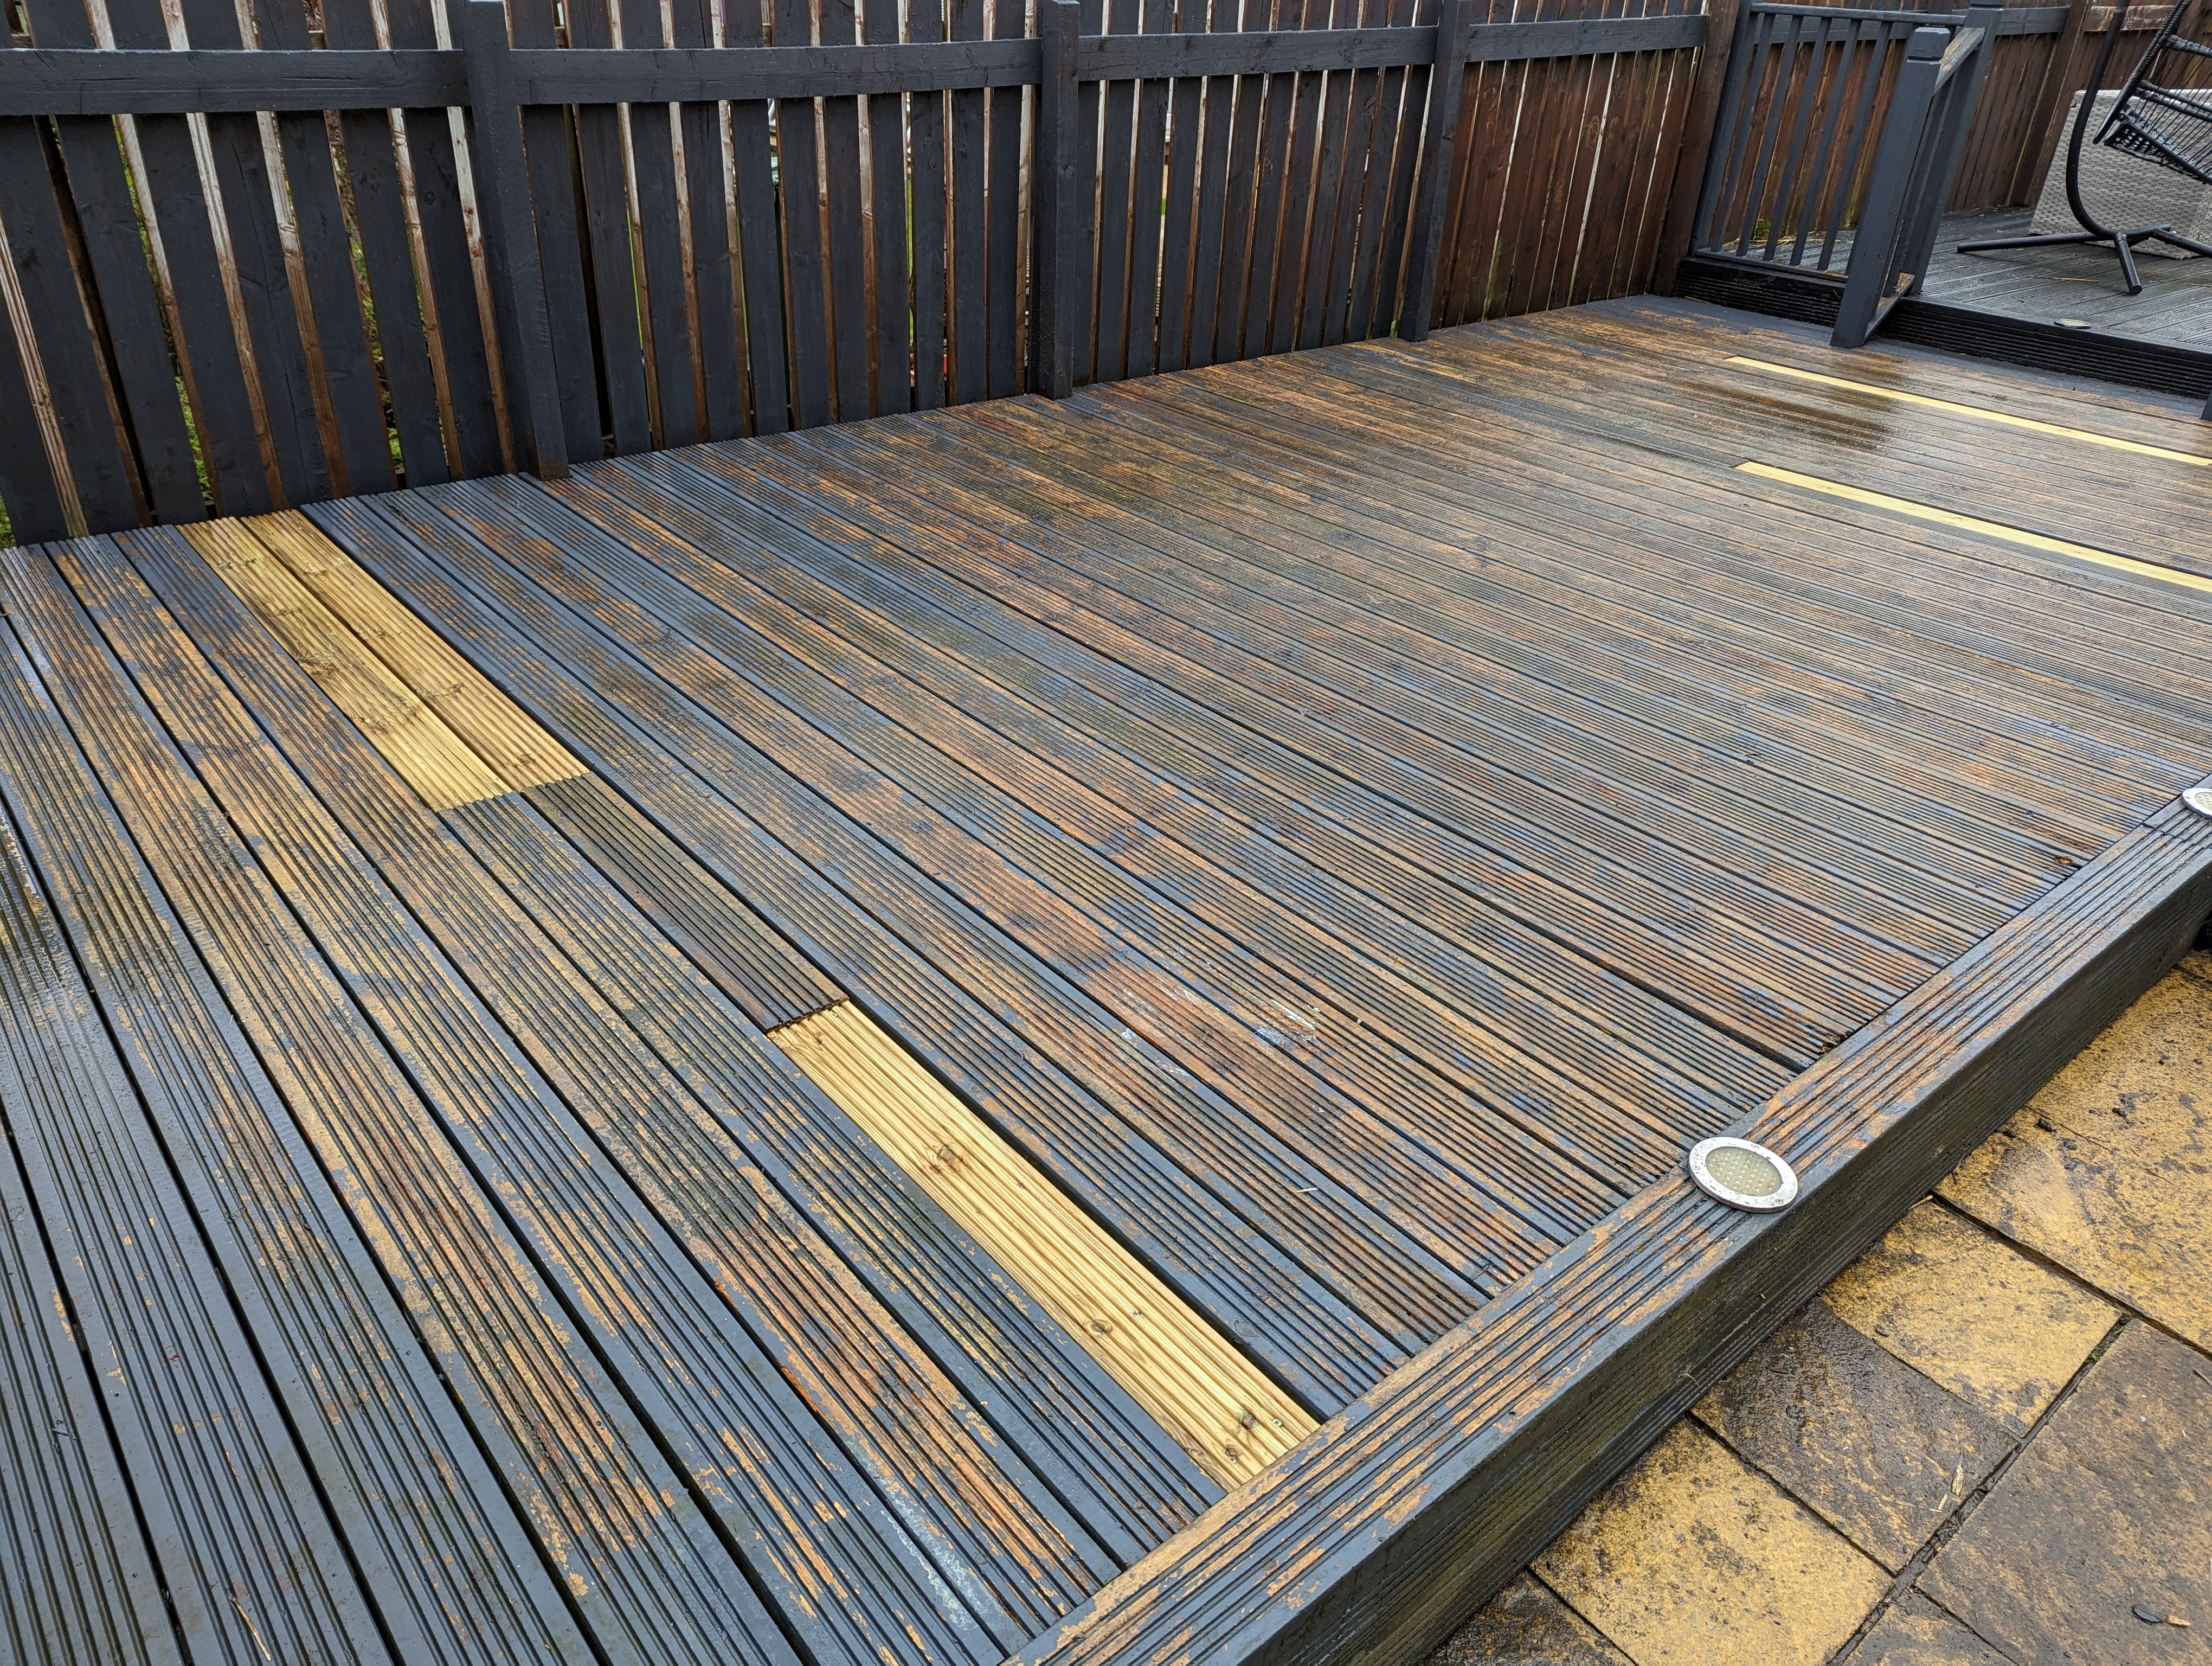
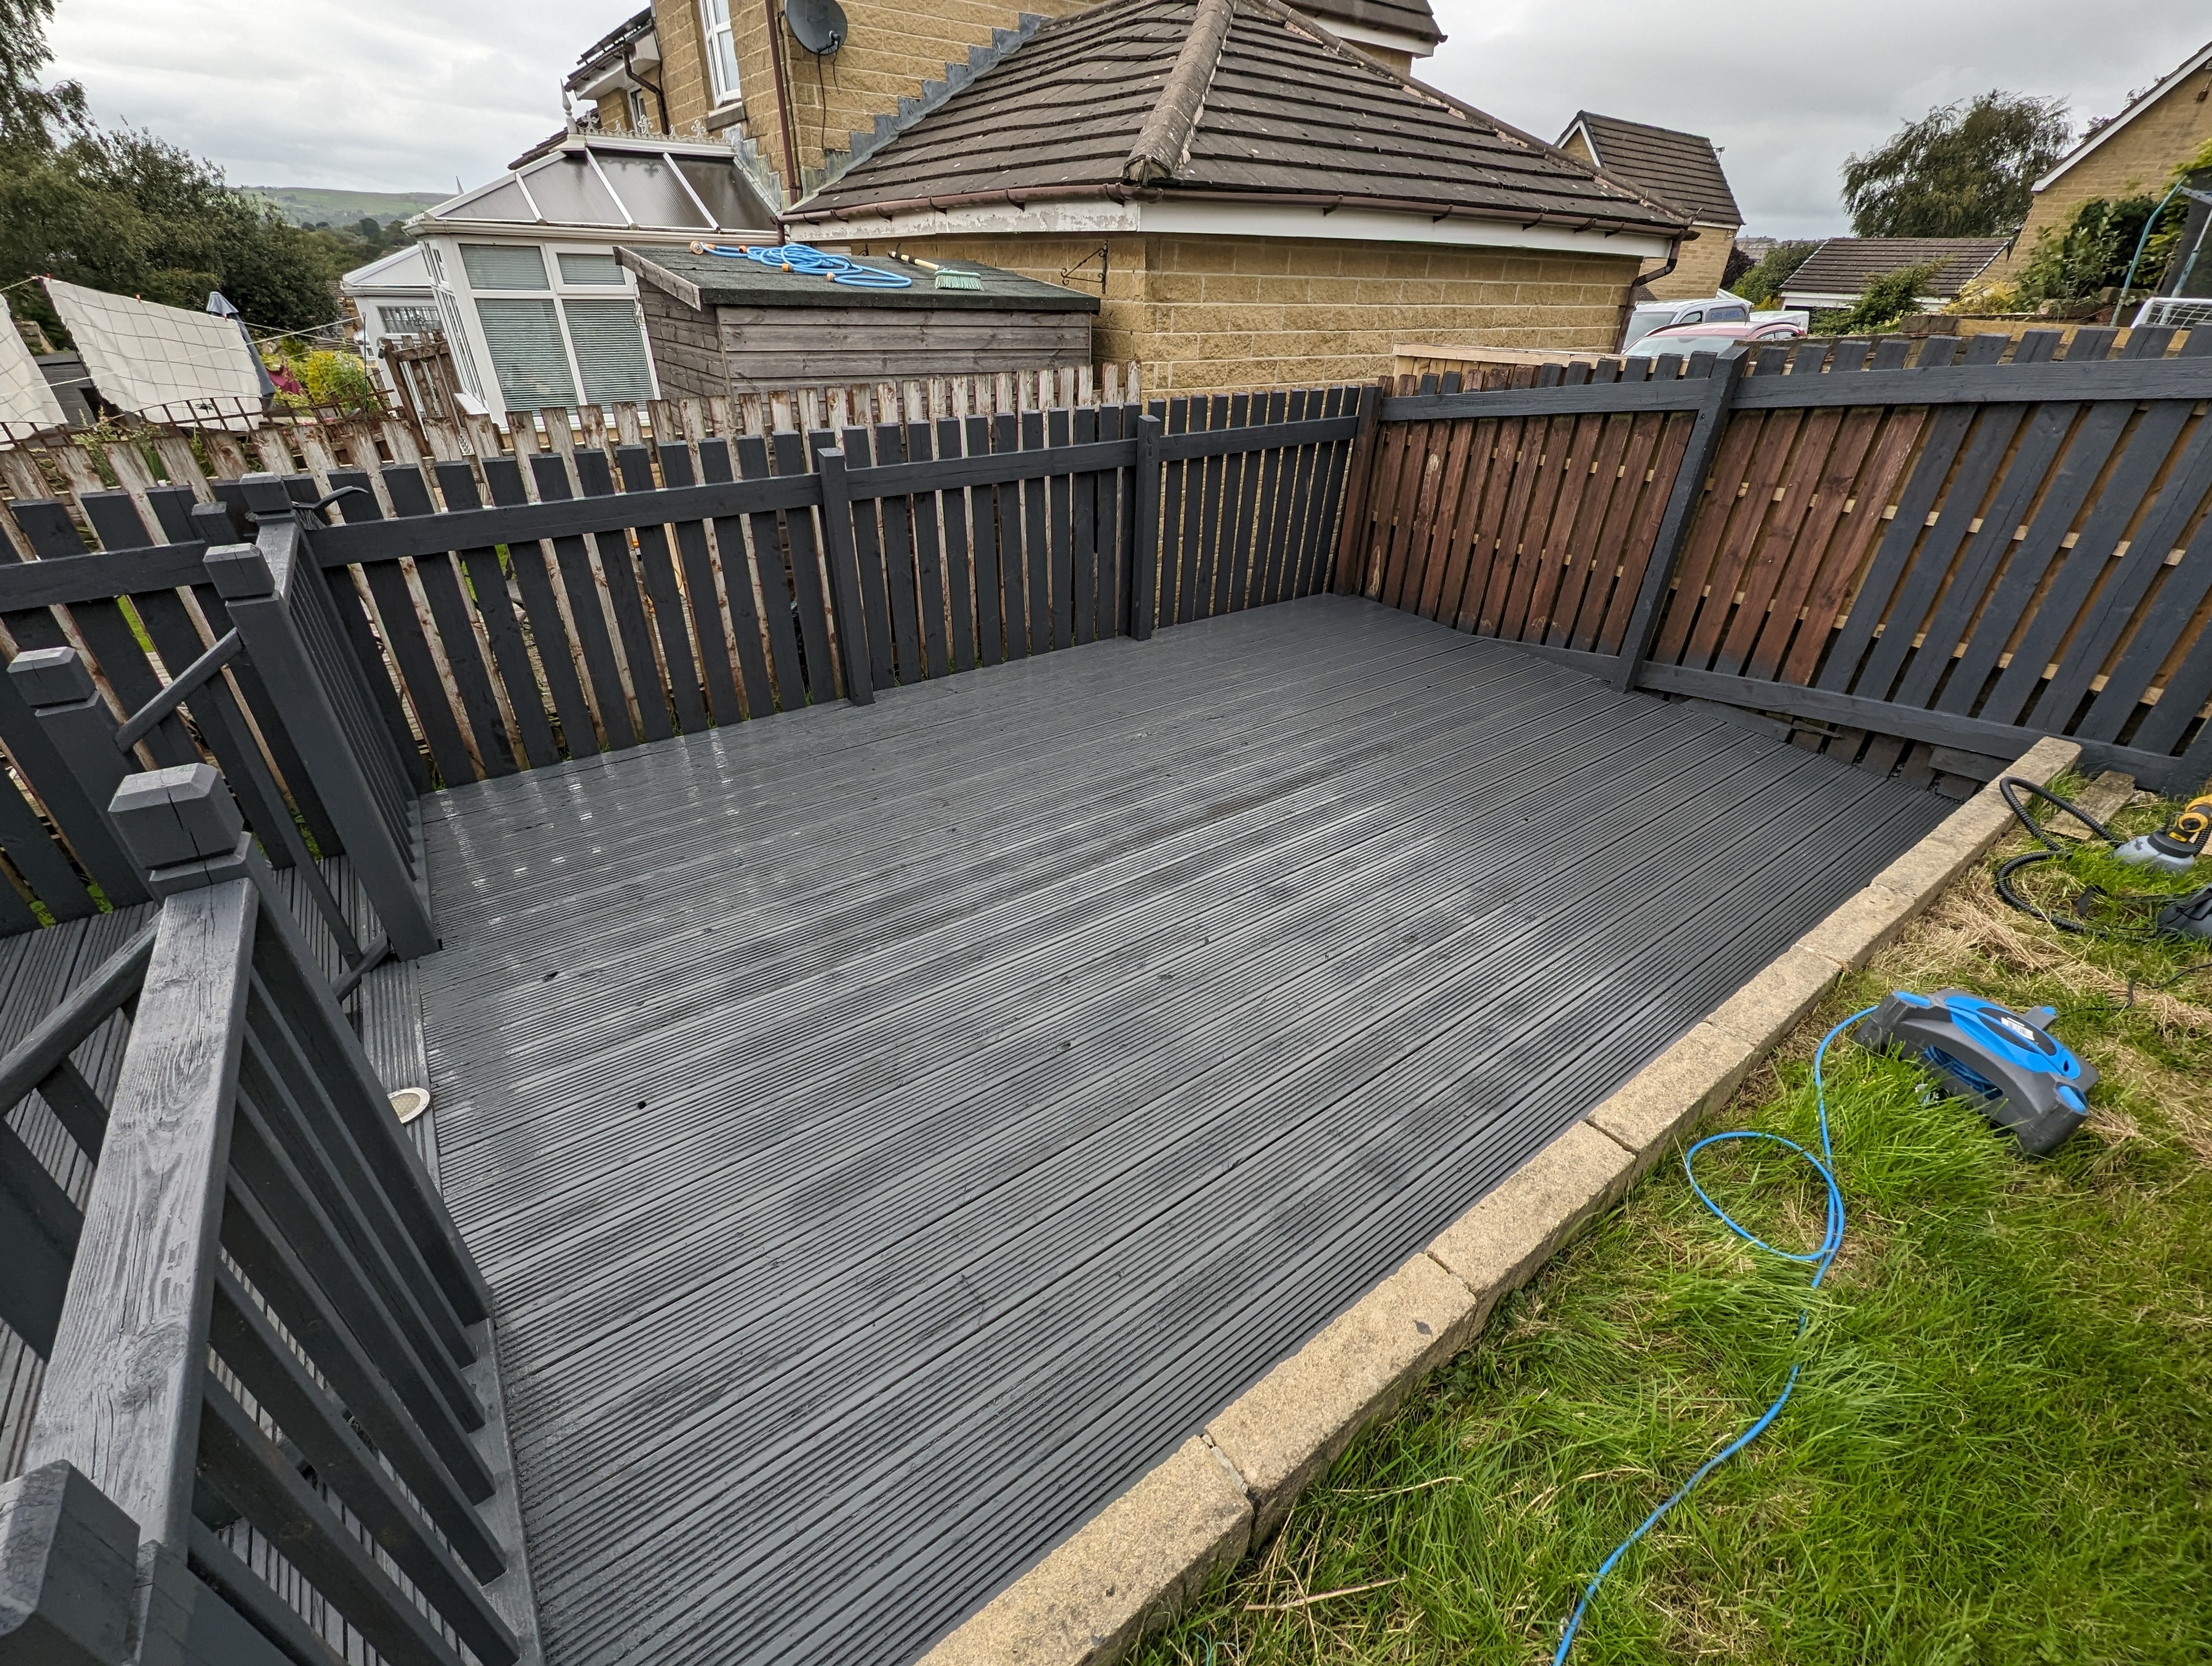
I used the pressure washer to remove a lot of the old flaking paint, then brushed and vacuumed the old flakes away, then sprayed with a decking sprayer. Just the screwfix no nonsense garden paint and decking stain for the fence and deck respectively, really impressed by the coverage and colour and how easily it went on, even on the bits I had to do with a brush to avoid getting overspray on neighbours' fences and sheds.

Overall quite pleased with the result. It's an old deck so it'll never look new but hopefully it'll give it a good few more years.

61
171
submitted 1 year ago* (last edited 1 year ago) by wifienyabledcat to c/diy


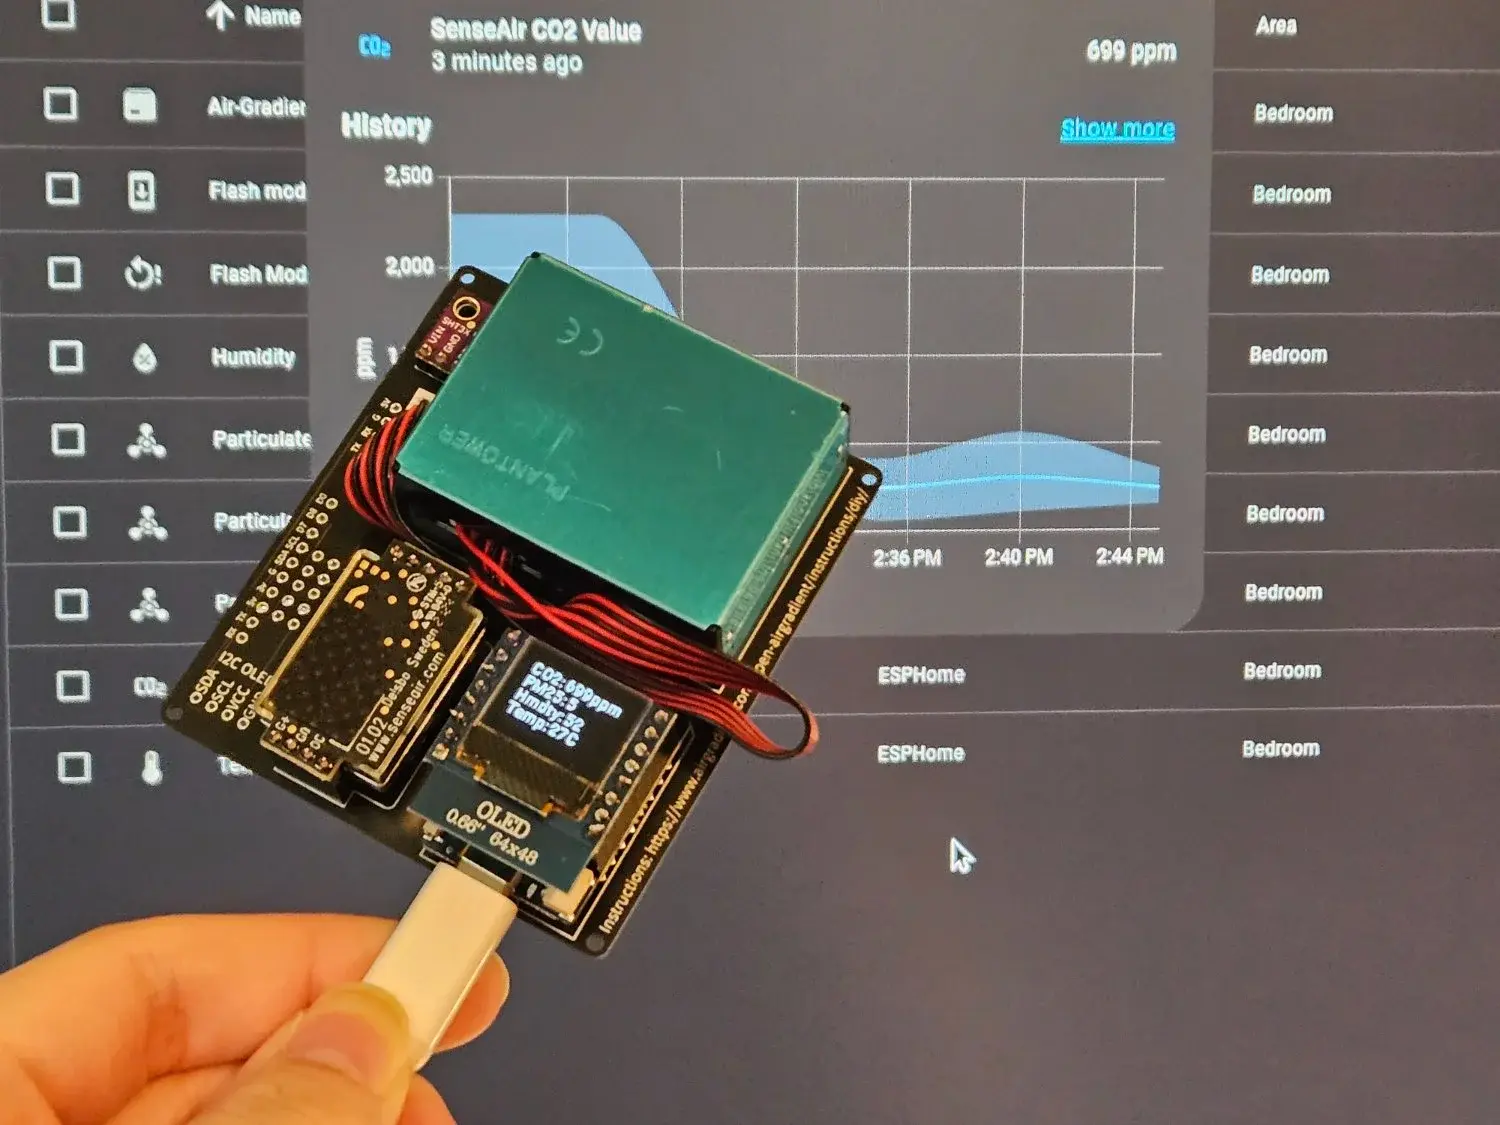
With how bad air quality has been this year, I grabbed myself a DIY AirGradient kit so I can monitor air quality in my living space. It was easy to assemble and only required a little bit of soldering knowledge. I'm definitely not proficient enough at soldering as many components ended up crooked on the board. Still works though lol.

In the picture it's running ESPHome with the configuration from ajfriesen on GitHub.

62


But at least no wrinkles after ironing..

63


The whole thing disassembled

3d printed a case

Parts I used

Built the entire thing yesterday and it hasnt exploded yet. Im seeing that as a win.
Capacity isnt huge but its tiny and a phone with 15% battery charge is better than one with 0

64
16
Who else's got a wet trunk? (pixelfed.crimedad.work)
submitted 1 year ago by CrimeDad@lemmy.crimedad.work to c/diy


cross-posted from: https://pixelfed.crimedad.work/p/crimedad/599378498285366446

Who else's got a wet trunk?

I think my sunroof drains might have been clogged. Any suggestions as to the best way to dry it out?

#volkswagen #vwgolf #alltrack #diy

@volkswagen@lemm.ee

65
14
submitted 1 year ago* (last edited 1 year ago) by loops to c/diy


Hello fine people of Beehaw,

I was wondering if any of you could point me in a direction of a natural wood glue I can buy that is, of course, affordable?

I'm making myself a desktop and I'd rather avoid synthetic glues (polyurethane stuff) and finishes, since the whole point is to replace the melamine thing I have now. I was planning on using pine resin pitch to glue up the boards, but my area has been in drought for almost three months now and I'd rather not set fire to the neighbourhood when I'm making the glue.

Meanwhile, I've been tripping over the box that holds the rest of the desk (I won't be making the legs) so I would love any suggestions!

For the finish I'll be using some sort of spirit varnish. In the link they use resin from the Jetoba Tree (aka animé :D) dissolved in >95% alcohol, and apparently this varnish has lasted for centuries on violins, so I think it would be interesting to try it on my desk.

All of this will likely be done with some 5/4 s2s soft maple because it looks pretty and I'm pretty chill with my furniture.

Cheers!

P.S. I live in Canada, PNW.

66


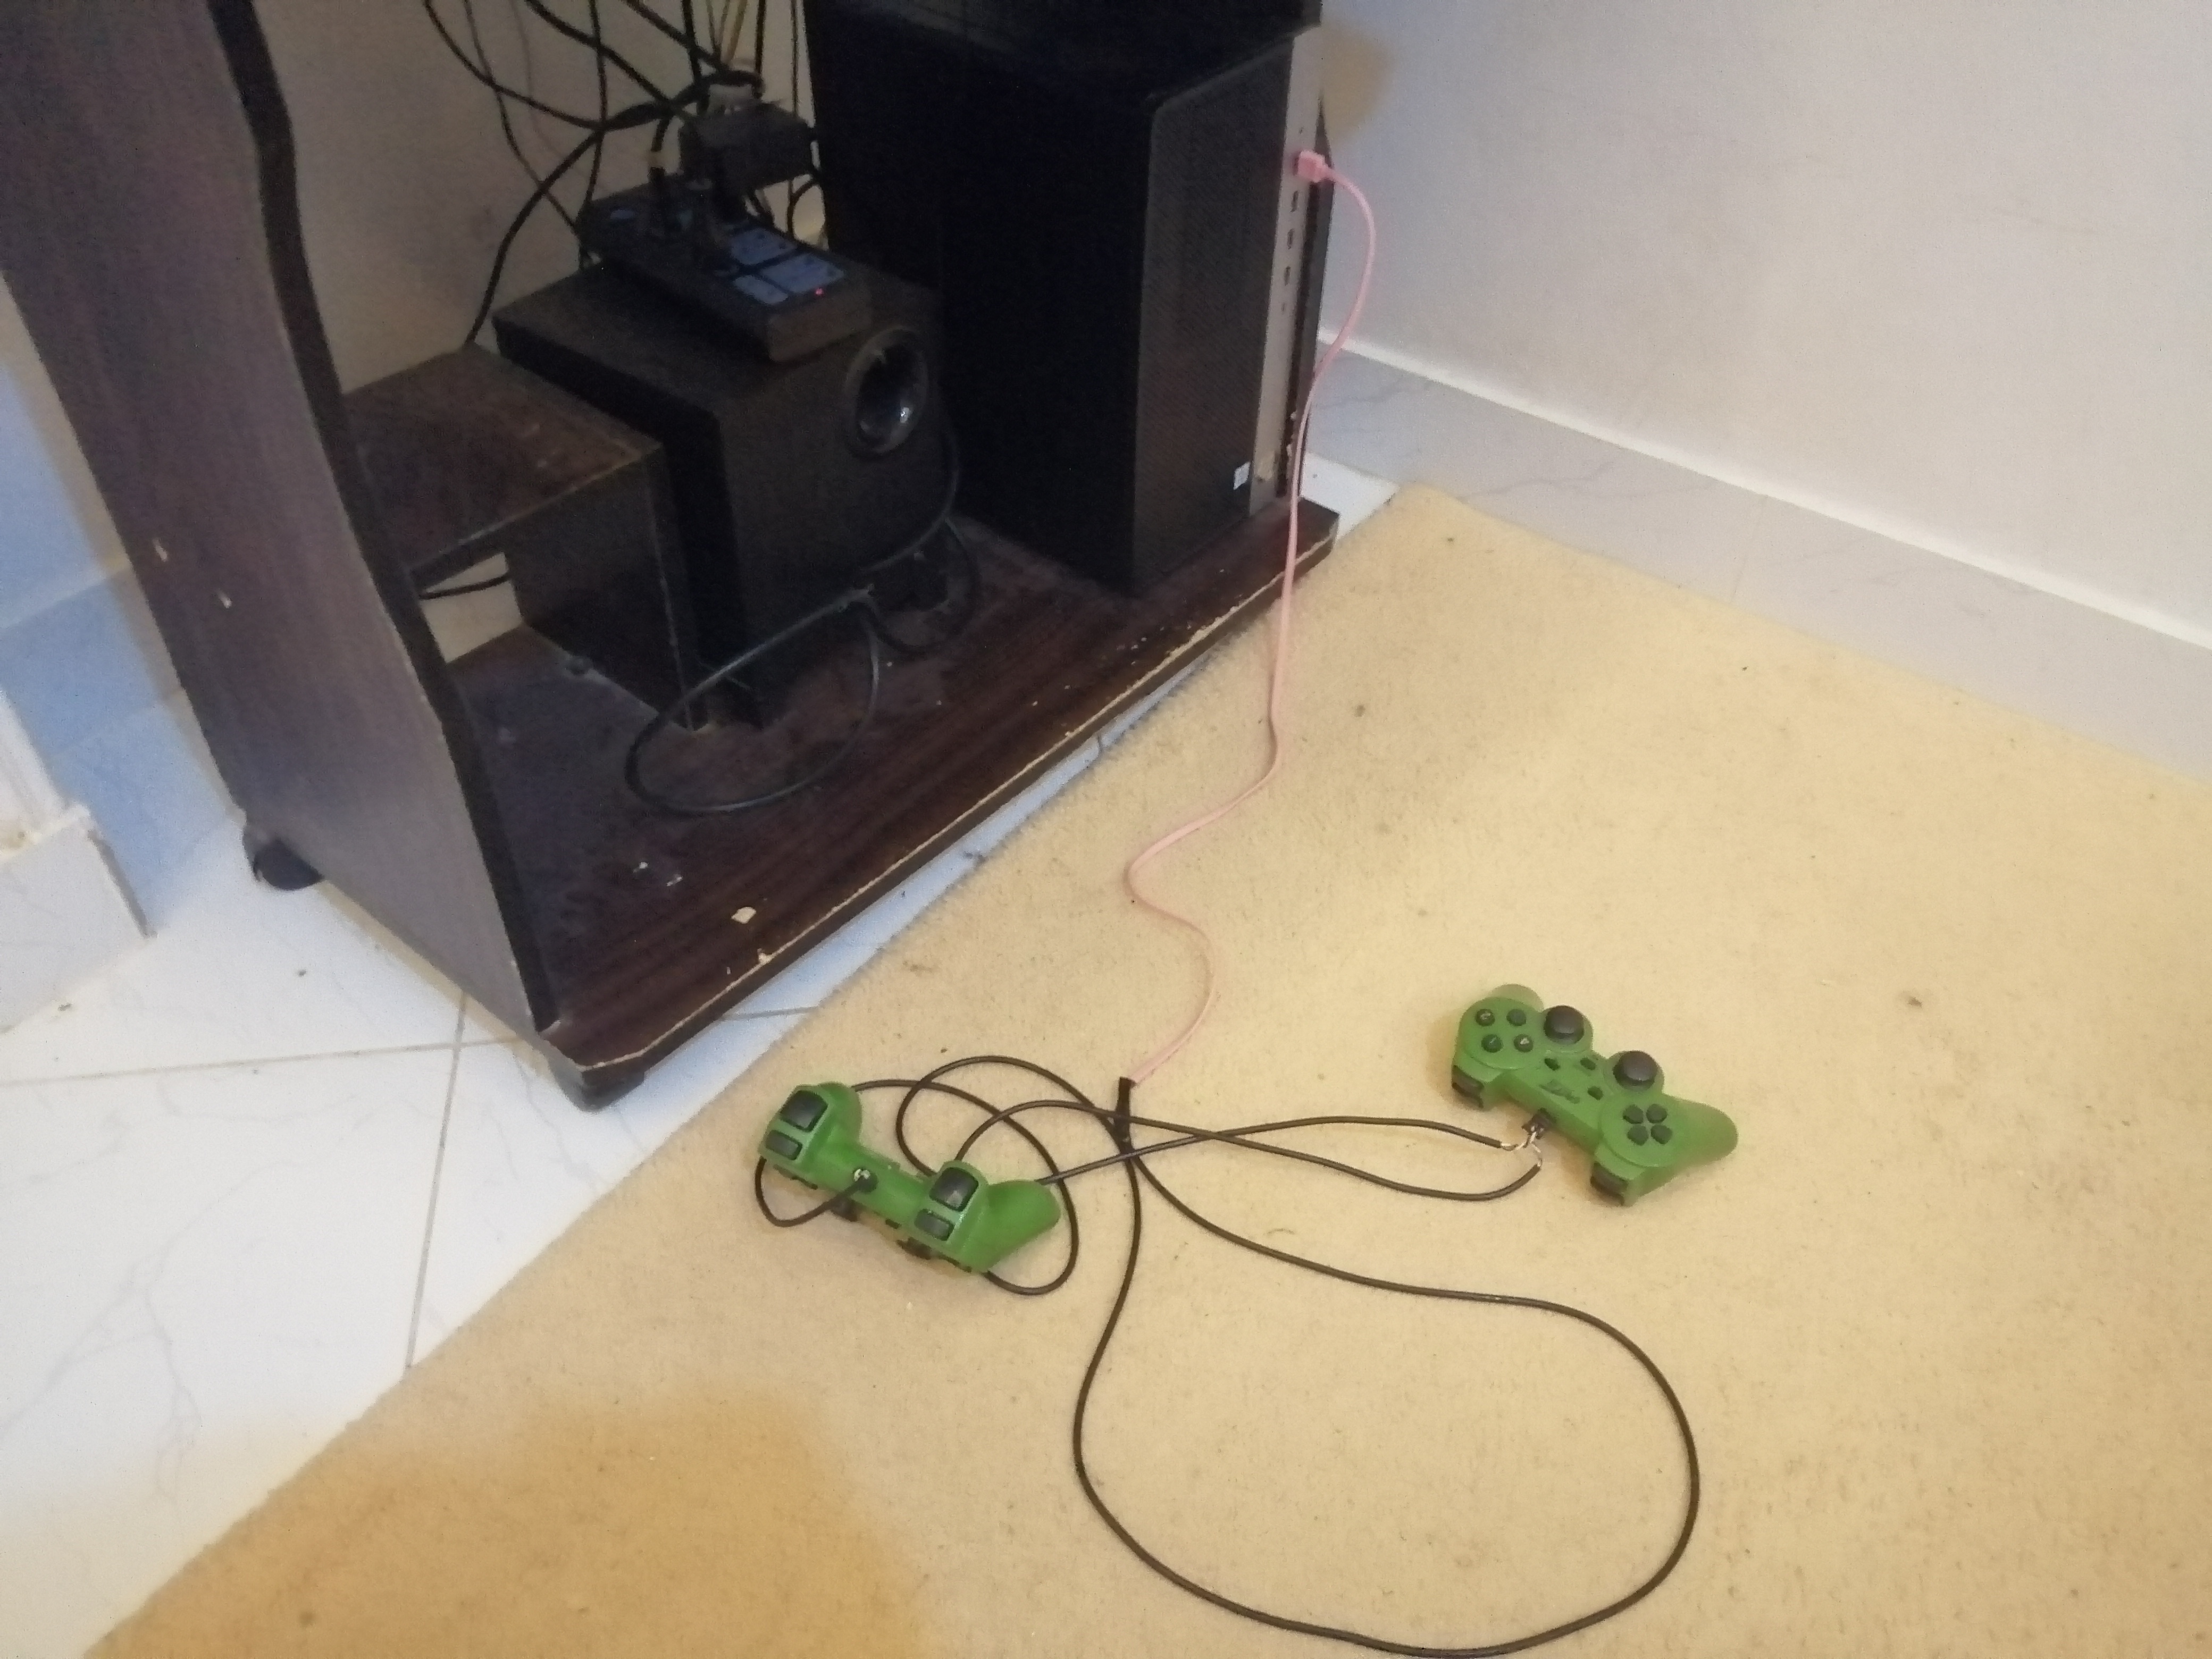
I might clean under a non-functioning button after this.

I used an old charging cable with a broken micro USB port.

67
17
Is this fixable? (infosec.pub)
submitted 1 year ago* (last edited 1 year ago) by Doods@infosec.pub to c/diy


My 9yr old sister felt something is preventing her leg from moving, so she used violence.

A joystick USB cable.

*Without buying - or ripping off - another USB head of course.

68
31
submitted 1 year ago* (last edited 1 year ago) by Generous1146 to c/diy


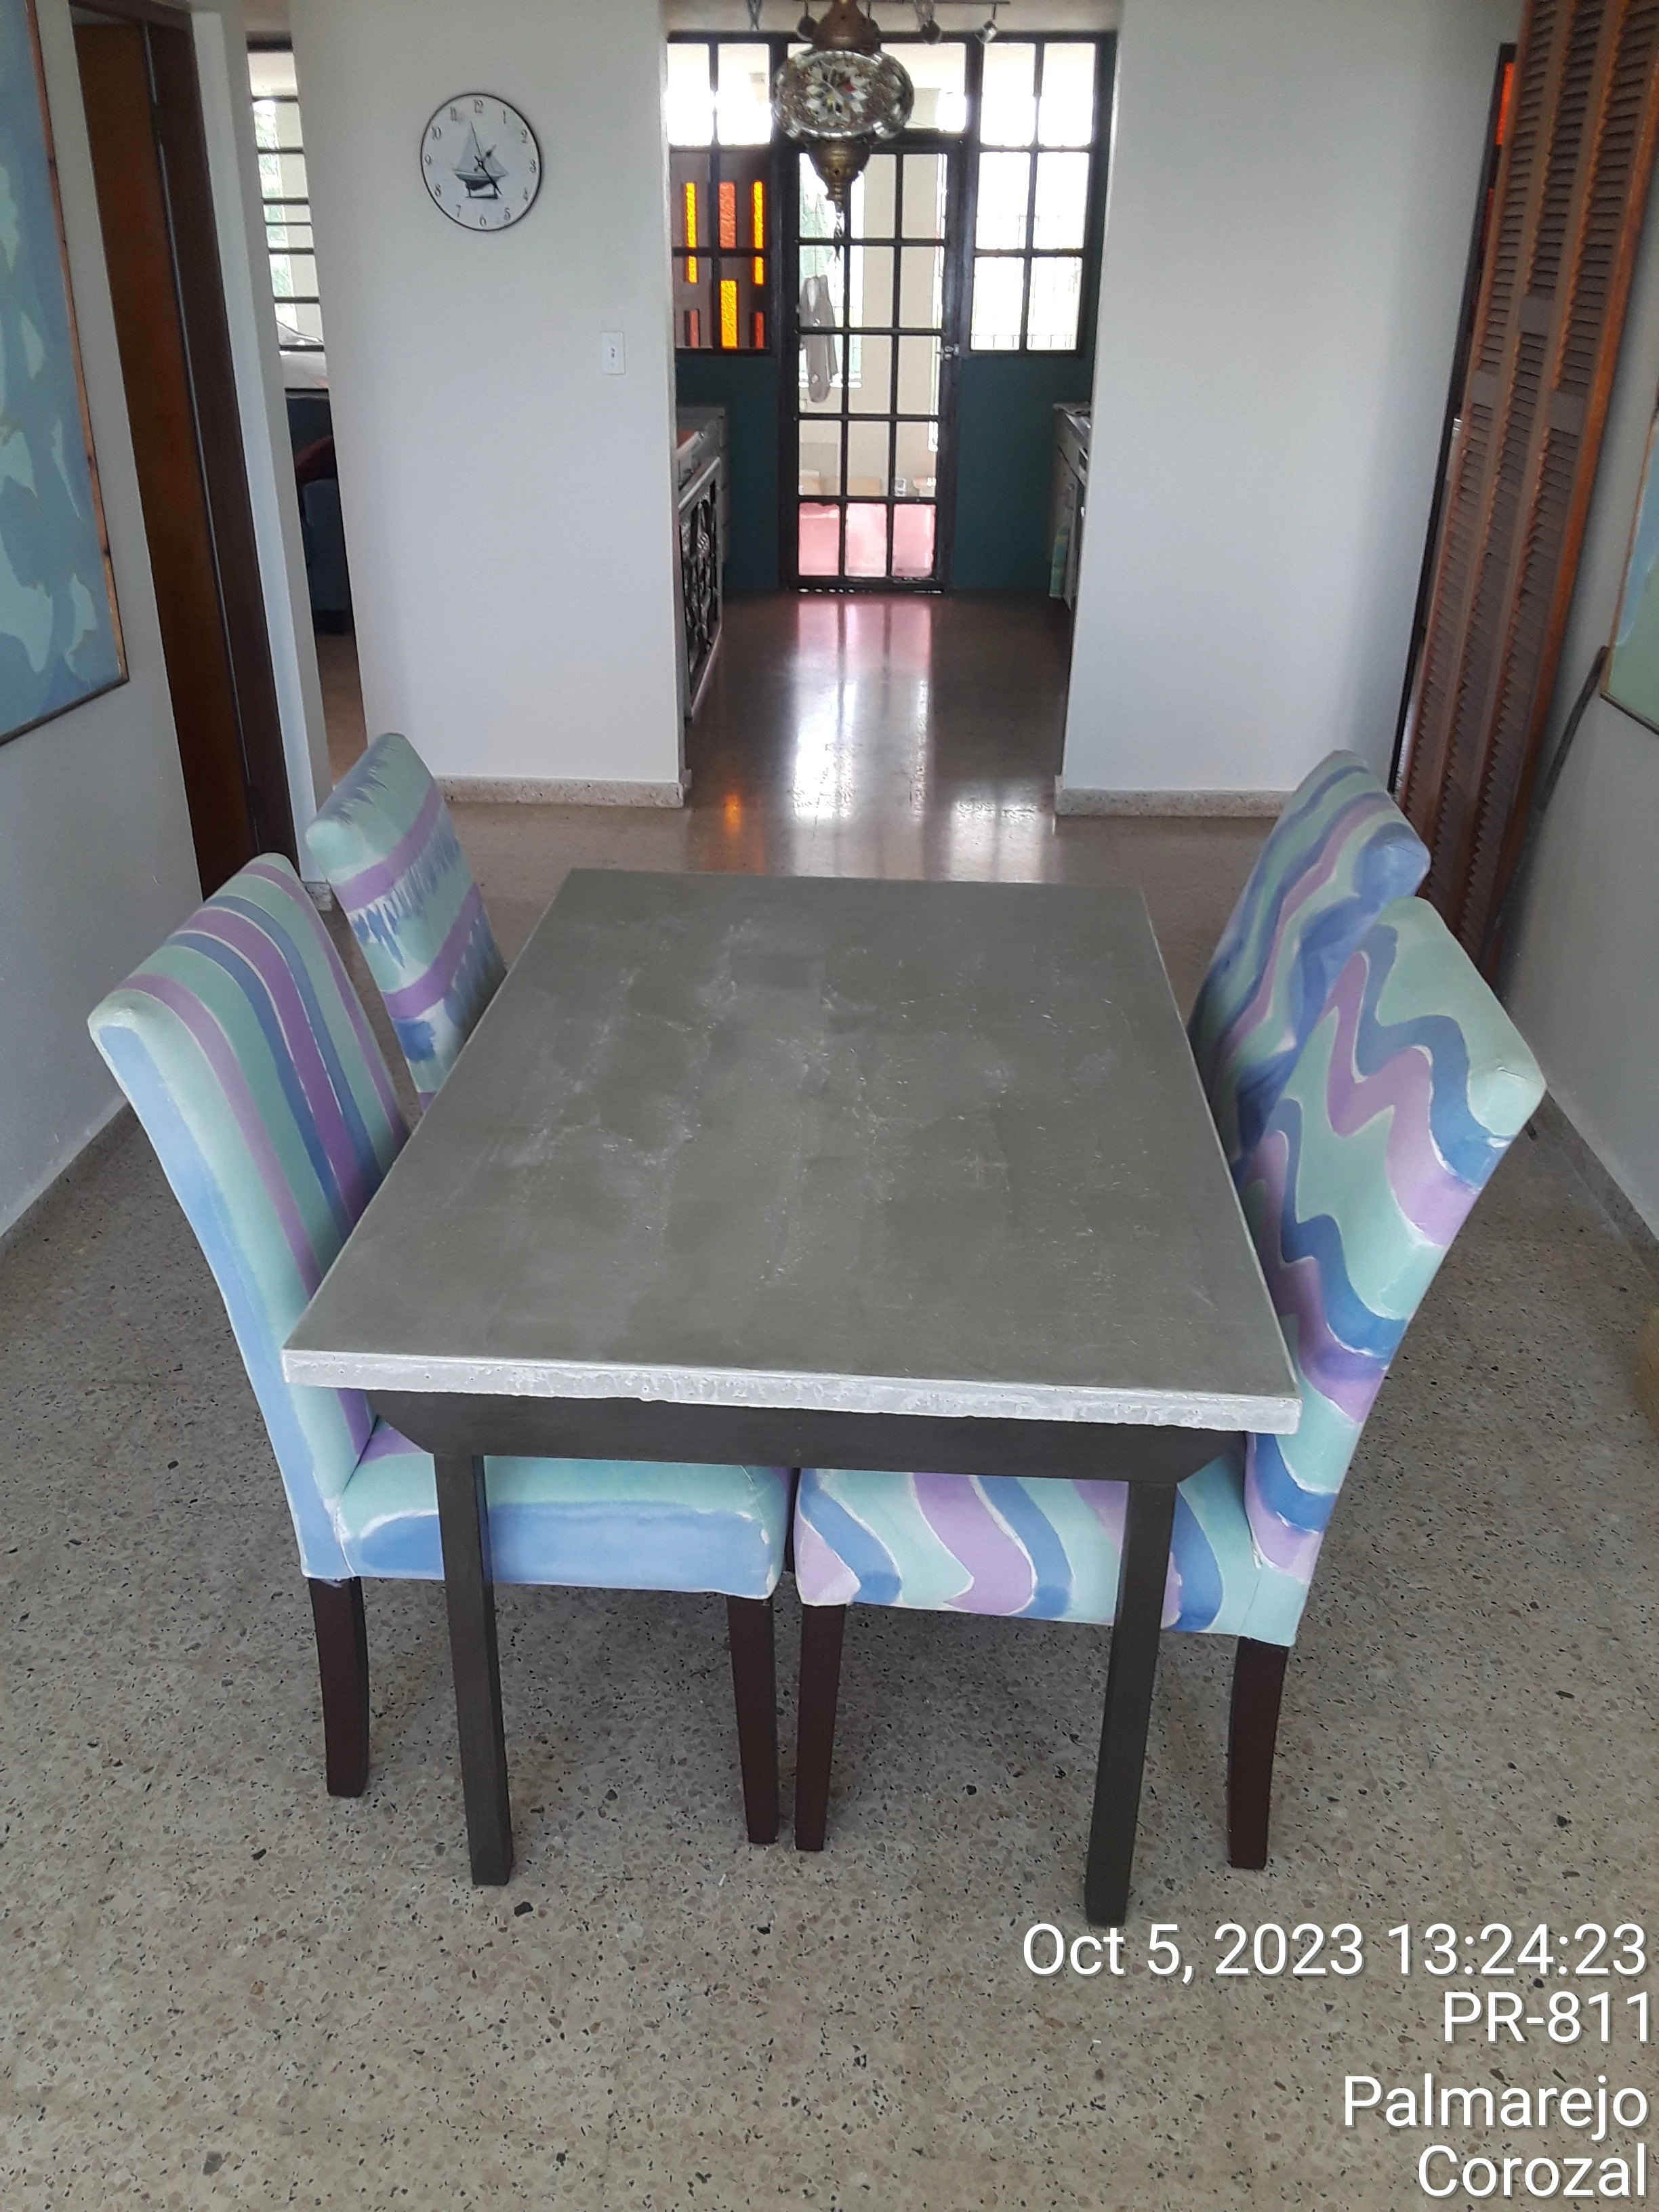
So this isn't really a tutorial on how to set up Hyperion since there are many great resources out there already. The one I've been loosely following is this one.

Instead I wanna highlight the pitfalls i stepped into so you wont have to live through the struggle yourselves. I also wanna take your fears of trying this yourself by highlighting that a lot of this process can be easier than expected.

The Cost

But first some stats on how much this project cost. While I didn't use all of these parts, I couldn't buy some of them in smaller quantities.

  • A RaspberryPi 3B+ €45.94
  • A WS2812B strip with 30 LEDs per meter from BTF-Lighting €28.99
  • 10 solderless LED strip connectors from BTF-Lighting €9.99
  • 6 pairs of barrel jack connectors €4.99
  • 120 jumper wires €6.99
  • A TreasLin 4K HDMI Capture Card €30.59
  • A 5V 10A power supply €26.95

For a total of €154,44. So the only product out there (that I know of) that's cheaper than DIY is the Lytmi Sync Stick. I probably could've gotten away with a cheaper capture card tho, especially since this one doesn't support CEC pass through.

The Hardware

Surprisingly enough, this was insanely easy. There is absolutely zero soldering required and the hardest part is just attaching everything to the back of your TV.

If you didn't know (like I did before doing this), most (individually controllable) LED strips come with a connector for power, data, and ground, as well as two loose wires just for power and ground each. These two loose wires can just be inserted into your barrel jack adapter, so no soldering here.
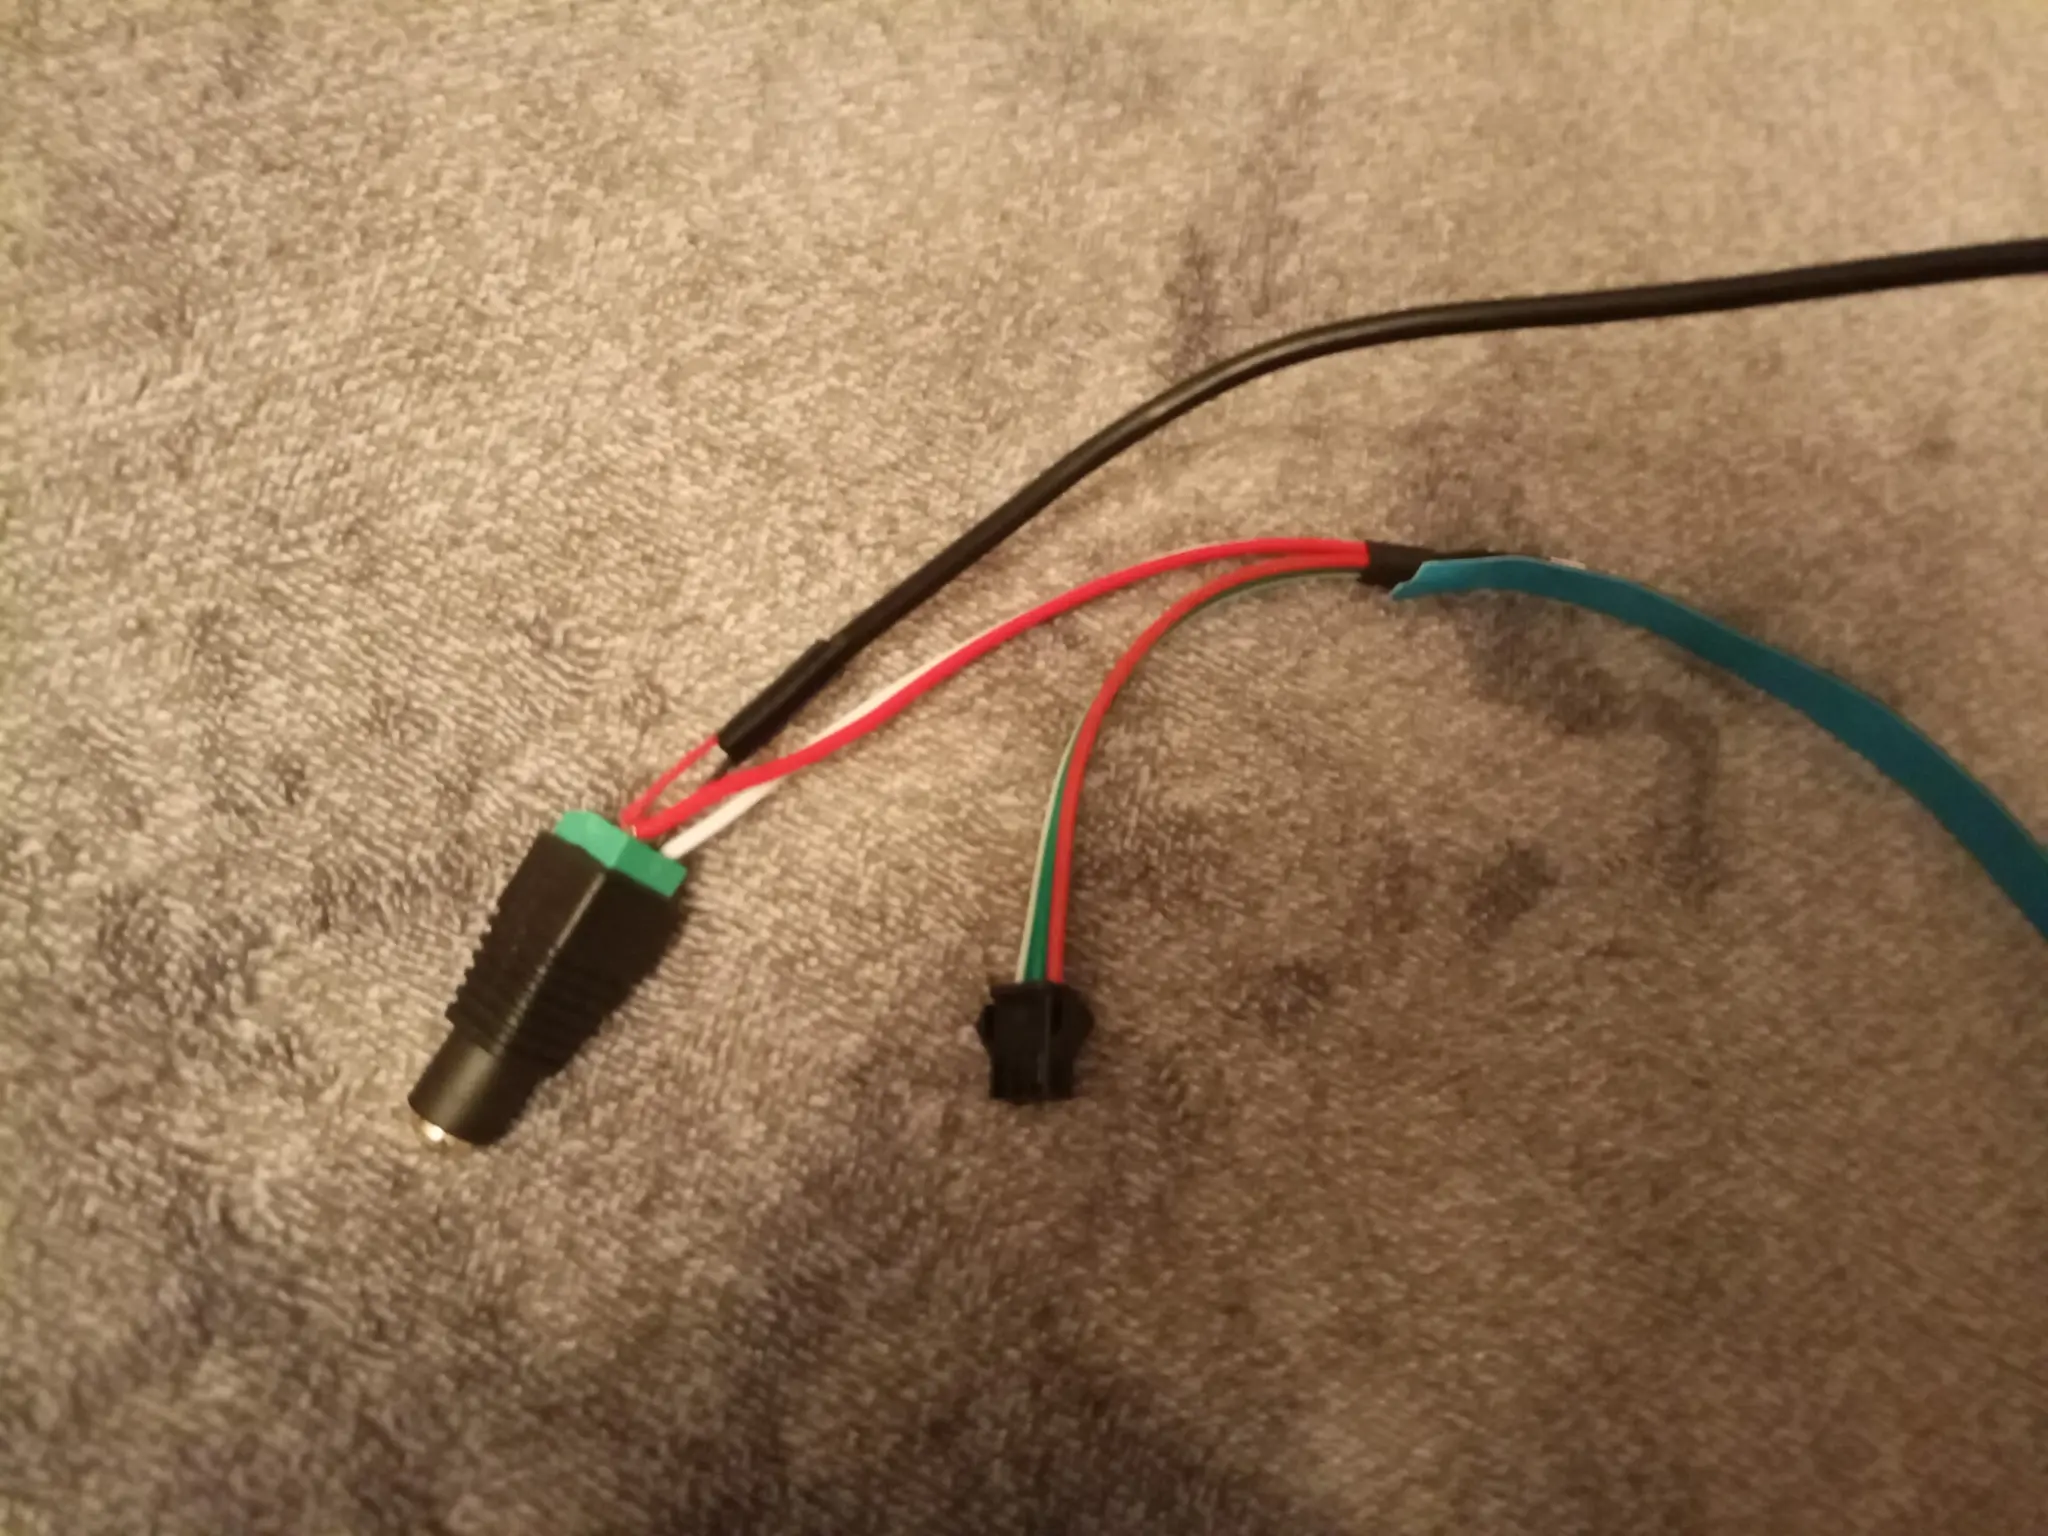
Now, longer LED strips usually need power injection after a few meters so the LEDs don't turn yellow further down the strip. But since I only used 100 LEDs in total, power injection wasn't necessary. Again, soldering avoided. Using more than 30 LEDs/m really isn't necessary in my opinion, so unless you have an insanely huge TV you probably shouldn't need to inject power either. You should still check tho. Just in case.

Attaching all of this to the back of your TV can be pretty tough tho. Especially If you find out half way through that your tape doesn't really stick to the back of your TV for whatever reason. I also didn't want to stick the tape directly to my Pi, so I put it in a plastic case I had lying around. Unfortunately the tape also didn't stick to that case. Even less so than to the TV. So my advice here is to check that your sticky tape actually sticks to the other materials before you take your TV off the wall and spend hours coming up with nice cable management.

On the flip-side, the strips themselves stick to basically anything you put them on. And since you can adjust your LED direction, starting point, etc. inside of Hyperion, you don't need to worry about where to start gluing down your strip.

The Software

Installing Hyperion is pretty straightforward on the Pi. You can easily install the stable as well as the nightly build from here.

If you're using a WS281x strip as well, you may get an error from Hyperion telling you Hardware revision is not supported. If that happens to you, you can use the pinout command on your Pi and check the revision number. In my case this was a020d4. Hyperion uses the rpi_ws281x library for WS281x strips, so if your revision number is somewhere in this file you can just install the nightly build of Hyperion from the download link earlier. The nightly build should contain the up to date version of that library. If your revision is not in that file tho, then you will probably have to ask the maintainers (create an issue) about adding support for your revision 🤷

Also, for Hyperion to send data over the GPIO-pins, it needs to run as root. If you're also following the tutorial on the raspberrypi website, they will tell you to start the service hyperhdr@pi. This is false in both the current version (at the time of writing this) of Hyperion as well as the HyperHdr fork they are using in that tutorial. Upon installing it, Hyperion will automatically start that service as your current user. You will need to disable it and re-enable it for the root user.

Now you should be almost done. I assume you already got the red and green Byte order correctly following some tutorial. But you will most likely find that the colors of your strip aren't accurate. Since my strip doesn't have a dedicated white LED, it just cranks the RGB ones up at max. Unfortunately this produces blue light instead of white. To fix this we will have to calibrate the LEDs in the menu under LED Instances > Image Processing. You may want to open this and `Remote Control* in two separate tabs.

Some people online will tell you to adjust only the gamma red, gamma green, and gamma blue values for this. In my opinion this is too complicated for this use case. These values do have their use, and we will change them soon enough, but for now we only need the color settings further up.

You can use this input in the Remote Control tab to set your backlight to a specific color.
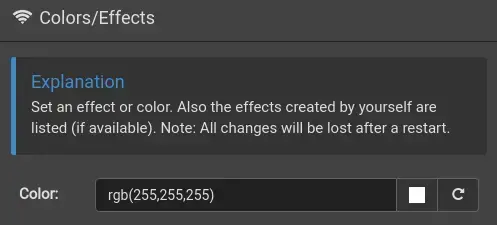
You can then change the values in Image Processing until your LEDs actually put out the color they are supposed to. Here are the values I had to use to achieve to correct colors:

Now that that's done you should go watch some movies/videos to test your new backlight out a bit. You will probably have a lot of flickering going on when the screen is dark. This is because of those gamma settings I told you not to touch earlier. These gamma settings control how each color LED scales with it's supposed brightness.

https://docs.hyperion-project.org/en/user/advanced/Advanced.html#gamma-curve

The three gamma values should all be the same. If they aren't, lets say your gamma red is lower than the other two. Then a dark grey would trigger only the red LED, since it scales more for lower values. A pure white would however still look the same, no matter what gamma values you enter. That's why I don't like using these to calibrate my strip. Setting all three to the same, higher value, will however prevent your LEDs from flickering like crazy during dark scenes (at least if the flickering was due to some dark, but not pure black objects passing by the edge of your screen).

Dang, this post turned out WAY longer than I thought it would... Writing this took so long, I even forgot the closing thoughts I initially wanted to write down here 😵‍💫

Also, check out the official Hyperion forum. There do be some advice to be had over there.
69
 
 
70


Hiya, I hope I'm not completely in the wrong place (/c/Technology seems to only be dedicated to tech news but not questions). I have this powerbank with a built-in solar panel. The powerbank itself seems great so far, but it's a pretty tiny solar panel. I've read about the difficulty of just hooking up a regular powerbank to a solar panel (spikes and dips in voltage due to clouds, people, etc.).

But since this powerbank is already designed to be charged with solar energy, can I simply hook a big-ass solar panel onto it and recharge it much faster than the officially displayed "several days, depending on the weather"?

71


Making any progress, you slackers? Tell us about it!

72


cross-posted from: https://pixelfed.crimedad.work/p/crimedad/593637638050605415

Anyone else have trouble with these GE dishwashing machines?

Mine cleans dishes well enough, but the gaskets leak easier than any other dishwasher I've ever had. I replaced the gaskets a few months ago, but if a little bit of debris builds up then it's leaking again. Also, the racks are badly corroded, but the machine is only maybe five years old. Anyway, it's just kind of funny that my aunt is coming over tomorrow and the last time she was here she noticed the dishwasher was leaking.

#rant #appliance #GE #dishwasher

@homeimprovement@lemmy.world

73


I'm planning to construct a home sometime in the near future in hot, arid part of the country. Obviously, keeping the home cool is a major concern and I've been considering all available options.

One of the recurrent ideas discussed online is using geothermal cooling. But I think I don't have enough land to implement it. I have a related idea though.

Water supplied during set hours of the day by the municipality is fairly cool even during the summer months and it is a common practice around here to first let it collect in an underground tank and then pump it to the overhead tank as needed.

What if I create a closed loop system of circulating water with two car radiators: one in the underground tank, submerged in cool water and another in the living area of the home with a fan blowing behind it.

Do you think it'll cause perceptible change in room temperature if there is, say, a temperature difference of 10 degrees Celsius between water and ambiance? I intend it to only reduce the load on the air conditioners and/or just delay the use of AC.

What kind of math/physics will be needed to assess if this is a feasibility? I tried looking hard but could not find anyone else discussing this idea, so I'm reaching out to you guys.

Thank you for your time.

74


cross-posted from: https://slrpnk.net/post/1050569

Obviously there's lots to improve here, but for plenty of people this is a great starting point.

75


My children are interested in making their own soap. I bought one basic piece of white soap and I have cocoa powder. I plan to melt and mix them slowly. Am I doing this right?

(I don’t know if their interest holds up, so I don’t want to buy shea butter, oils, tools, colors… and all that stuff, yet. I’m just looking for the easiest way possible.)

view more: ‹ prev next ›