Do It Yourself

7734 readers
1 users here now

Make it, Fix it, Renovate it, Rehabilitate it - as long as you’ve done some part of it yourself, share!

Especially for gardening related or specific do-it-yourself projects, see also the Nature and Gardening community. For more creative-minded projects, see also the Creative community.


This community's icon was made by Aaron Schneider, under the CC-BY-NC-SA 4.0 license.

founded 2 years ago
MODERATORS
101


Last year I had an old concrete porch re-done. Long story short, they did not keep it wet when curing, and now the concrete has several cracks in it. I'm concerned about the cracks getting worse and spreading over time, so I am thinking about filling the cracks with some kind of compounds. Any recommendations? I'm thinking a flexible compound like the Sika self leveling concrete fill, but am open to more experienced suggestions.

102


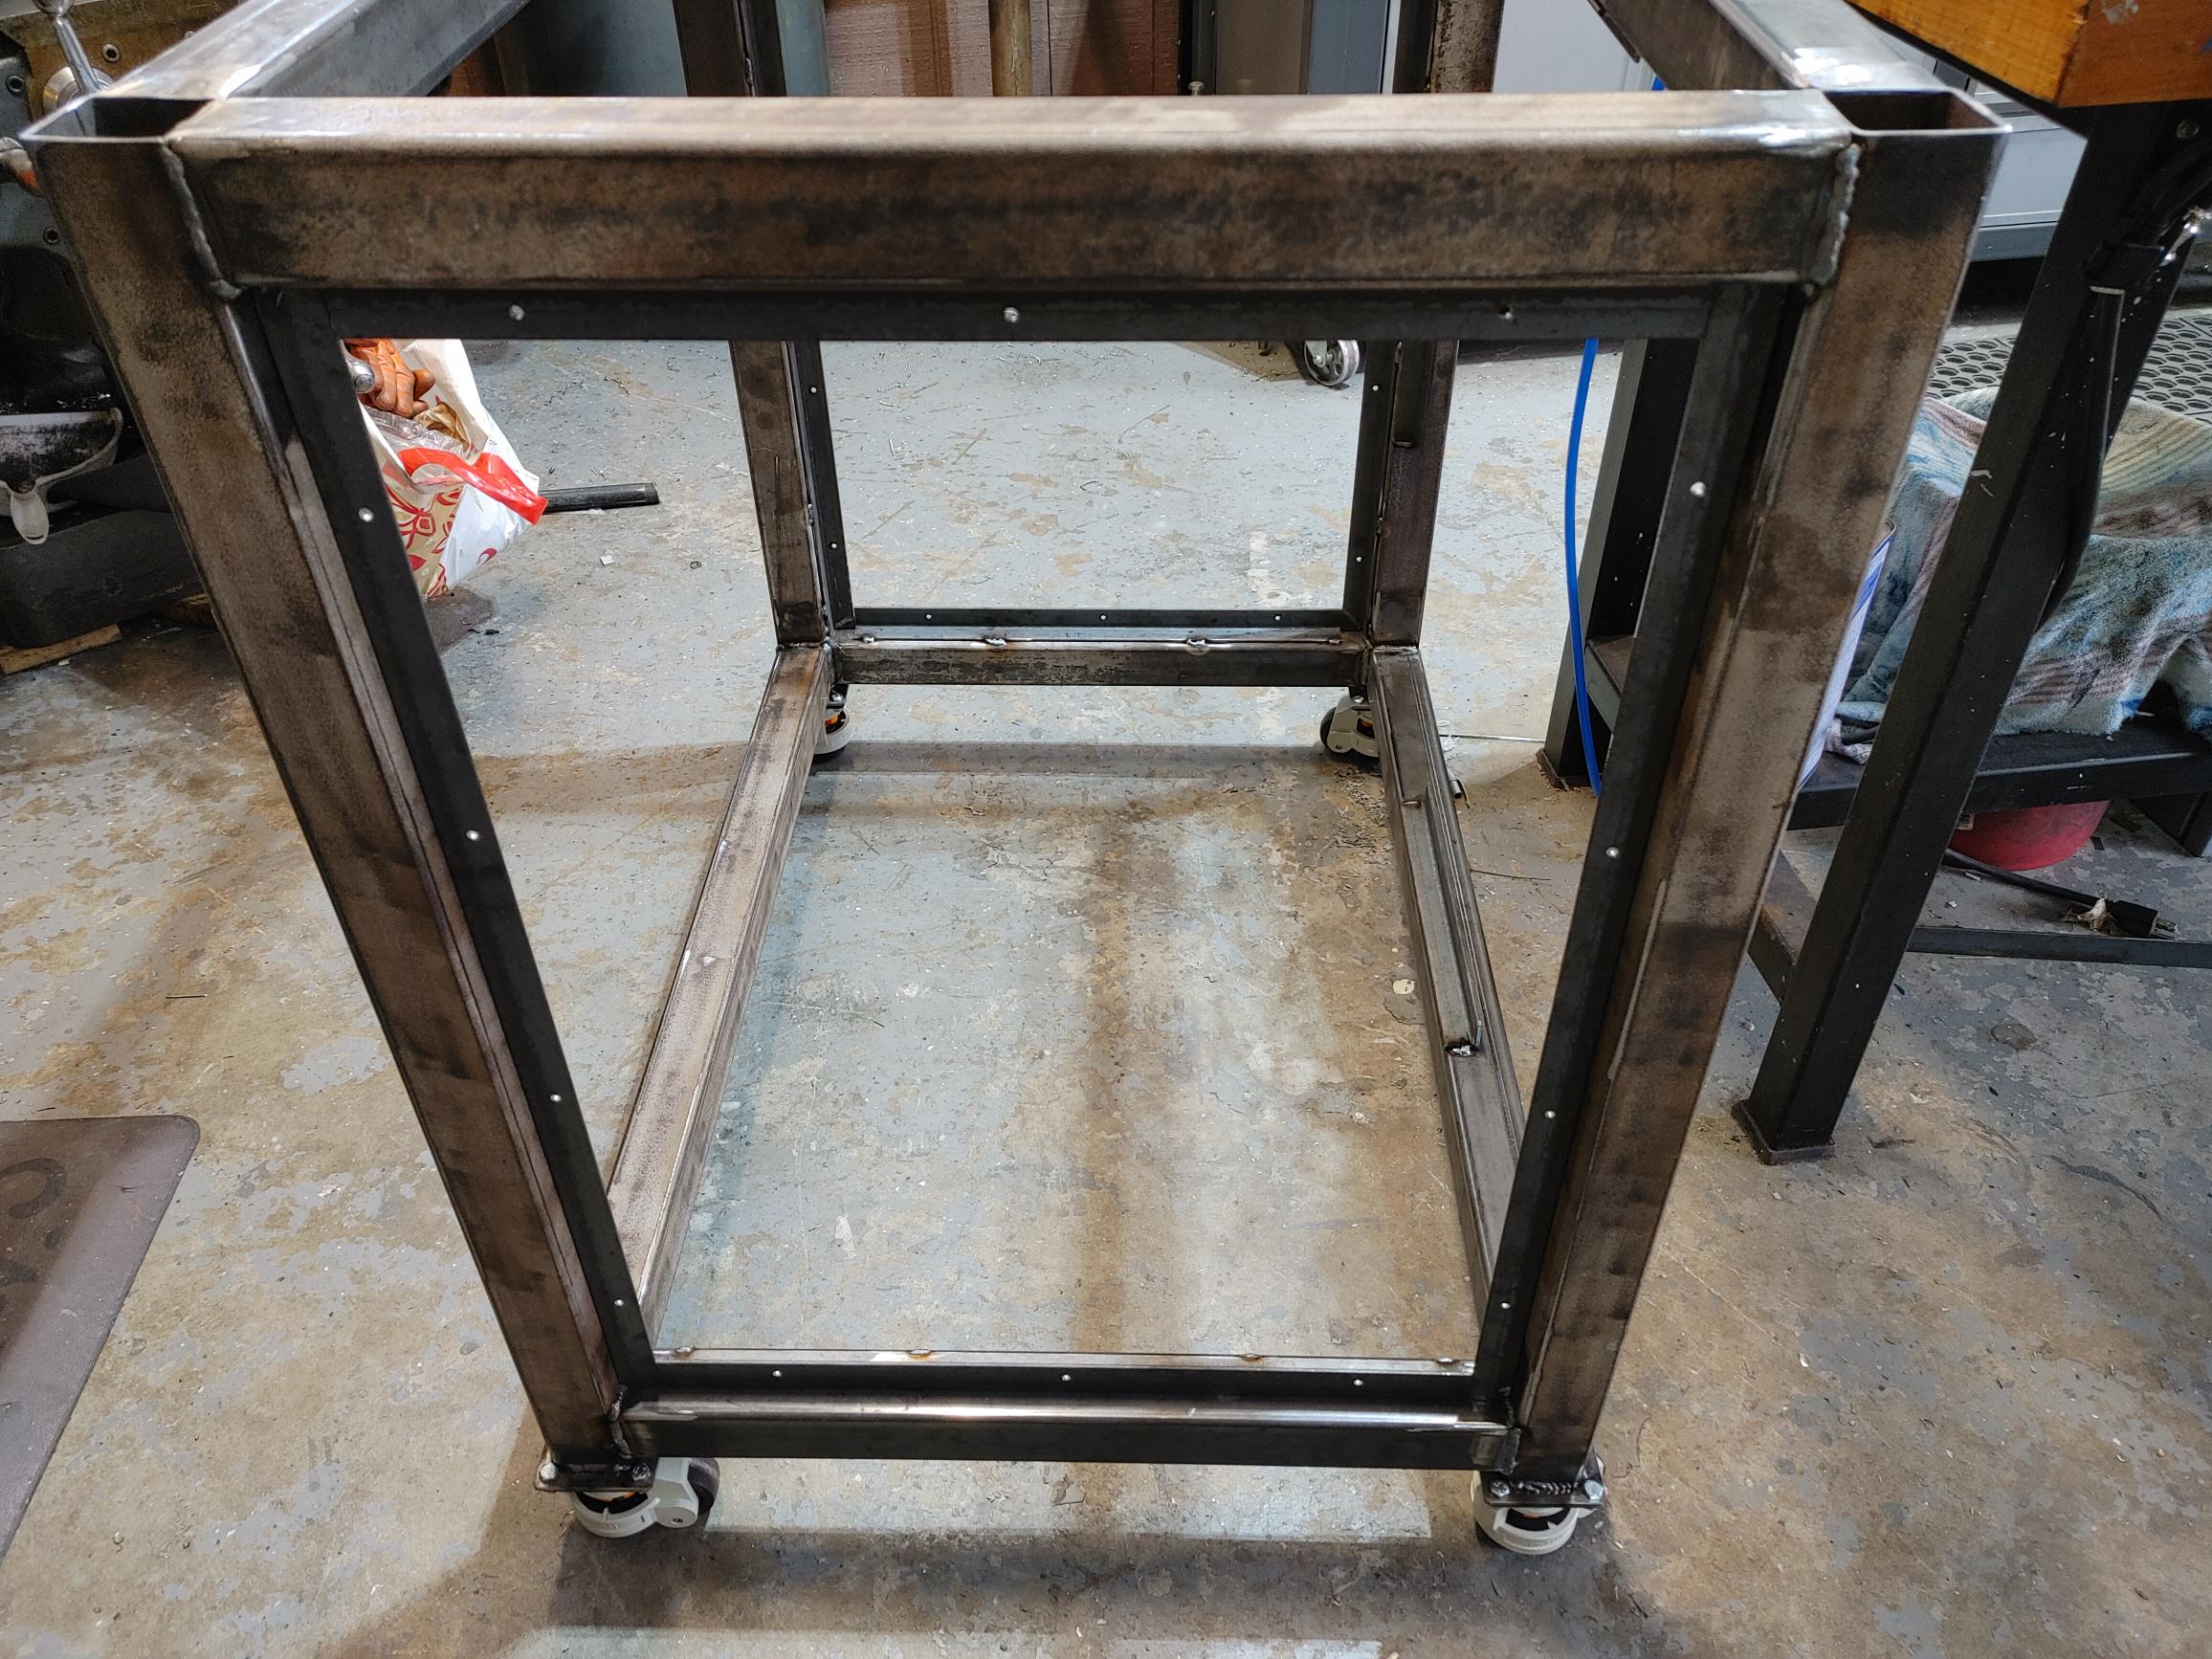
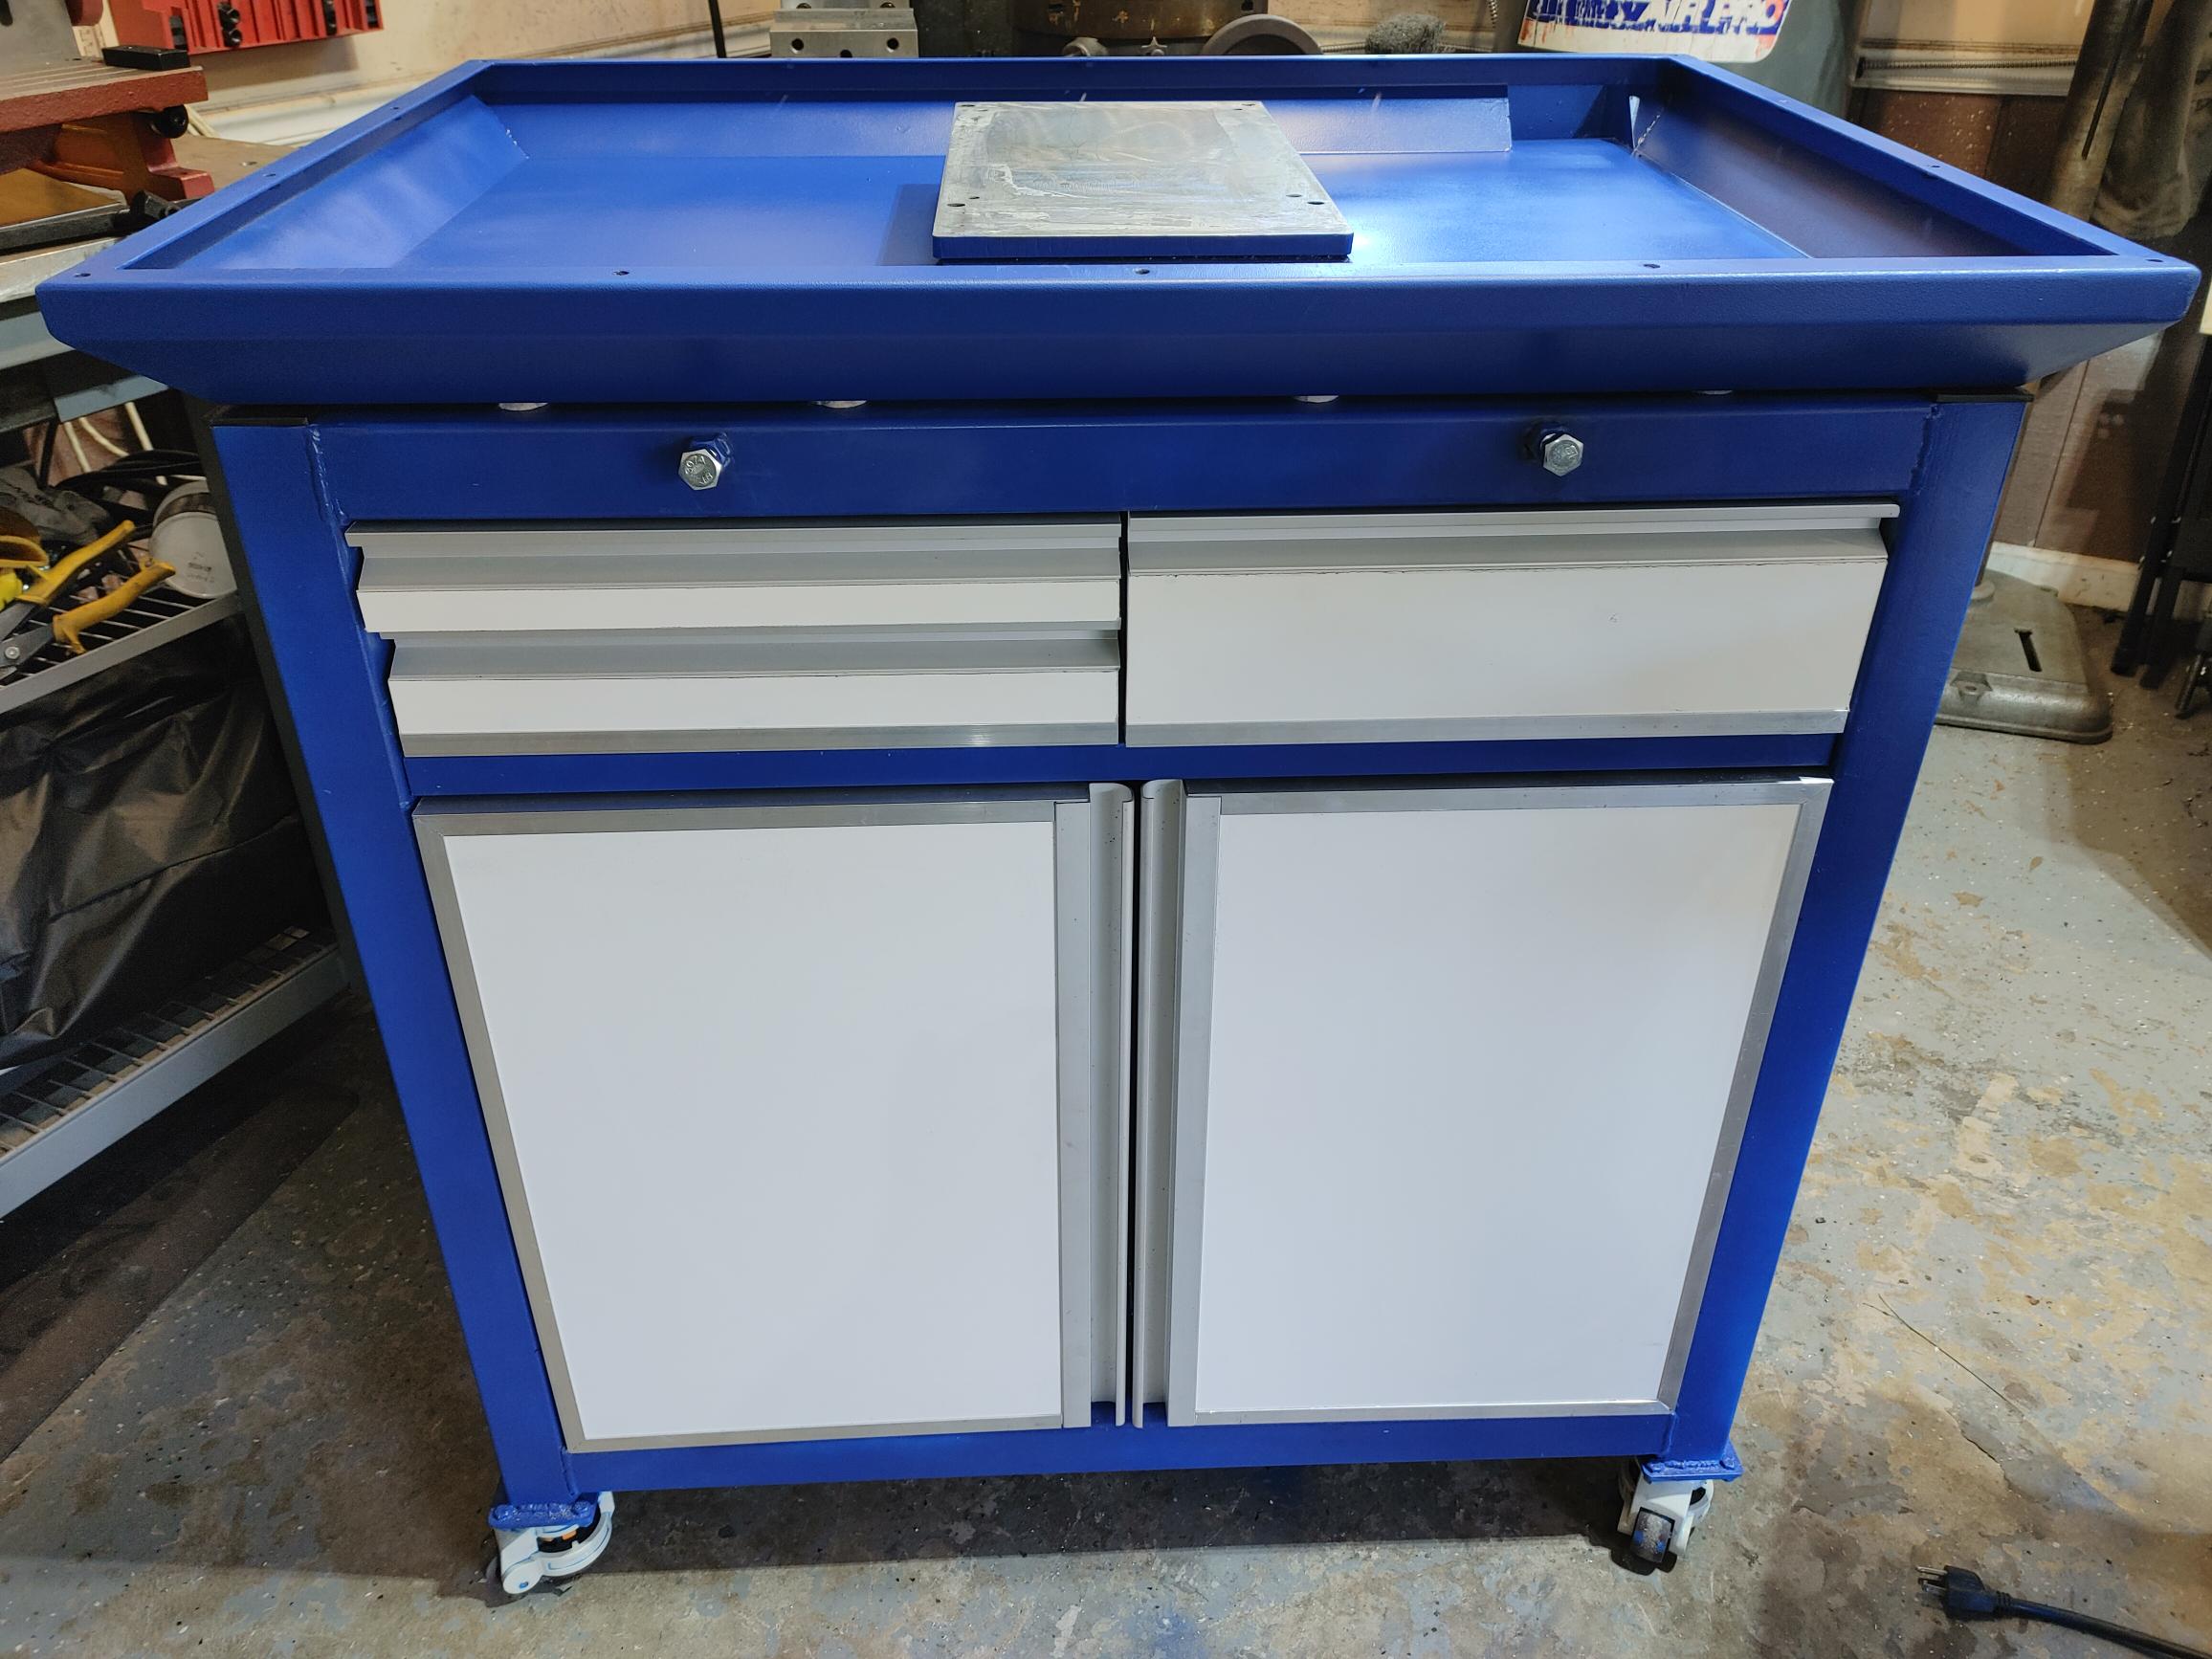
Thought I'd share a recent build for an ongoing CNC milling machine project. The Mill needed a solid base as well as storage for the liquid coolant pump and oiler, and some drawers for tooling.

I've found that you can get nice looking results welding up a frame from 2" square tube and then use bog standard melamine panels for the sides.

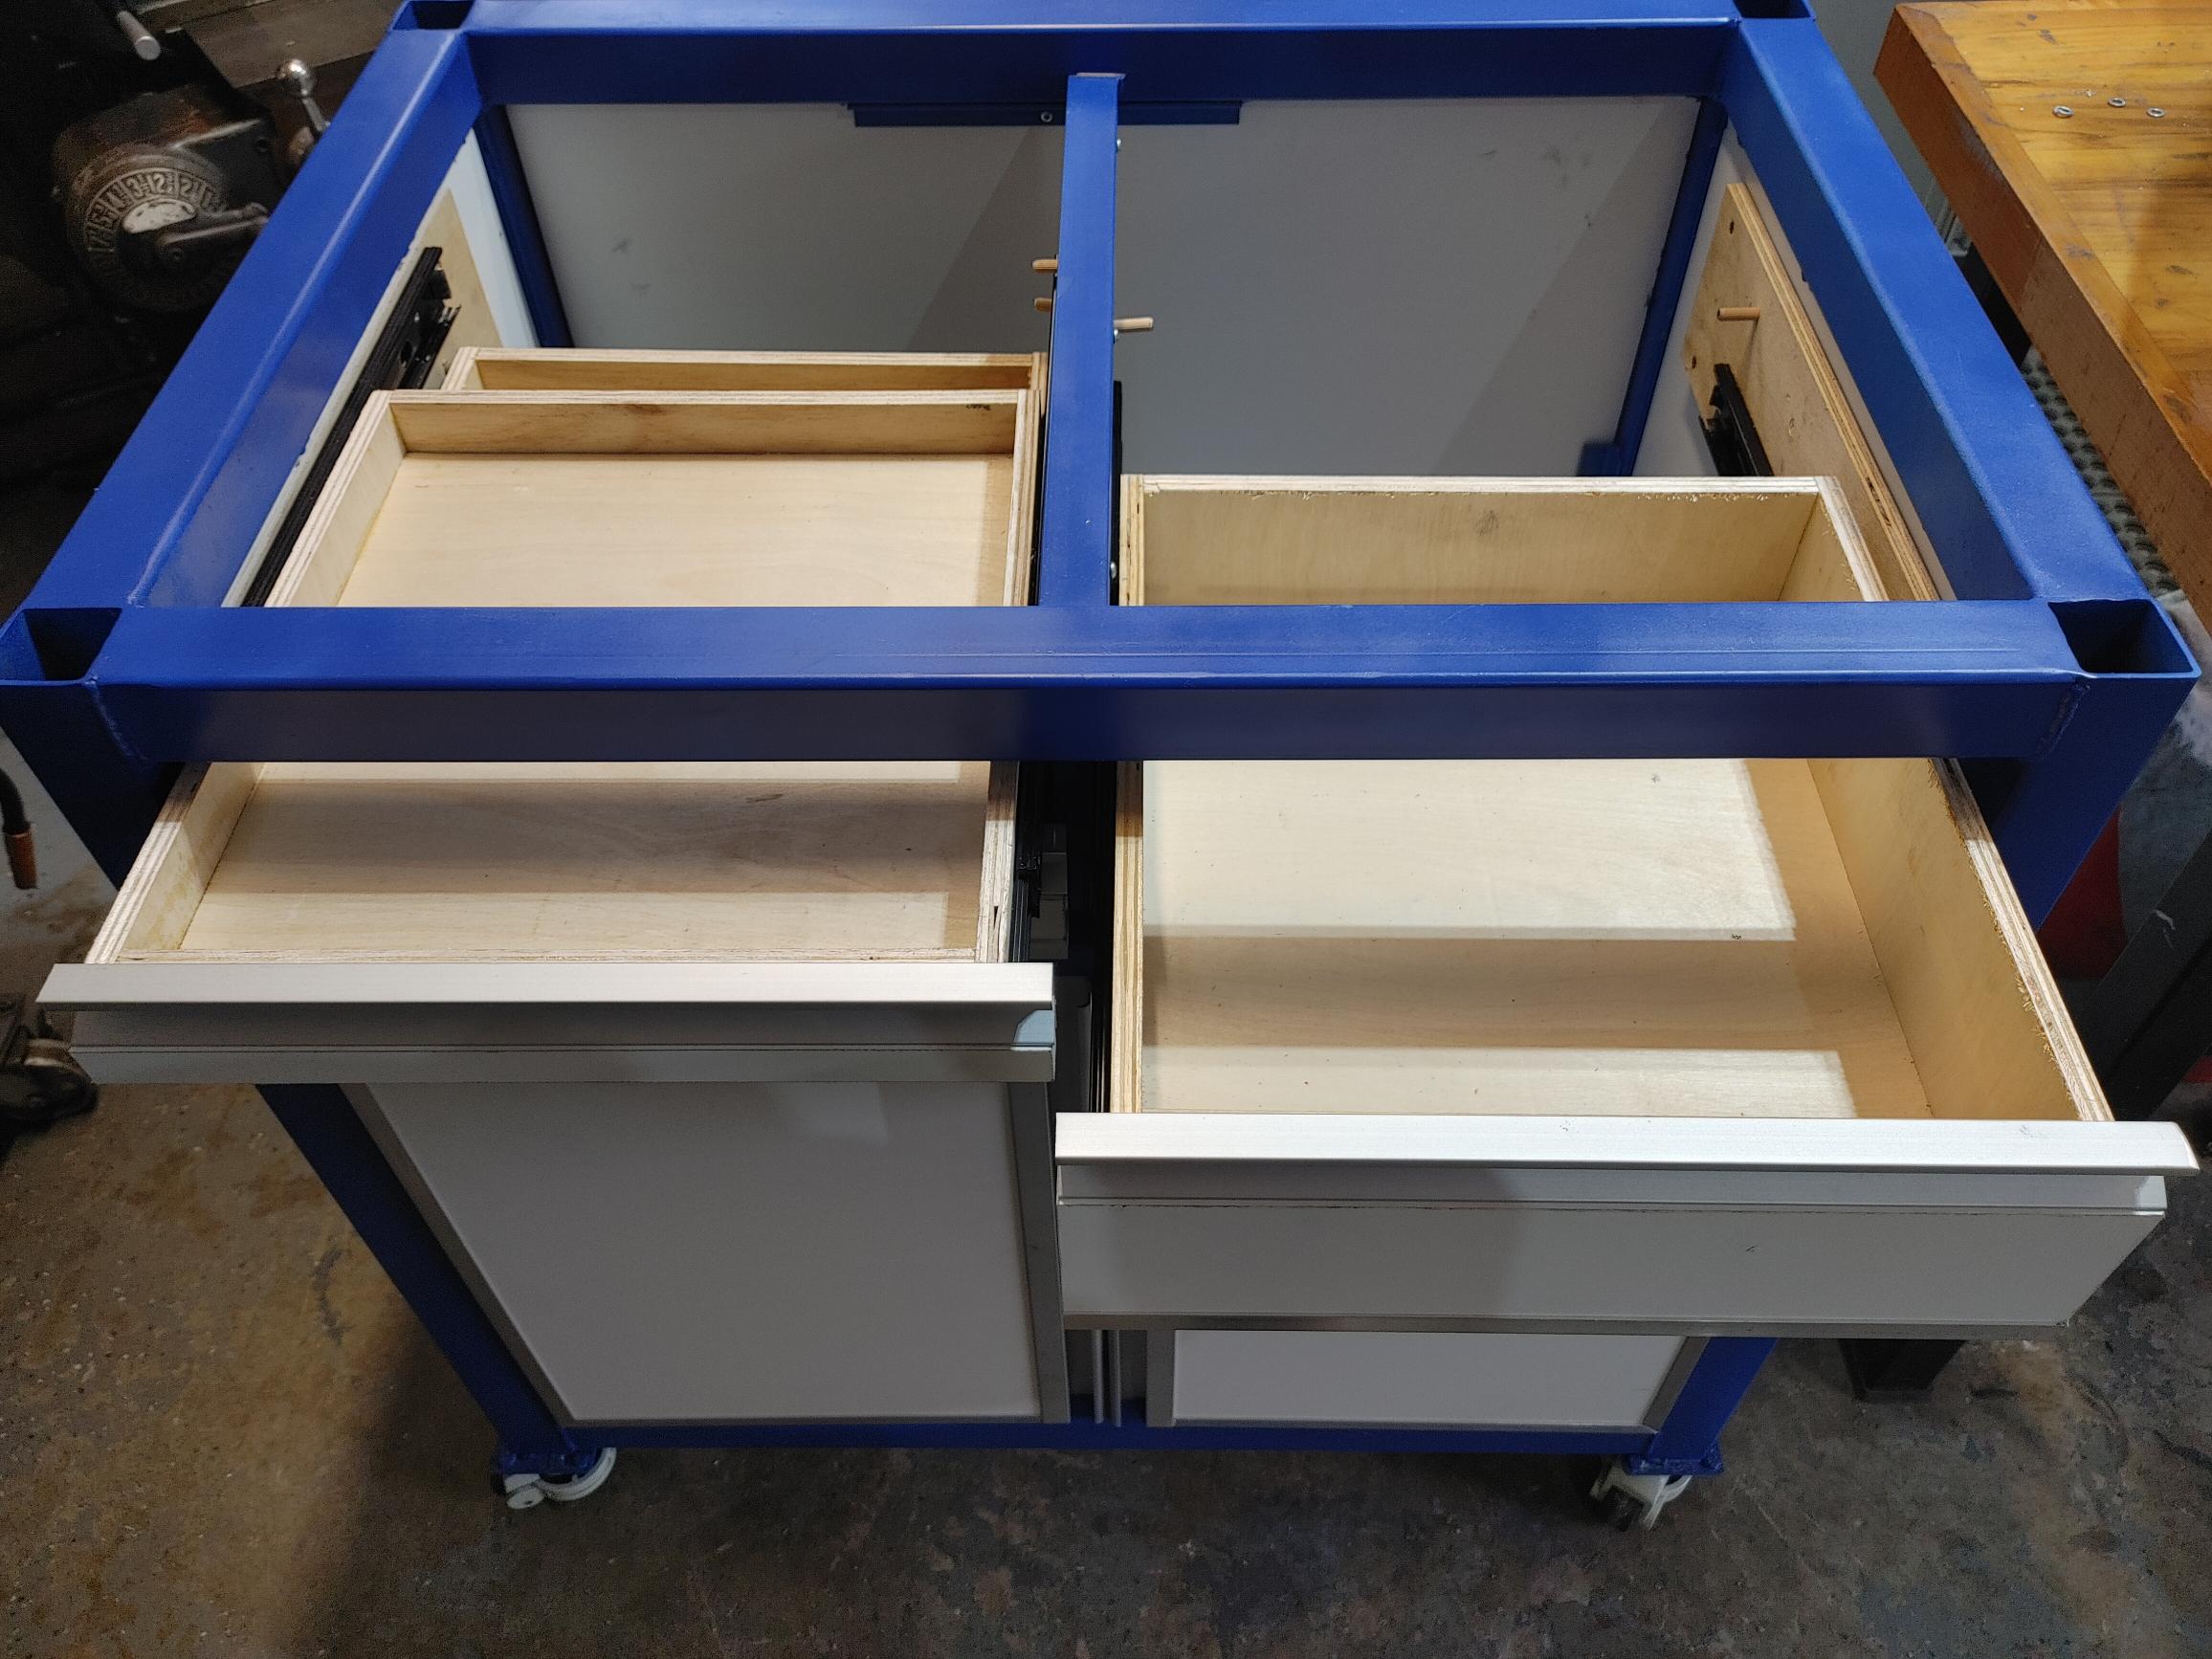
3/4" angle can be welded in to hold the panels and hide the melamine edges.

Add some simple box drawers and Ebay slides, and voila...

The drawer pulls are leftover continuous aluminum extrusion. Again, they hide the edges of the melamine.

Anyway, not rocket science, but thought I'd pass the build idea along!

103


What is the best way to insulate garage door windows? Or the best way to replace them with newer glass?

104


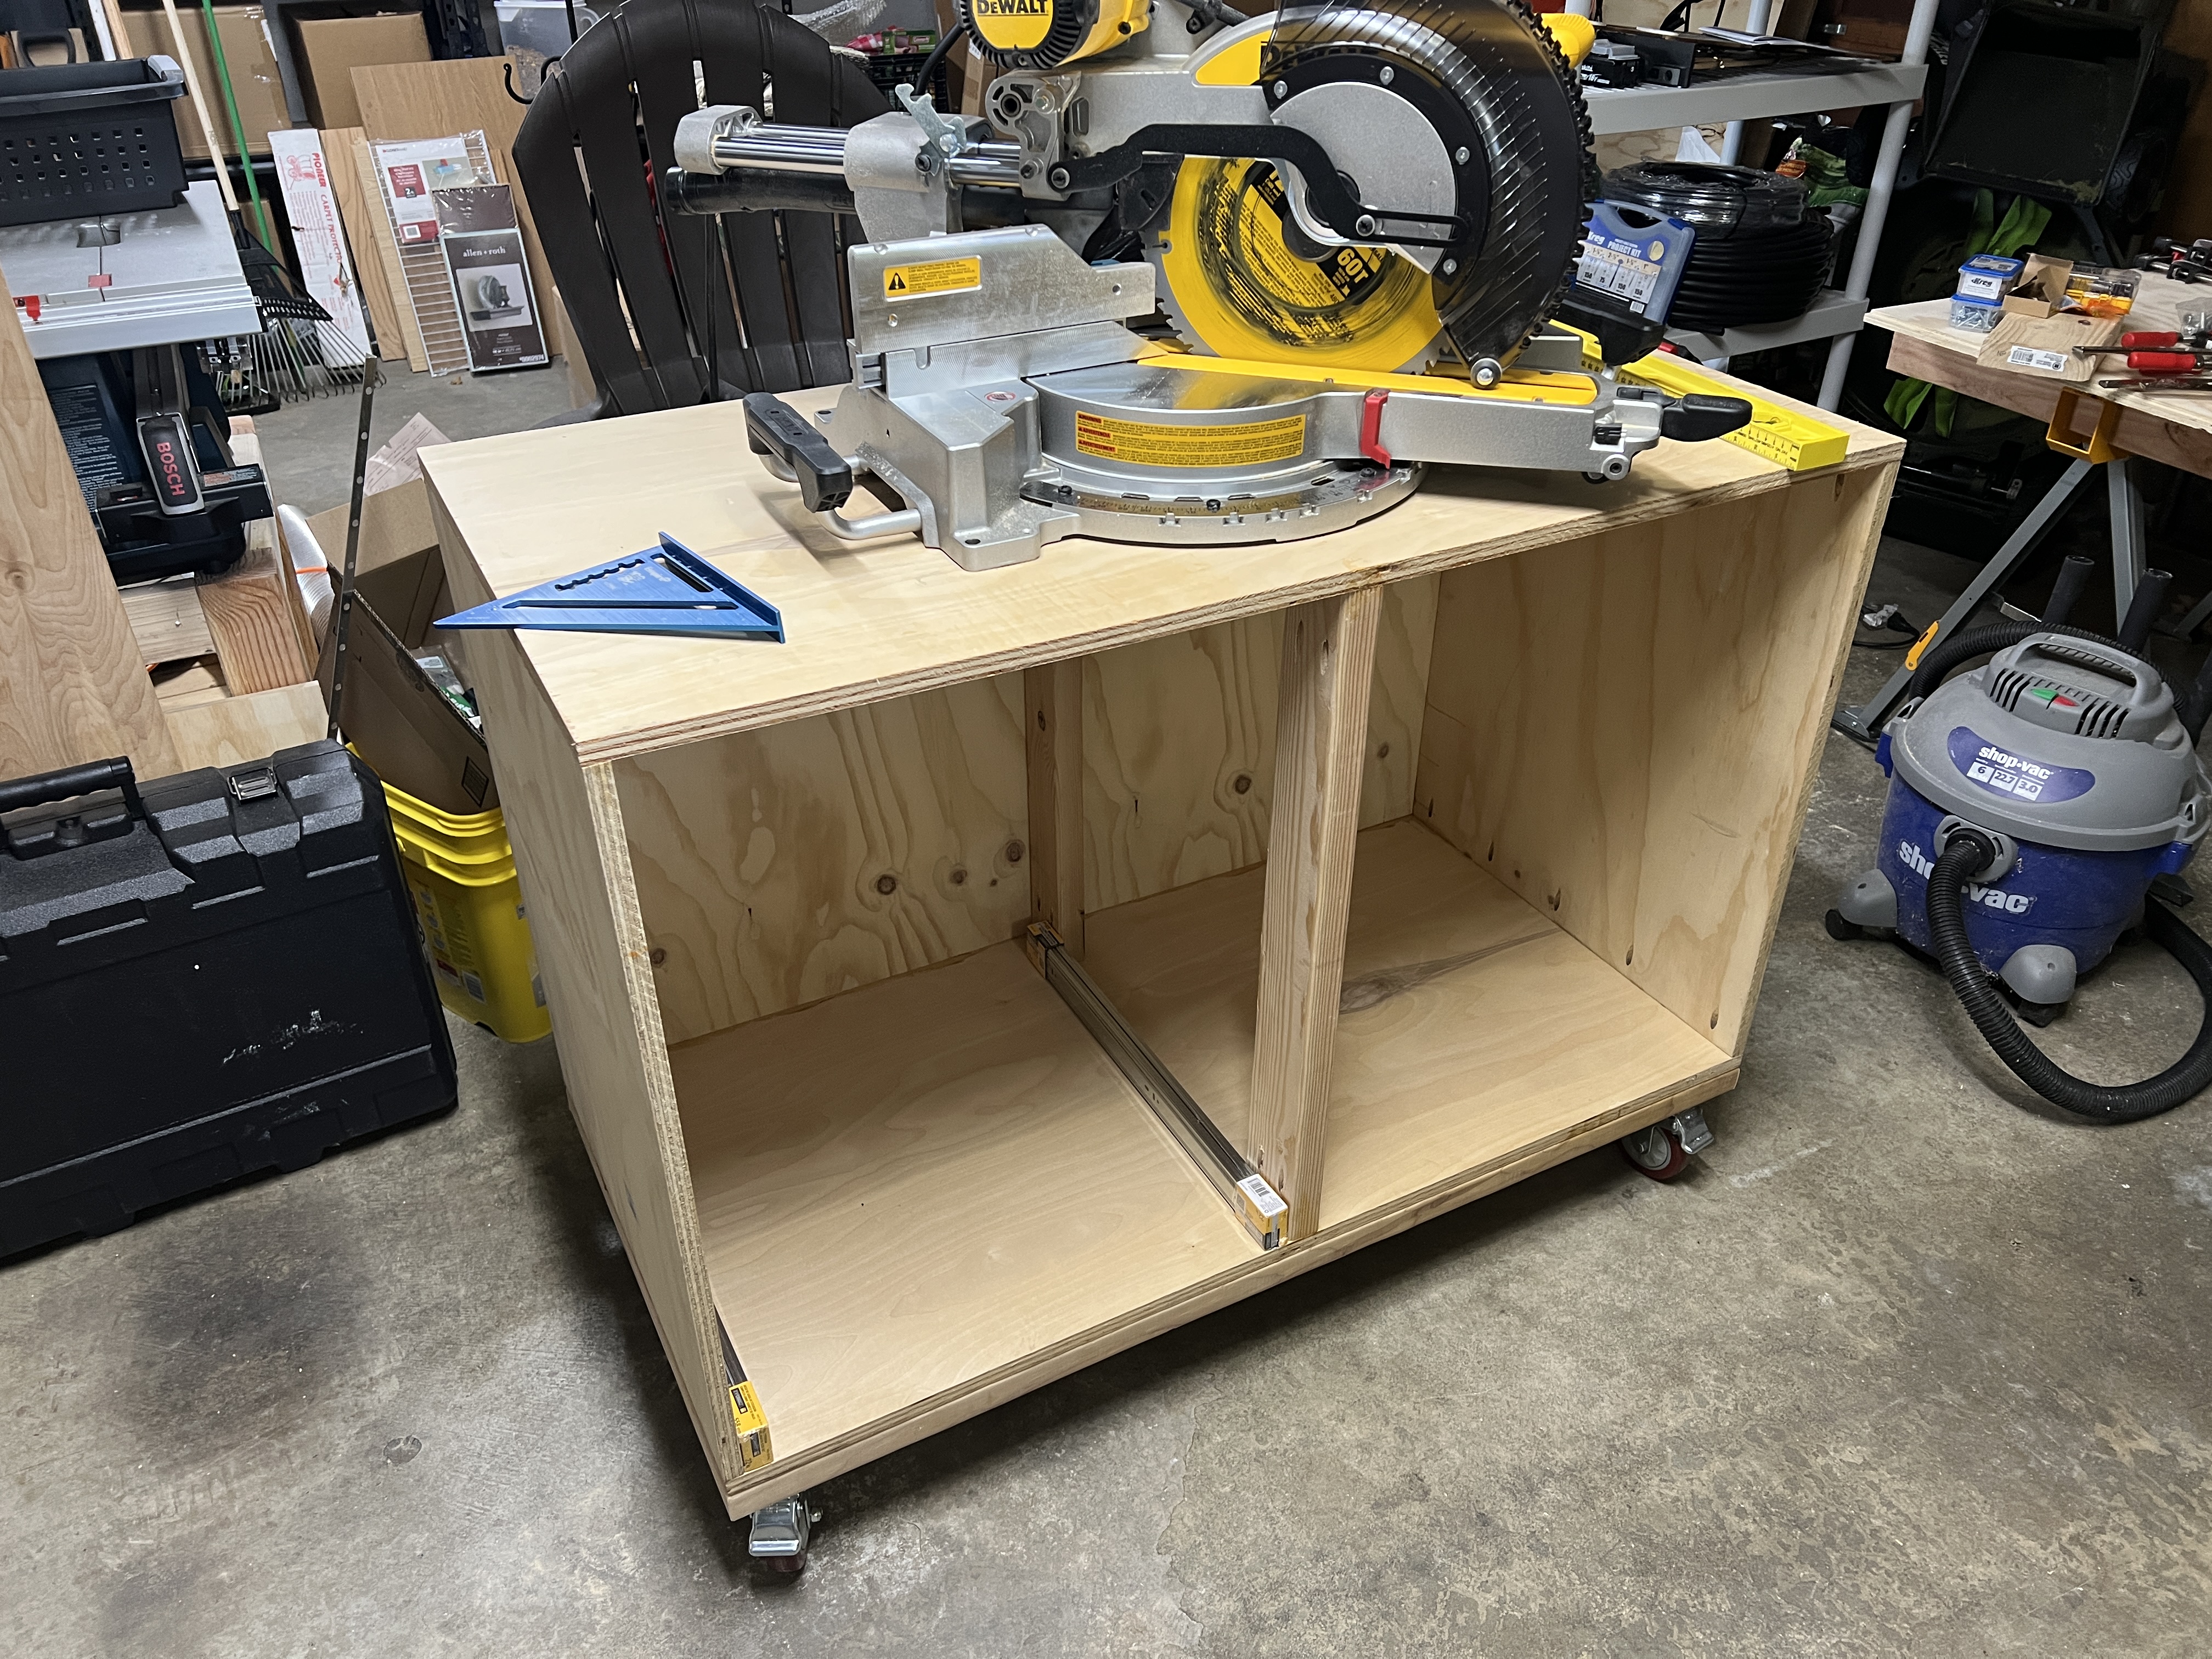
This weekend, I have some plans to finish up my miter saw stand, and do some other "puttering" around my shop. Putting together a list of actions, and their order, to help me keep myself accountable (:

  • Align the miter saw at 45 degrees (it's a hair off)
  • Align the tablesaw blade arbor to the miter slots
  • Cut the parts for six total drawers
  • Build drawers, and install
105


I am drawing out diagrams for a project I want to do to involve loads of buttons in a 8x8 grid but... I don't know how to go about driving them, if someone could show a simple way to not use a lot of pins to accomplish this I'd be happy as then I'd be able to continue drawing out my plans.

This is my first electrical project, so loads of learning to do

106


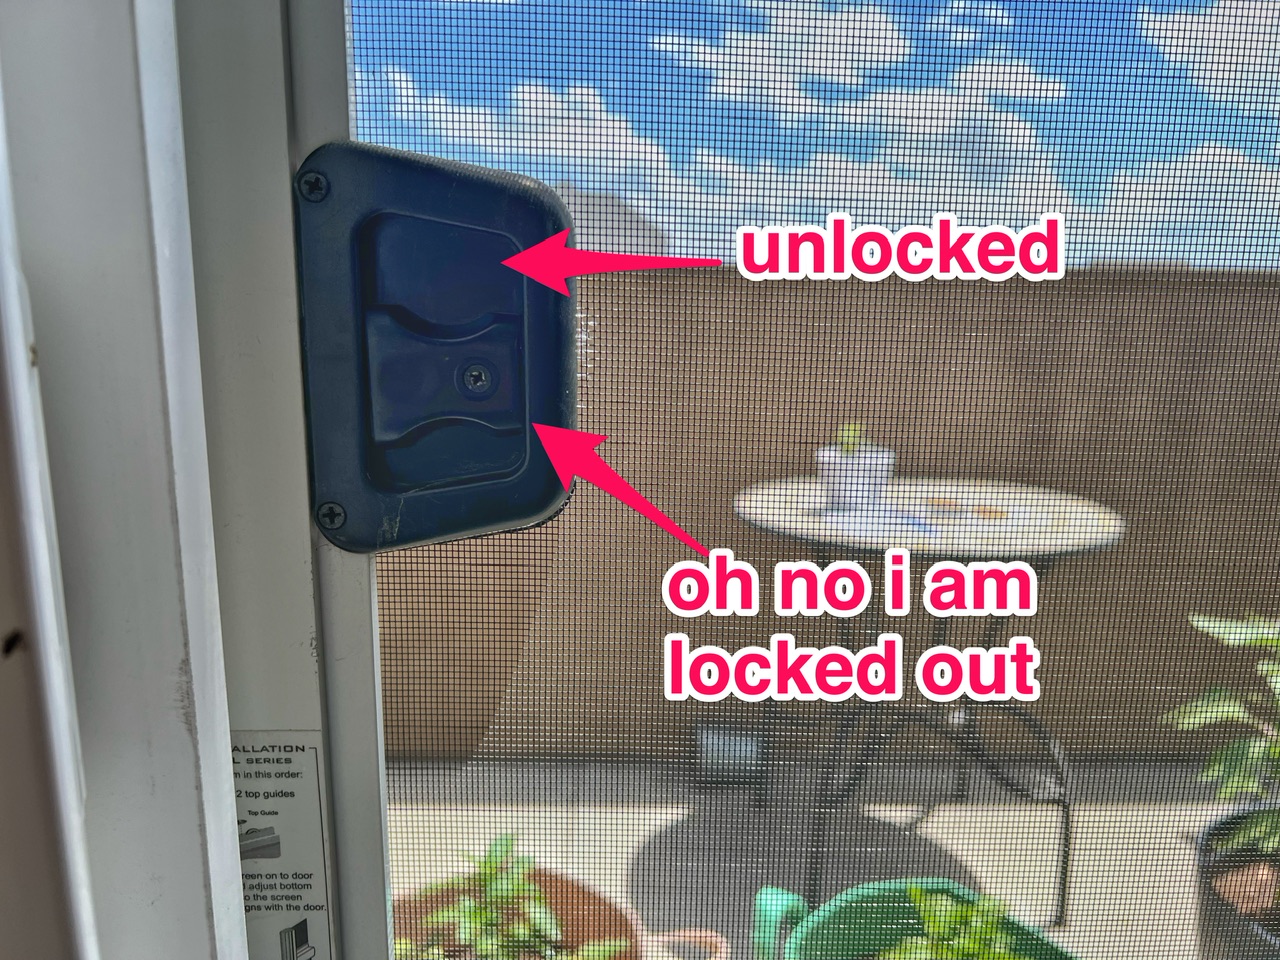
Edit: Looks like forcing the lock to stay up is the best option, plus adding a hook-and-eye latch to keep the cats (one of whom particularly reckless) from getting onto the roof by way of the balcony.

When I go onto the balcony and close the screen door behind me, the lock falls down into the locked position. (Conveniently, this mostly happens when I’m not wearing pockets and therefore don’t have my phone.)

The lock doesn’t seem to be loose, or at least the screw won’t go any tighter. I don’t think I’m closing the screen any more firmly than necessary.

Other than trying to remember to instead close the glass door behind me — passing through doors happens on autopilot so I’m very likely to forget — is there some way to prevent locking myself out? Or is it working as designed and I have a head-in-clouds problem rather than a flaky-door problem?

107


cross-posted from: https://slrpnk.net/post/488623

A small solar power system to run a LoRa water temperature sensor year round. Here's some pretty graphs of the data:

https://www.kaedon.net/mitigomish/watertemp

This is a project that's been running for almost 2 years now. Everything is still working with very little down time! The solar power system is way overpowered for what it's doing, but I wanted to make sure it works through the dark winters.

The temperature sensor is at the bottom of a bucket in the ground, because the water level gets pretty low in the winter and I didn't want the ice to destroy the temperature sensor when it drifts.

Any thoughts or suggestions for improvements are welcome!

108
4
submitted 1 year ago* (last edited 1 year ago) by whaleross@kbin.social to c/diy


My kitchen stove hood fan needs a new carbon filter as the current one lookes pretty caked with grease from the previous owners of the place. It turns out the manufacturers filters cost €150 which I find a bit excessive. Filters seem to be the printer ink of the kitchen.

So I'm thinking either if it is possible to clean out the current one, or reuse the casing and refill it with some bulk carbon filter material, if there is such to be found.

I have no idea, I've never done anything of this sort before.

Experiences, ideas, suggestions much appreciated.

Edit: There is a metal mesh under that is washable, but also an internal filter, as the hood is recirculating the air back into the kitchen. My apartment building does not allow kitchen fan exhaust into the ventilation system.

109
5
submitted 1 year ago* (last edited 1 year ago) by isosphere to c/diy


...

Luckily, I had some repair tools (specifically a hot air rework station), enough experience to make me cocky, and a general disregard for the risk of destroying the thing.

It's as good as new now! Details in the attached link, I hope it helps someone else; I was flying blind.

110


I've recently installed new brake pads on my bike, all good. They are disc brakes. After a week they were too loose, thought it was because they were new, so readjusted them. A week later and I have to readjust them again. I only cycle about 70km per week. Before the pad replacement I didn't have to do it so often.

Is it still because they're new or am I forgetting something? Thanks.

111
146
submitted 1 year ago* (last edited 1 year ago) by Hotchpotch to c/diy


Today i'm actually proud of myself. I'm good with wood, textiles, gardening, trees etc. But metal, machines, electronics don't come natural to me at all. I learned to take care of bicycles or chainsaws because I had to but those scary household machines never. Until today. The machine stopped midway, full of water and clothes. Panic ensued. I already saw myself forced to buy a new one. After mere 20 years!

But mommy raised not quitter, so i took the stuff out, drained the water (without flooding the bathroom!) and had a look at that debris catcher thing and the lye pump. Both a bit dirty but easily cleaned and the pump's screw still moved. After looking into the waste tube I put everything together again and run an empty cleaning cycle. At first everything seemed fine but coming back from a short nap the machine was full of water again. So rinse and repeat it is.

This time i watched a few videos on how to dismantel the machine to get to the inner tubes. I had a hard time finding something since i've apparently got a rare top loader model. Luckily i watched one vid with a guy looking at the lye pump with a flash light instead of just feeling for coins or buttons with my fingers. So back down on the belly it was.

Lo and Behold! There was the culprit! A bloody rubber band had wrapped itself around the screw. Not nice. At all.

Being the good hoarder i am, it wasn't difficult to find some long hooks (spare bike spokes) to fish it out. Doing it was though. But with a good amount of patience and some luck (and an astonishing lack of cursing) i managed to untwine it and ease it out, without leaving anything stuck around the screw. (Funny thing is I don't use any white rubber bands, ain't got a clue where it came from.)

All in all it took me "only" two hours. But I fixed my first washing machine!

I hope you enjoyed my little Saga of "The Washing Machine and The Rubber Band" and I wish you at least the same amount of success for your own projects. Be they voluntary or not.

112
9
submitted 1 year ago* (last edited 1 year ago) by Crotaro to c/diy


Hey there, I hope question posts are okay. My fiancé and I are planning to turn our Dacia Dokker into this sorta mini camper amalgamation. Do any of you have experience with this sort of endeavor and can offer tricks or insightful knowledge?

Edit: I should add that it's supposed to be modular. So luckily (or unfortunately?) I don't need help on how to permanently fix furniture onto the car frame.

113


Hey all! Want to see if anyone here has a recommendation for a good hand truck for a diy'er / home owner. I wouldn't use it frequently, but when it's needed it is the right tool for the job. Had to move a fridge yesterday, and regretted not having one already. Thanks!

114


After my trusty Hazel bow cracked last year, my eyes turned to the huge Blackthorn I have in my garden.

Blackthorn, unlike yew or ash, is not the typical bow wood. But this is largely due to the fact that they usually grow in hedges and it is hard to find a piece long and straight enough to make a bow out of it.

First step is to harvest this in late autumn and let it dry for 8 months.

115


I'm just a little excited about Halloween lol, any name suggestions?

116
42
Harbor Fright (lemmy.blahaj.zone)
submitted 1 year ago by thepiguy@lemmy.blahaj.zone to c/diy


Screen capture from the lastest I Like to Make Stuff video.

117


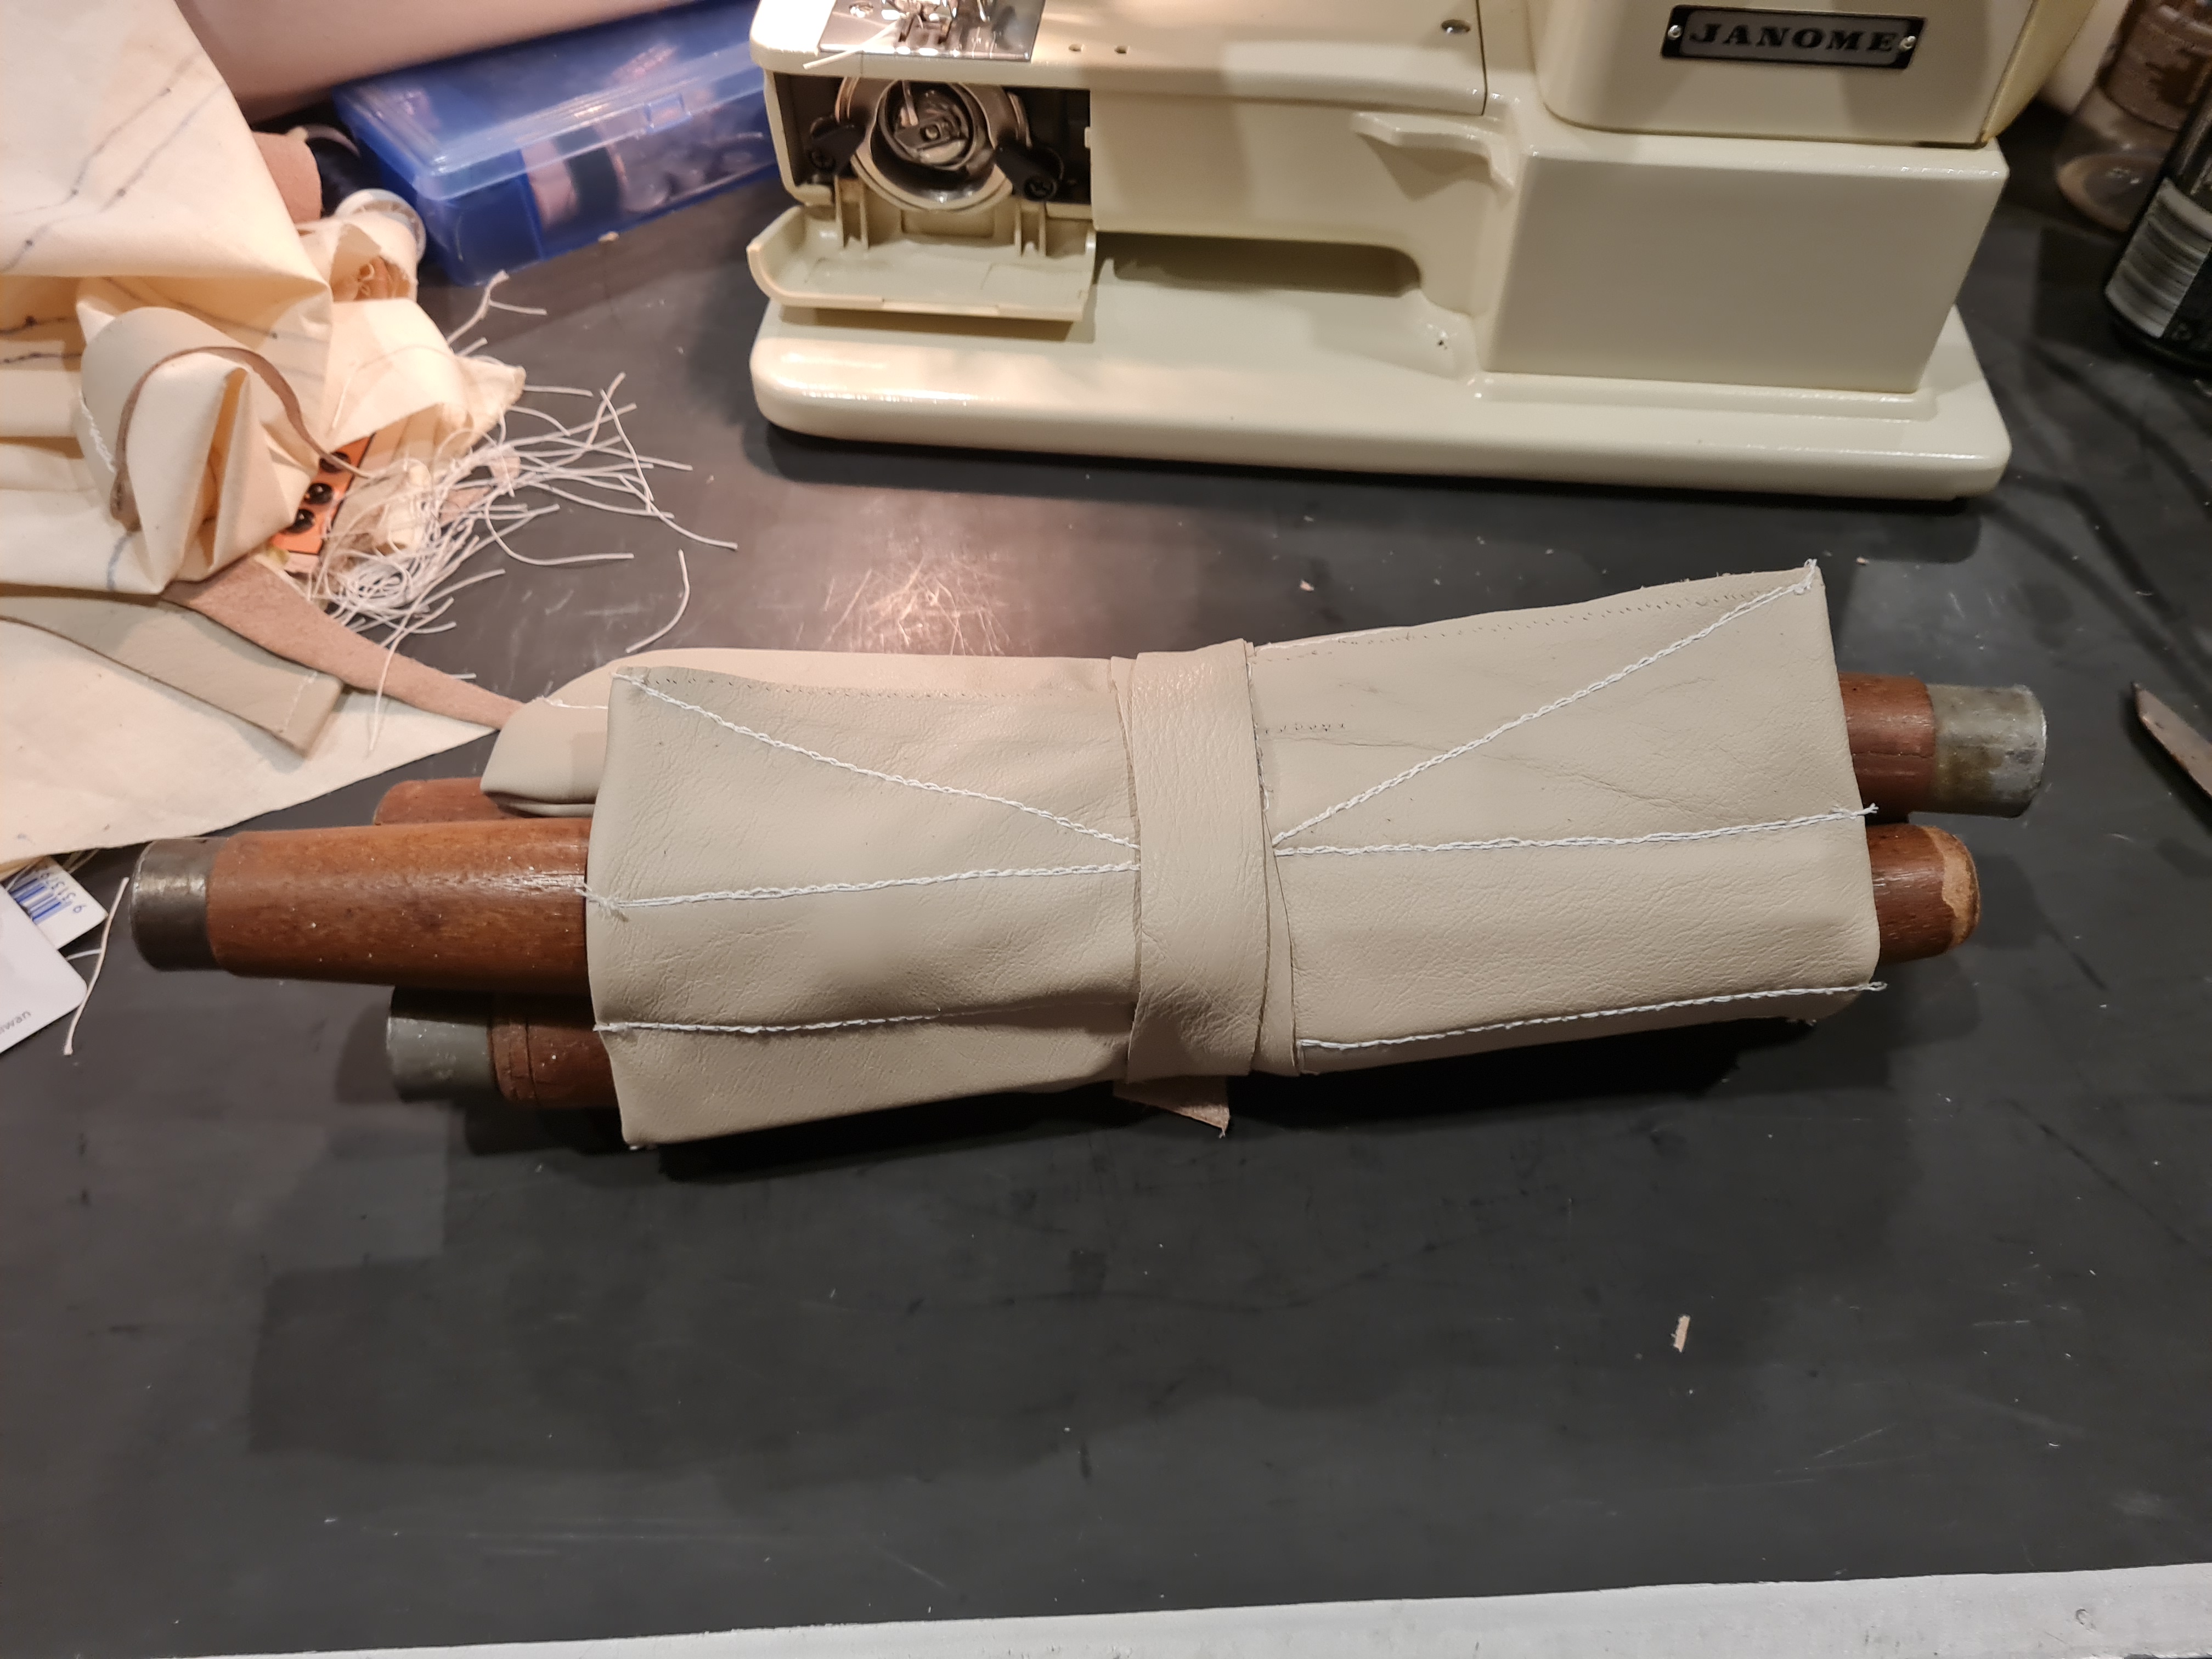
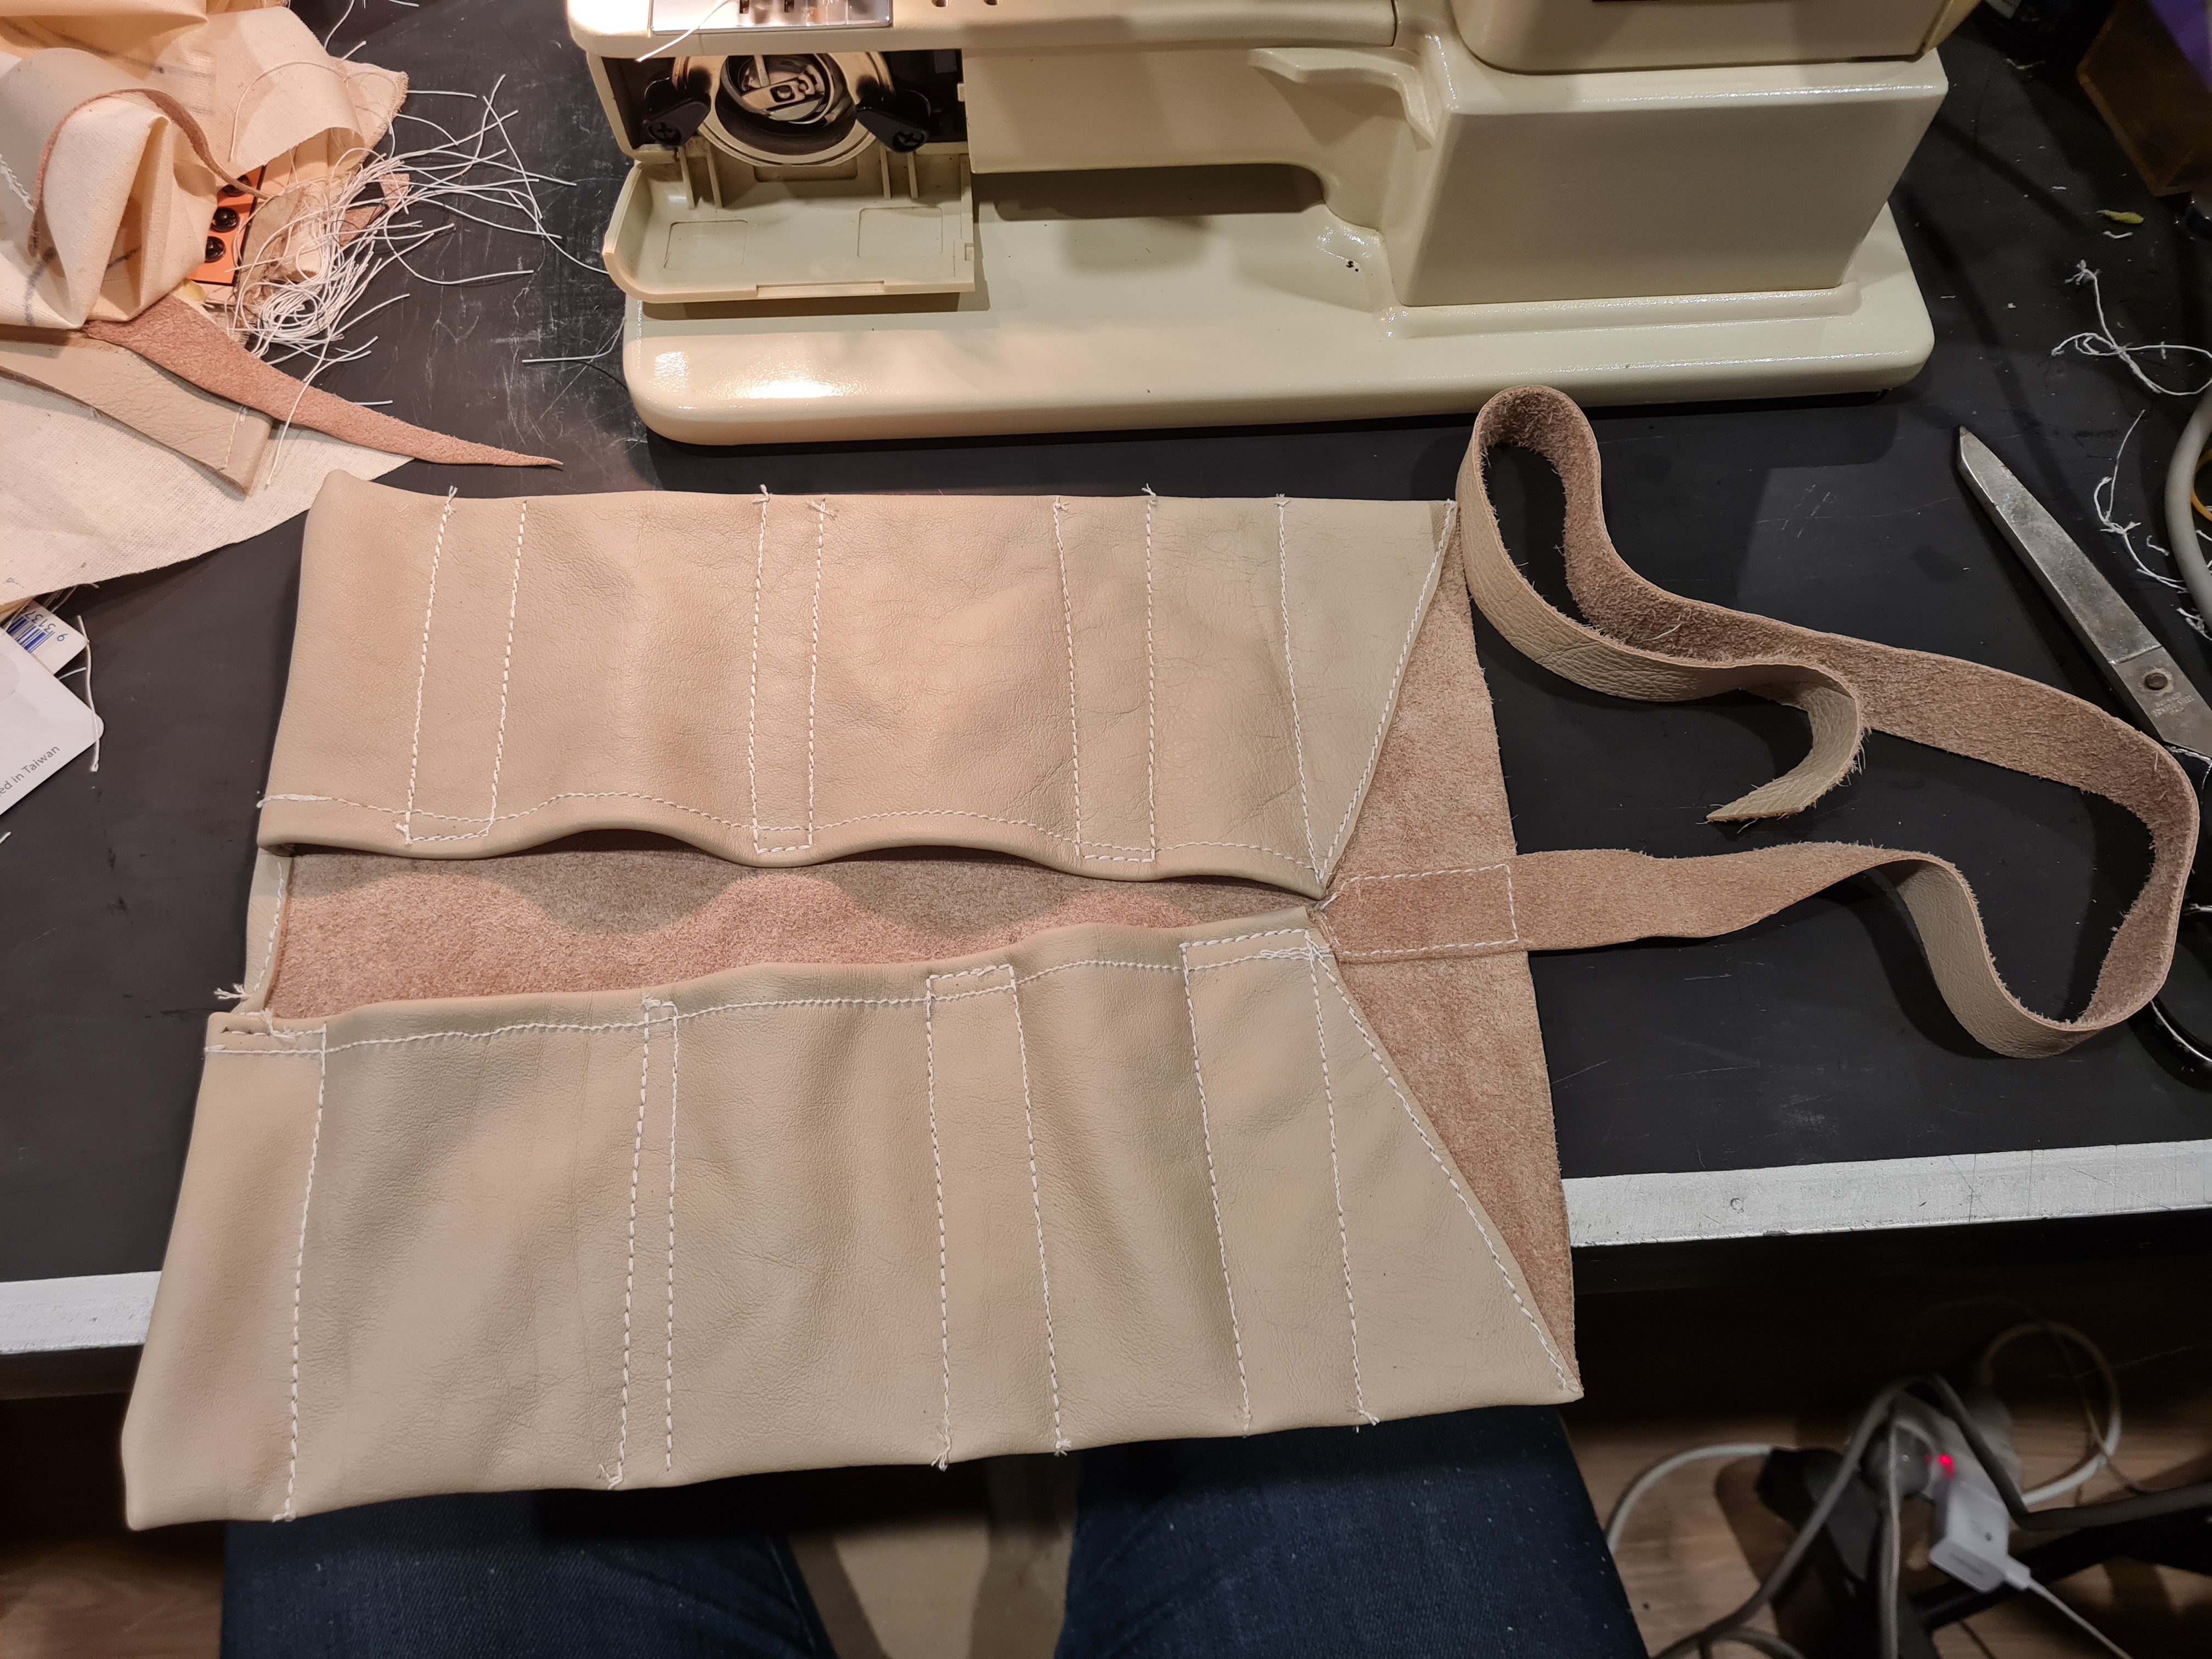
Never made anything with leather before and it has well and truly kicked my arse in the attempt. Some are longer than others, hence the trapezoid

Here it is with the chisels wrapped up

118


Full build album: https://imgur.com/a/UOzzdc4

Back when the pandemic started, my sibling and I decided to take on a little woodworking project during lockdown: a table for tabletop gaming, featuring fold-out player stations and a TV in the middle for battle maps. After more than 3 years, we finally finished!

This was our first major woodworking project, and we made a ton of rookie mistakes. I was too impatient with the wood stain, and I got really inconsistent results, and despite our best efforts a lot of pieces didn't line up quite right. But overall the table is beautiful and it's built like a tank, so it should last through many campaigns.

Hopefully this project will be the first of many!

119
17
submitted 1 year ago* (last edited 1 year ago) by theDuesentrieb to c/diy


This is a repost from a recipe I posted on r/archery:

Been experimenting with diy targets for a while. This is one made out of a 50x50 cardboard box filled with stacked cardboard.

I alternated cardboard scraps with thightly fitted peaces to press them down.

I finished them up with a U formed piece that sticks tight and prevents the pieces beneath to come out on top.

The benefits of this is that I can just swap out the box (have several) reuse most of the filling. Also it is cardboard only, no glue or else, which means it is still fully recyclable.

After some arrows thrown at, it I'll probably put some flat pieces to the back.

Apart from that it works great so far

120


I was thinking of installing a shade sail to my house with 2 of the points anchored to my house. The type of sail I'm installing is a square type I found on Amazon. Does anyone have any thoughts on whether this is safe in the event of high winds? Some videos I've found suggests the most you need to do is make sure you're tying into the end of a roof rafter... I know how to locate that, but I'm still a little nervous high winds could damage that part of my roof. Anyone have experience with this? Am I being too paranoid with this as a concern?

121


Full build gallery here.

Flat top stoves are so challenging to keep looking perfectly clean!

We were left a rectangle of our quartz countertop material when we built our house, so I decided to make a noodle board to cover the stove (it's never been actually used to make noodles...)

122
67
submitted 1 year ago* (last edited 1 year ago) by roblarky to c/diy


This was a fun and challenging build!

Full gallery here.

I ordered some cheap single board amps and power supplies from AliExpress and used a DSP so each speaker (mid/tweet/sub) has their own dedicated amp and fine tune control ability for the frequency drop-offs, gain, etc.

They sound amazing!

123
124


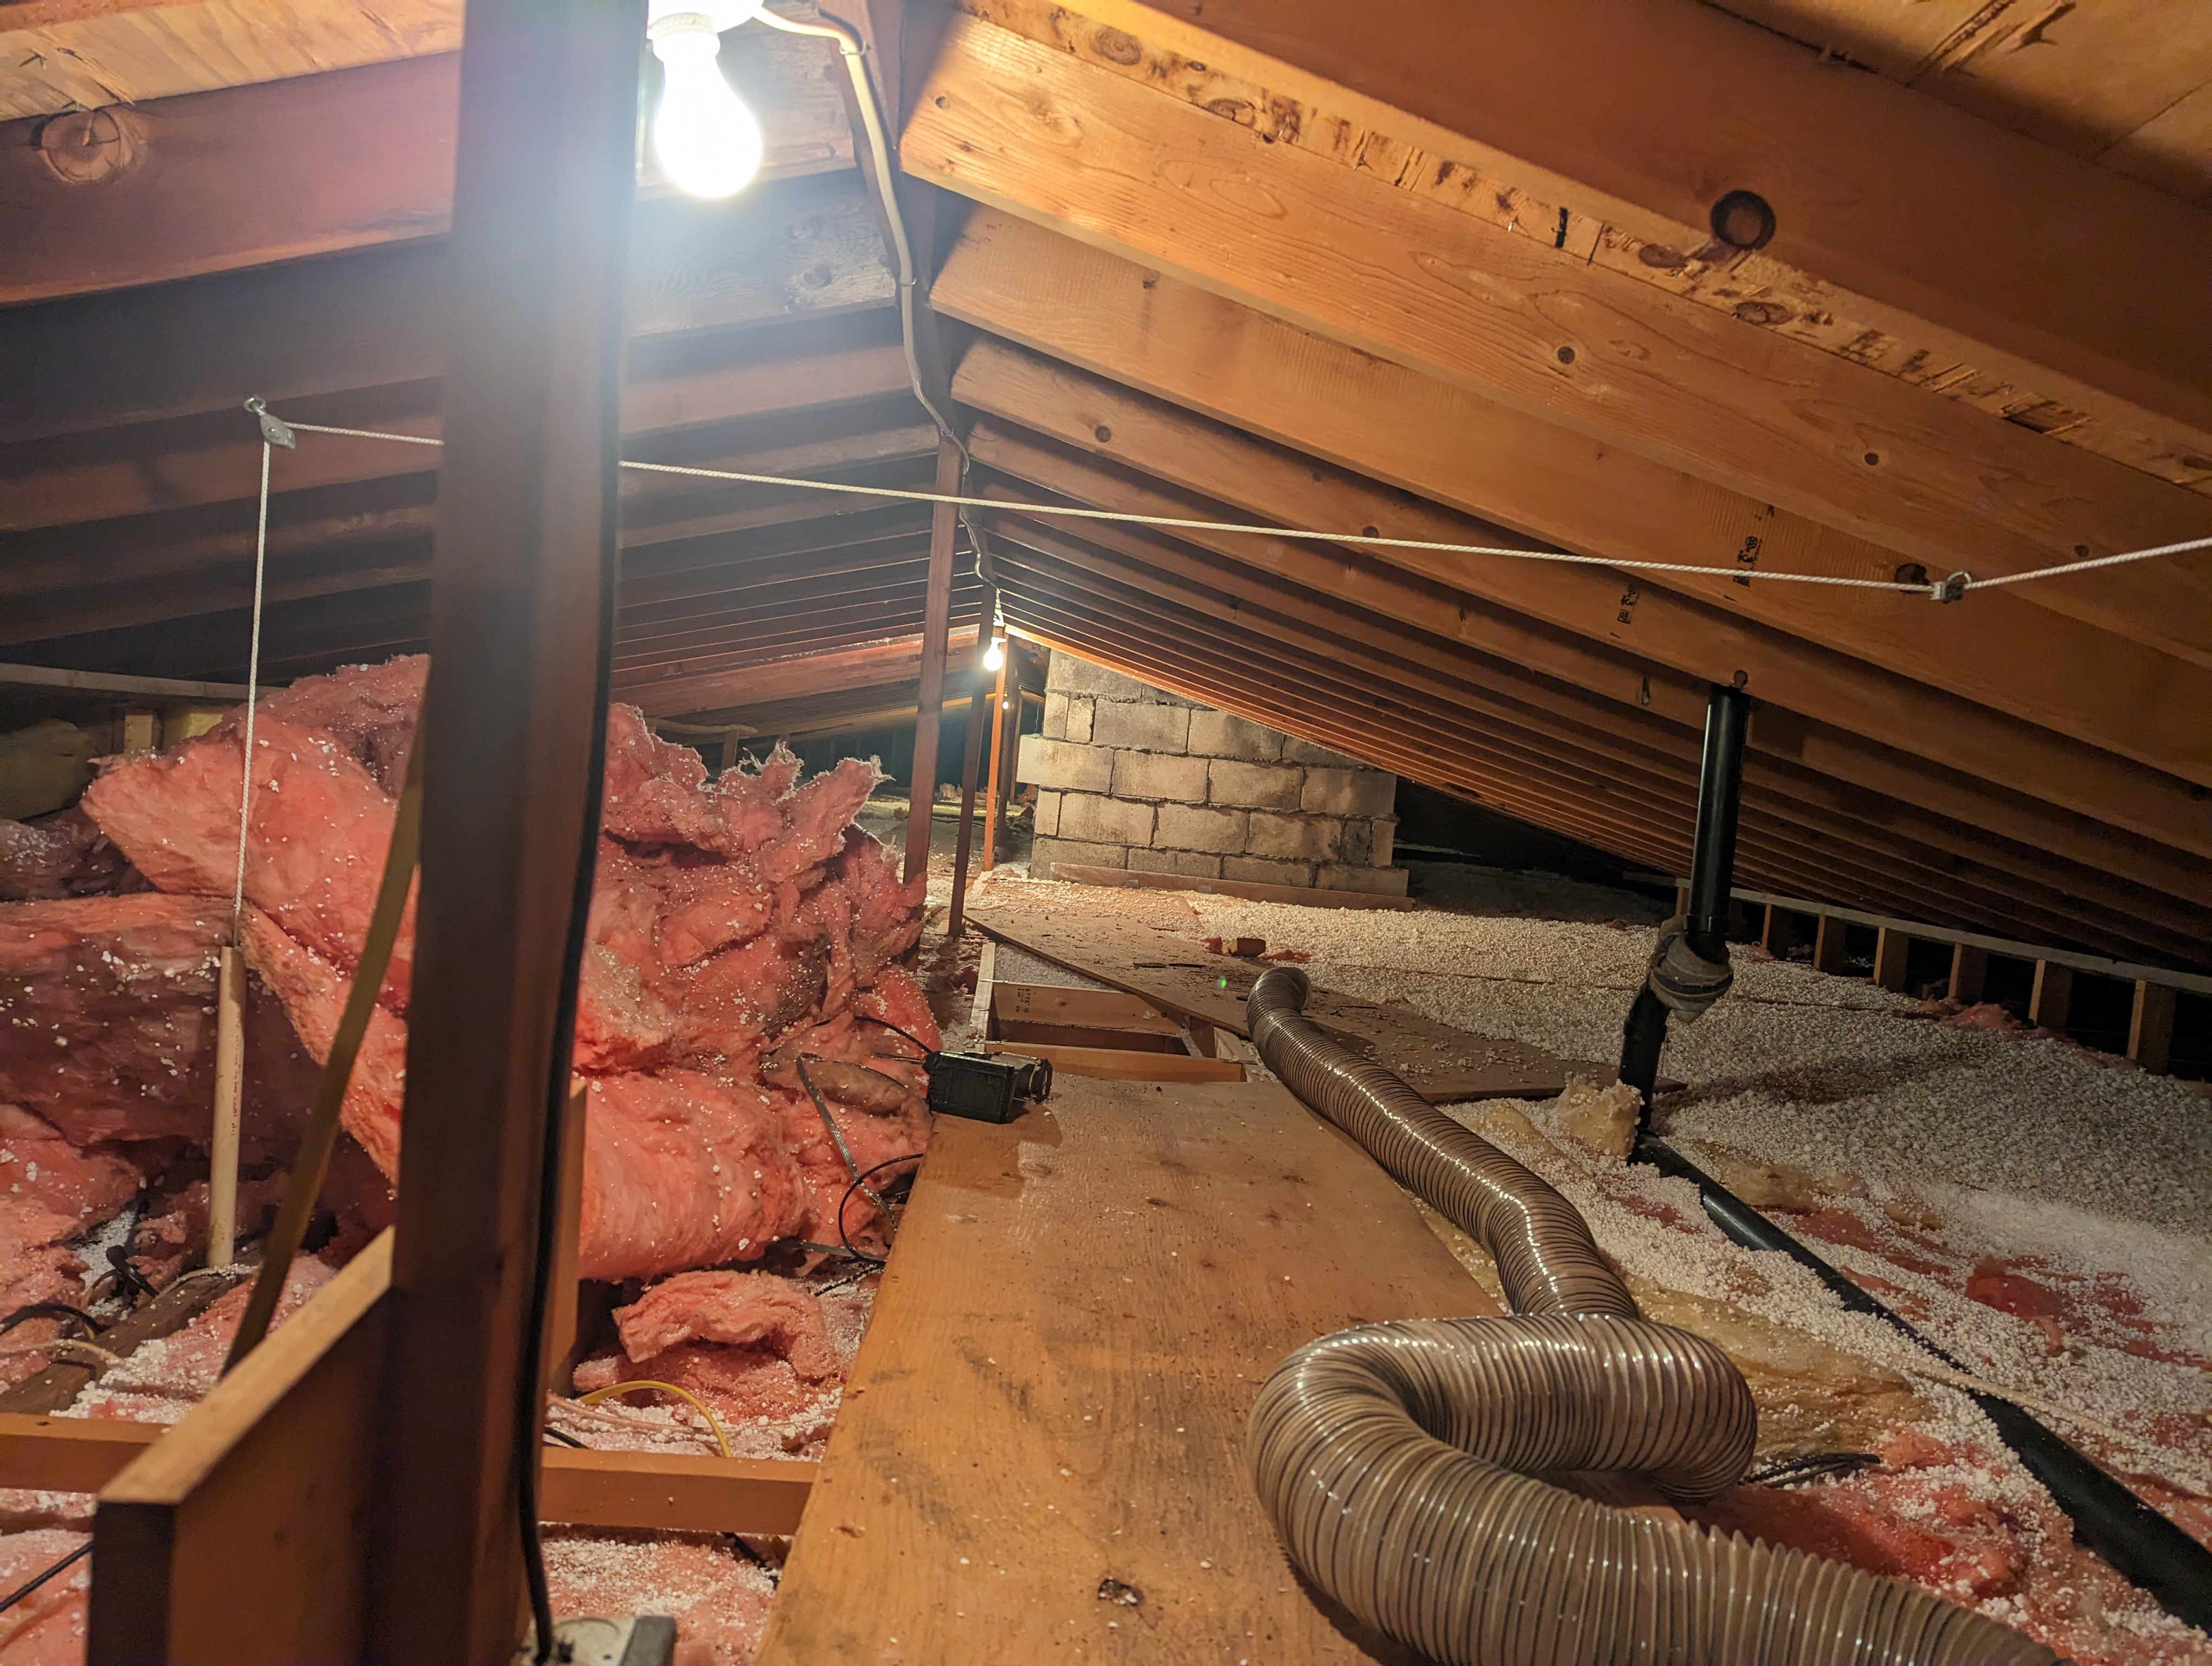
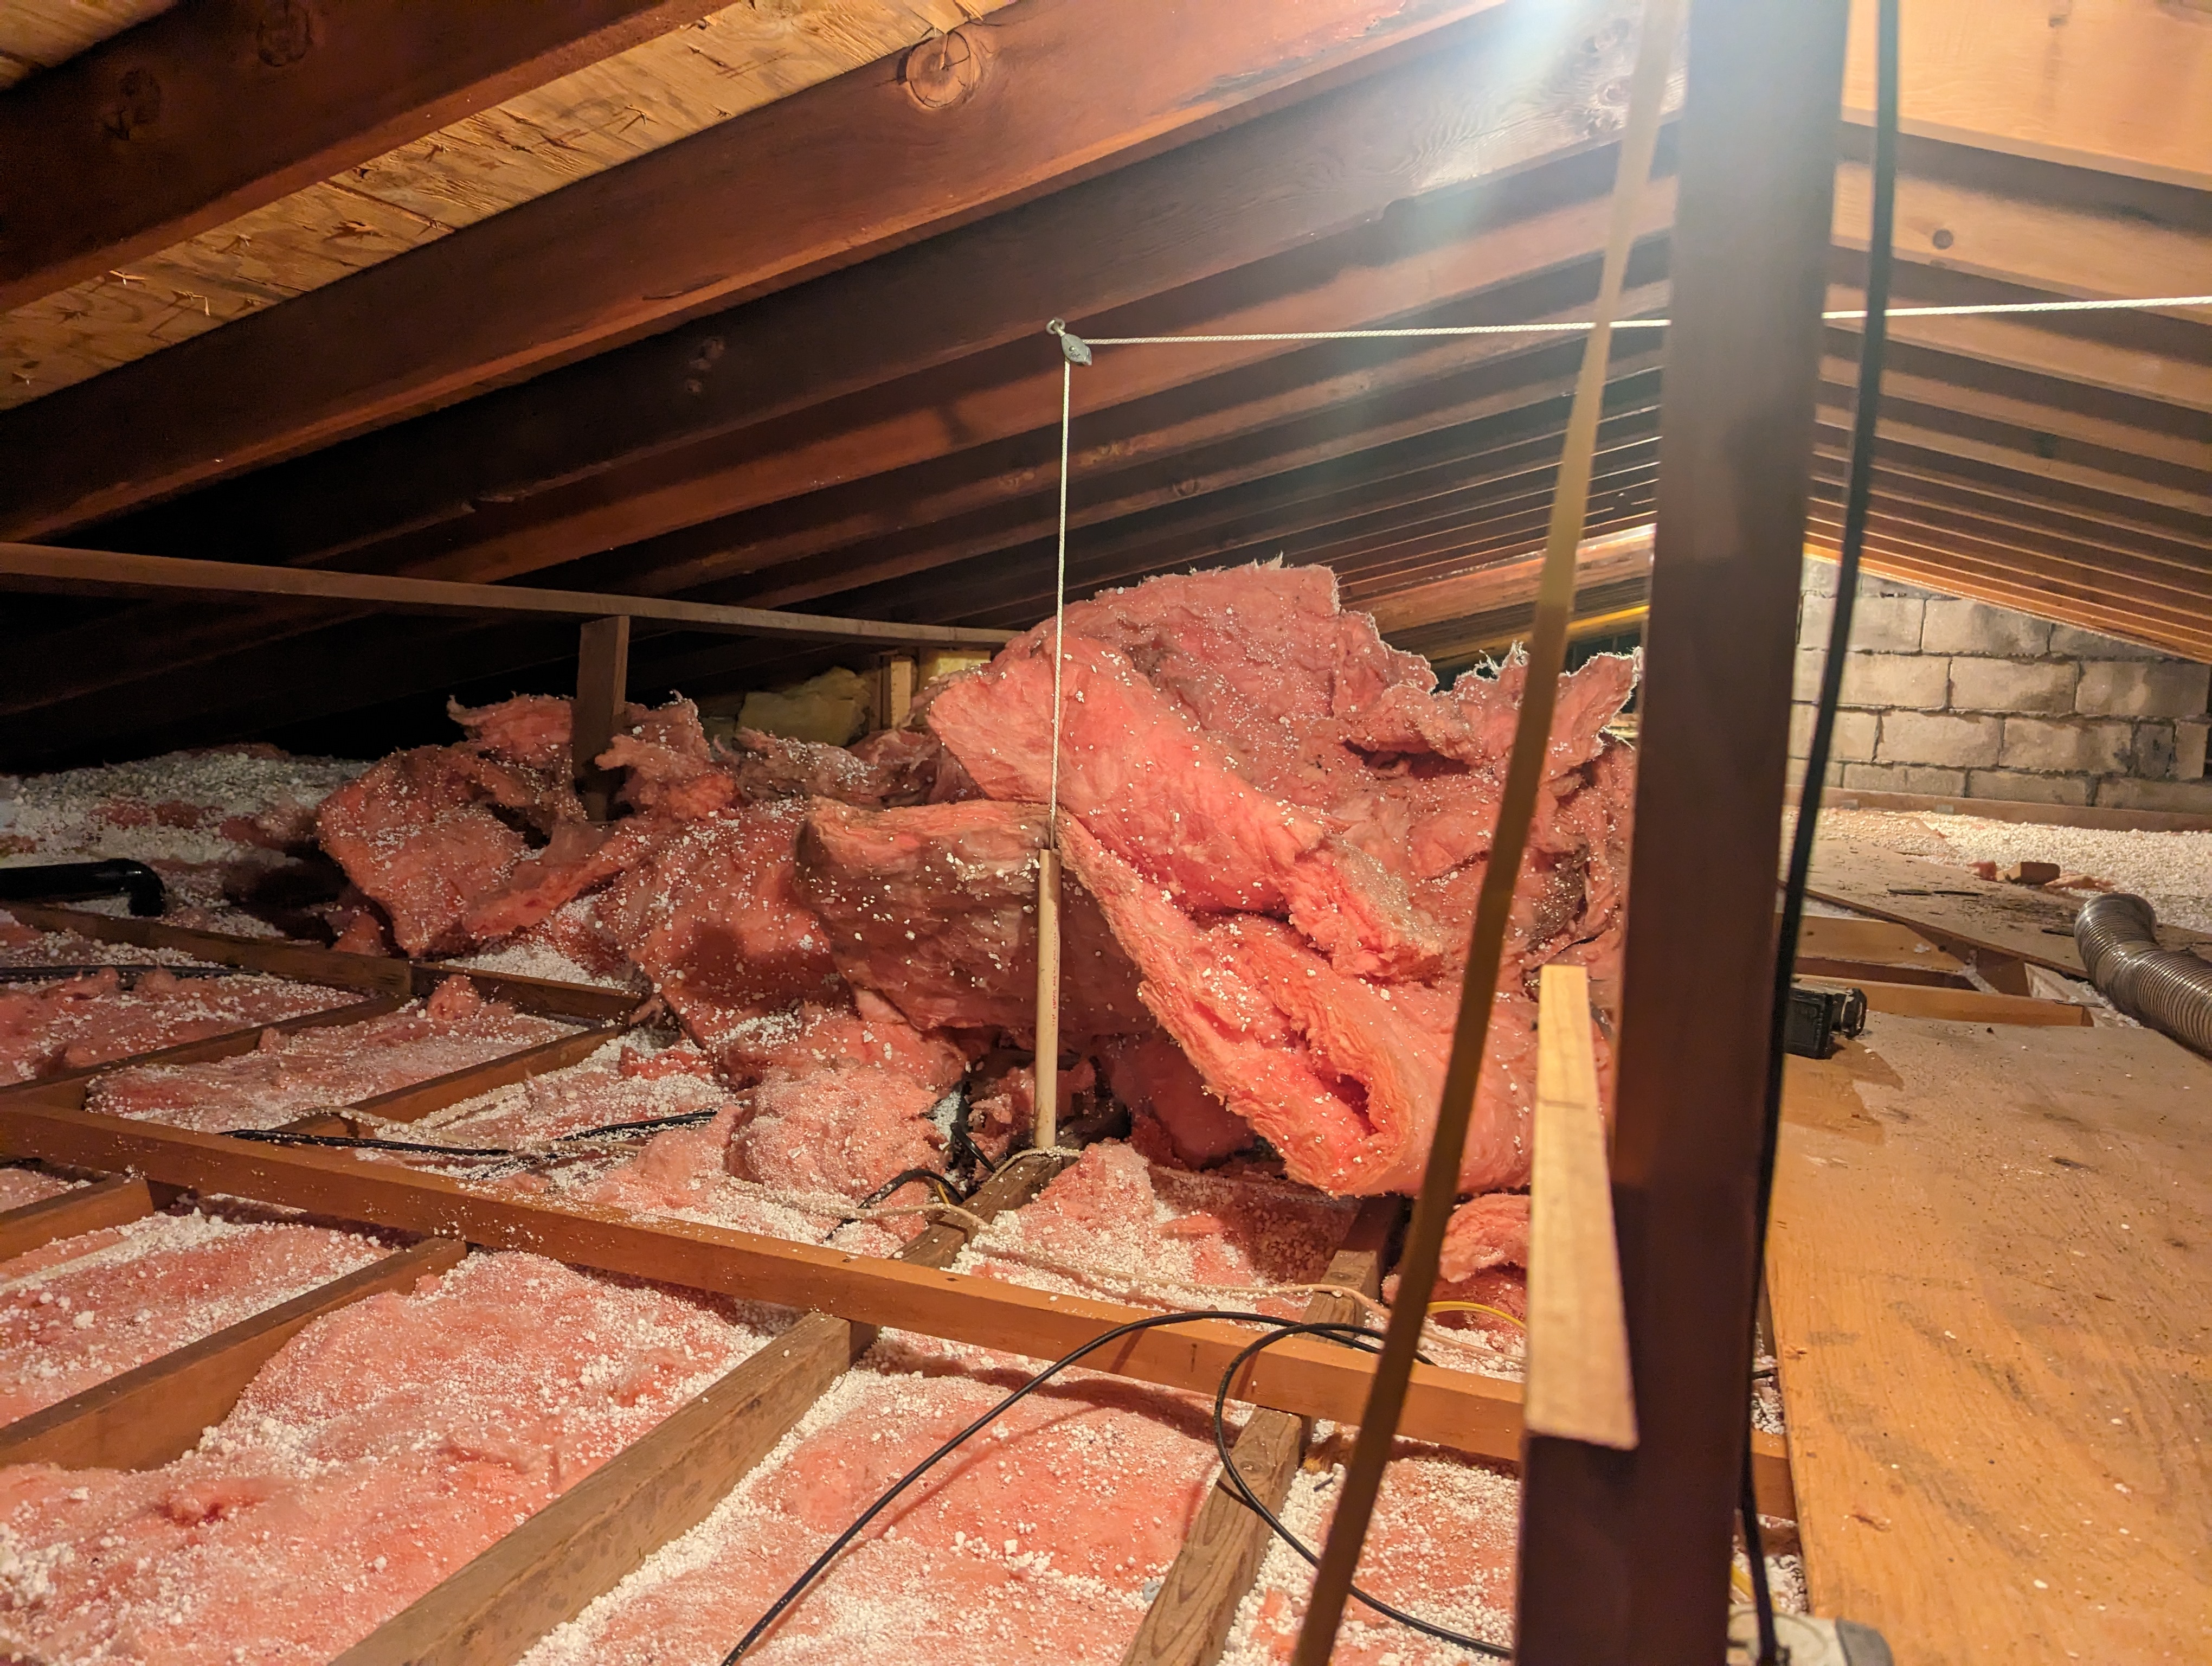
So far this is the DIY project I dislike the most. Removing tons of loose styrofoam from my attic. Only doing part of it for now to get access above a bathroom that we're remodeling. Eventually I'll remove all of it, seal the air gaps, and probably replace the insulation with blown in cellulose.

The the insulation vacuum bags definitely make it easier.

125
30
submitted 1 year ago* (last edited 1 year ago) by Hindufury@lemmy.world to c/diy


Between work, the heat, and dealing with clay soil this took way too long to complete! I love how it turned out. The next step is using a hoe to slope the soil over the gravel, tamp it down, and plant some sedum ternatum for groundcover.

view more: ‹ prev next ›