1
Woodworking
217 readers
1 users here now
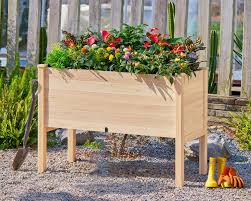
A handmade home for woodworkers and admirers of woodworkers. Our community icon is a planter box made by @Captain Aggravated, the winner of our summer '24 woodworking contest. Congratulations!
founded 1 year ago
MODERATORS
2
3
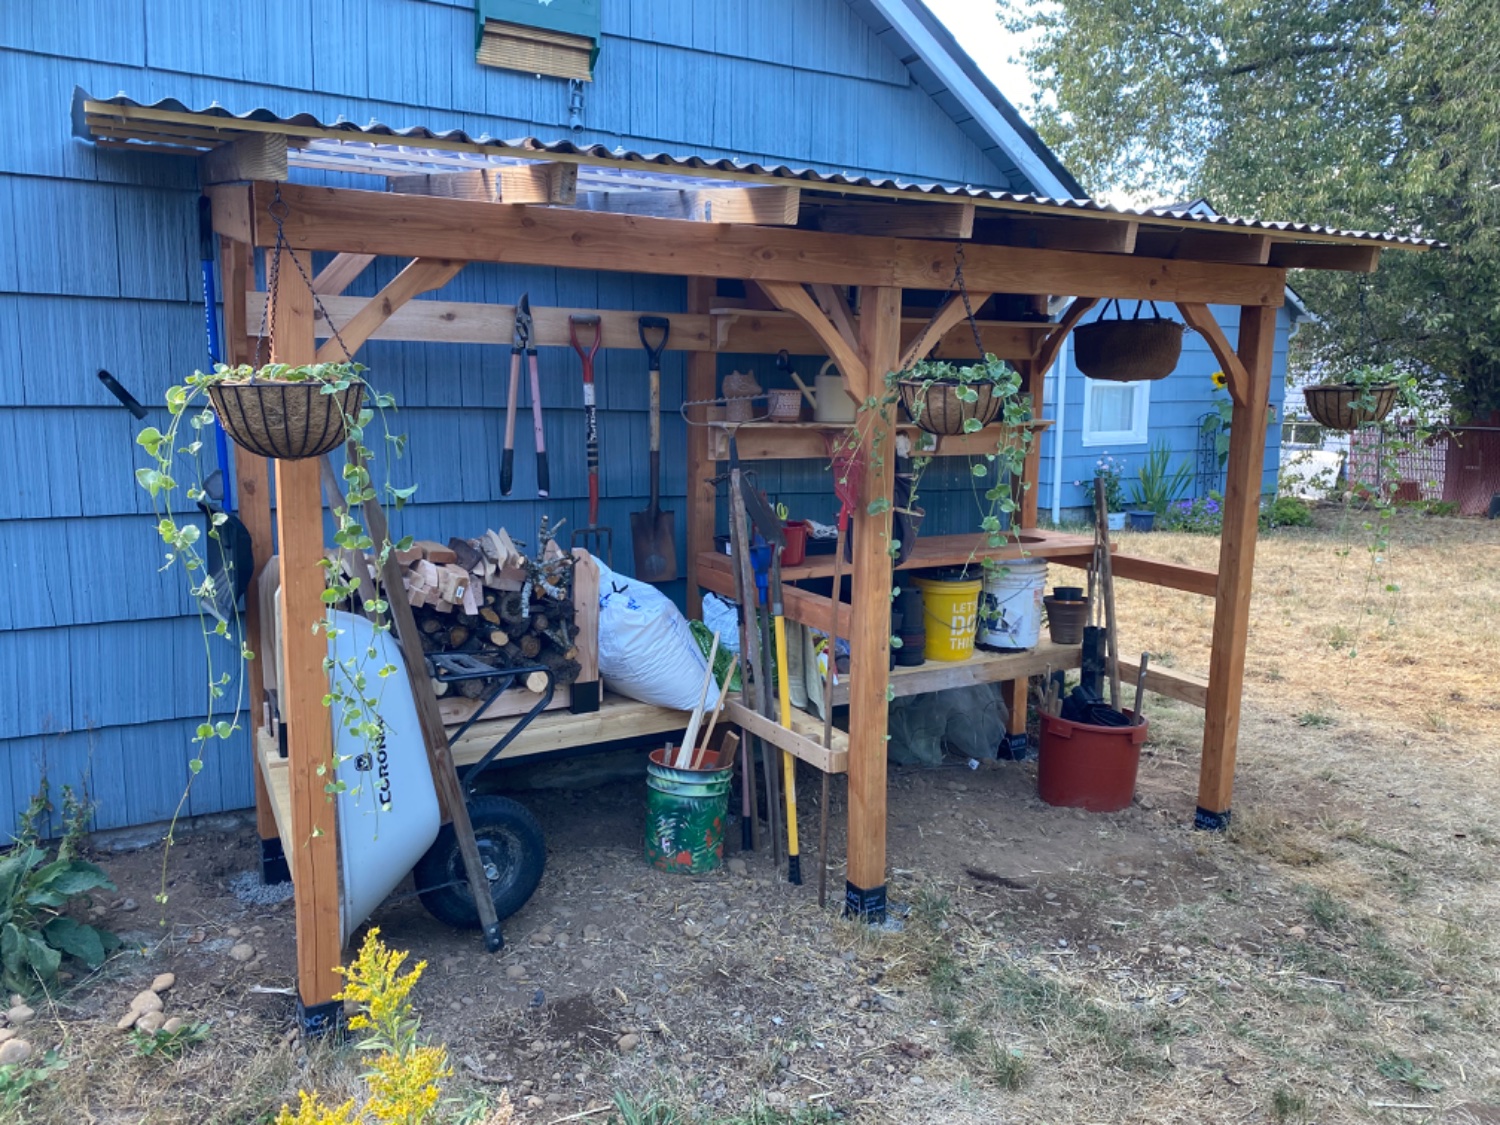
The potting bench has a hole so that soil can be brushed into the bucket below. I was able to salvage some of the older boards from the old pile of junk that stood there before, which are in the roof. Speaking of the roof, see how some of it is clear? I’m going to build a cold frame into that part of the roof for hardening off plants! I’m having a hard time deciding how to do that but though.
The wife wants gravel on the ground but I’m not so sure. I think that the gravel will just end up filling with dirt and debris and weeds. I think I might prefer to just leave it bare earth. What do you think?
4
21
With their 'Tale of the Cedar Planter Box.' This beautiful planter is now the new icon for our community and they are credited on our sidebar! Question for the winner: what would you choose for our next theme if we do another contest in the fall or winter?

6
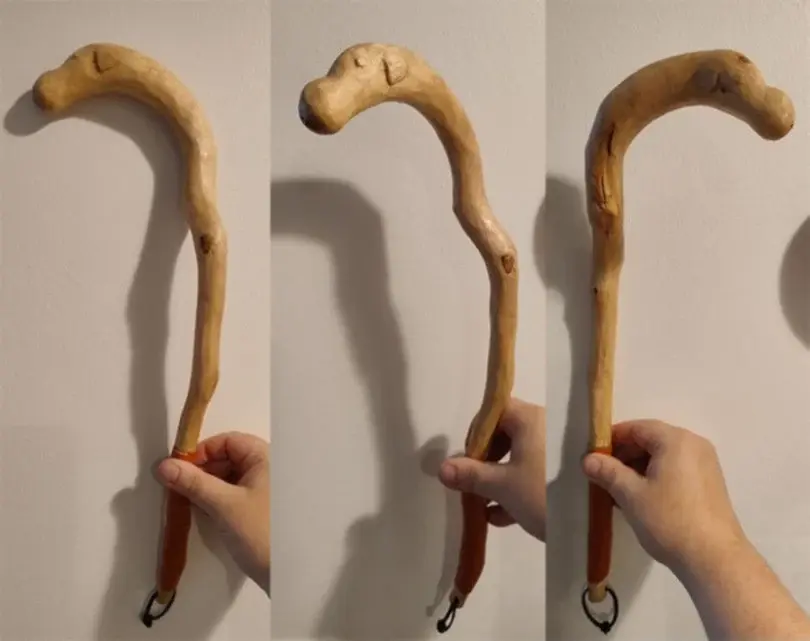
A pain hook (self-use massage device for the neck and back) made from a pine branch. Snoopy-like dog appeared from the branch while whittling, hence the name.
Lightly stained with walnut colour stain and a light beeswax layer on top of that so it feels smooth on the skin. Handle made from old repurposed leather belt strips.
These pain hooks are an old Finnish and Karelian thing for massaging one's neck and back, and I was wondering if these sort of self-care "devices" are known and in use in other cultures?
7
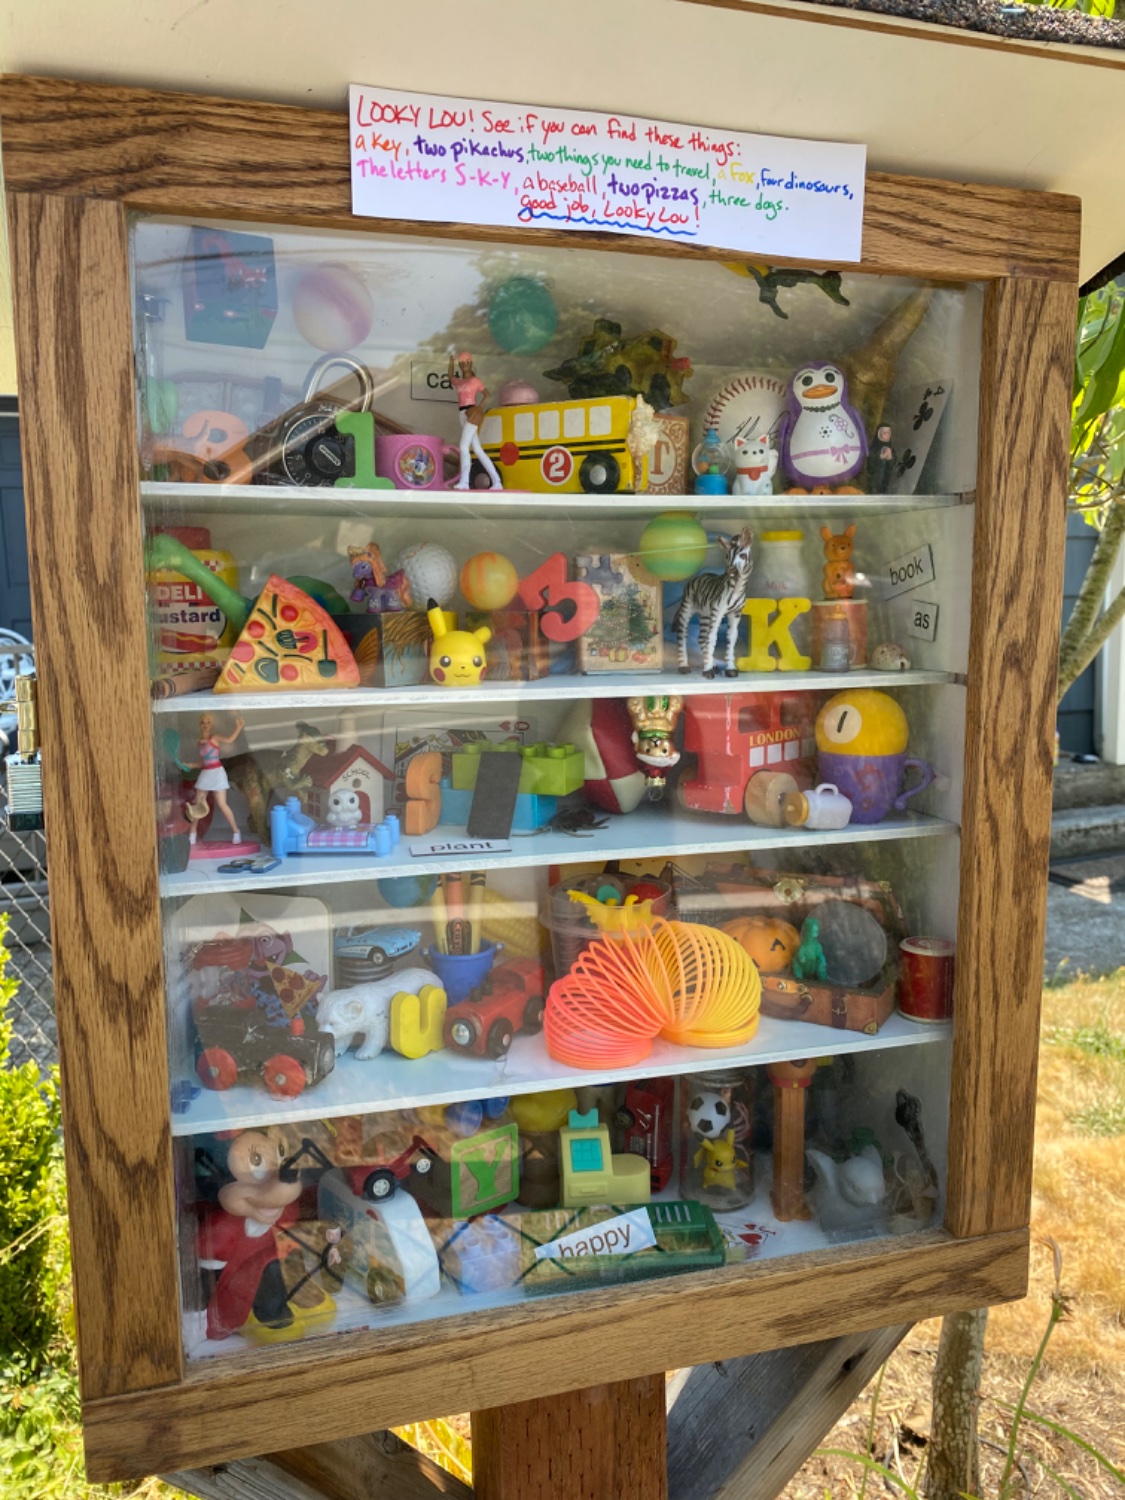
Sorry for the glare making it hard for you to play along. I’ll have to take better pics. I came up with the idea last year, but I live on a dead end street. Then my cousin said I could put it at his house. He was helping me glue in the pieces when the concept of it finally clicked for him and he got so excited about what clues you could give to search for and things to put inside. It’s so fun. I went to the Goodwill “bins” and just filled up a box with every little object I could find. The pieces are hot glued in place just in case the box rattles. Maybe in a few months we can change the sign so you have to find new things. I can also remove entire shelves or maybe just pop off the toys. Hot glue comes off easy enough.
I live in Portland and would love to make another and find someone around willing to host it in their yard. So if you’re interested let me know.
8
45
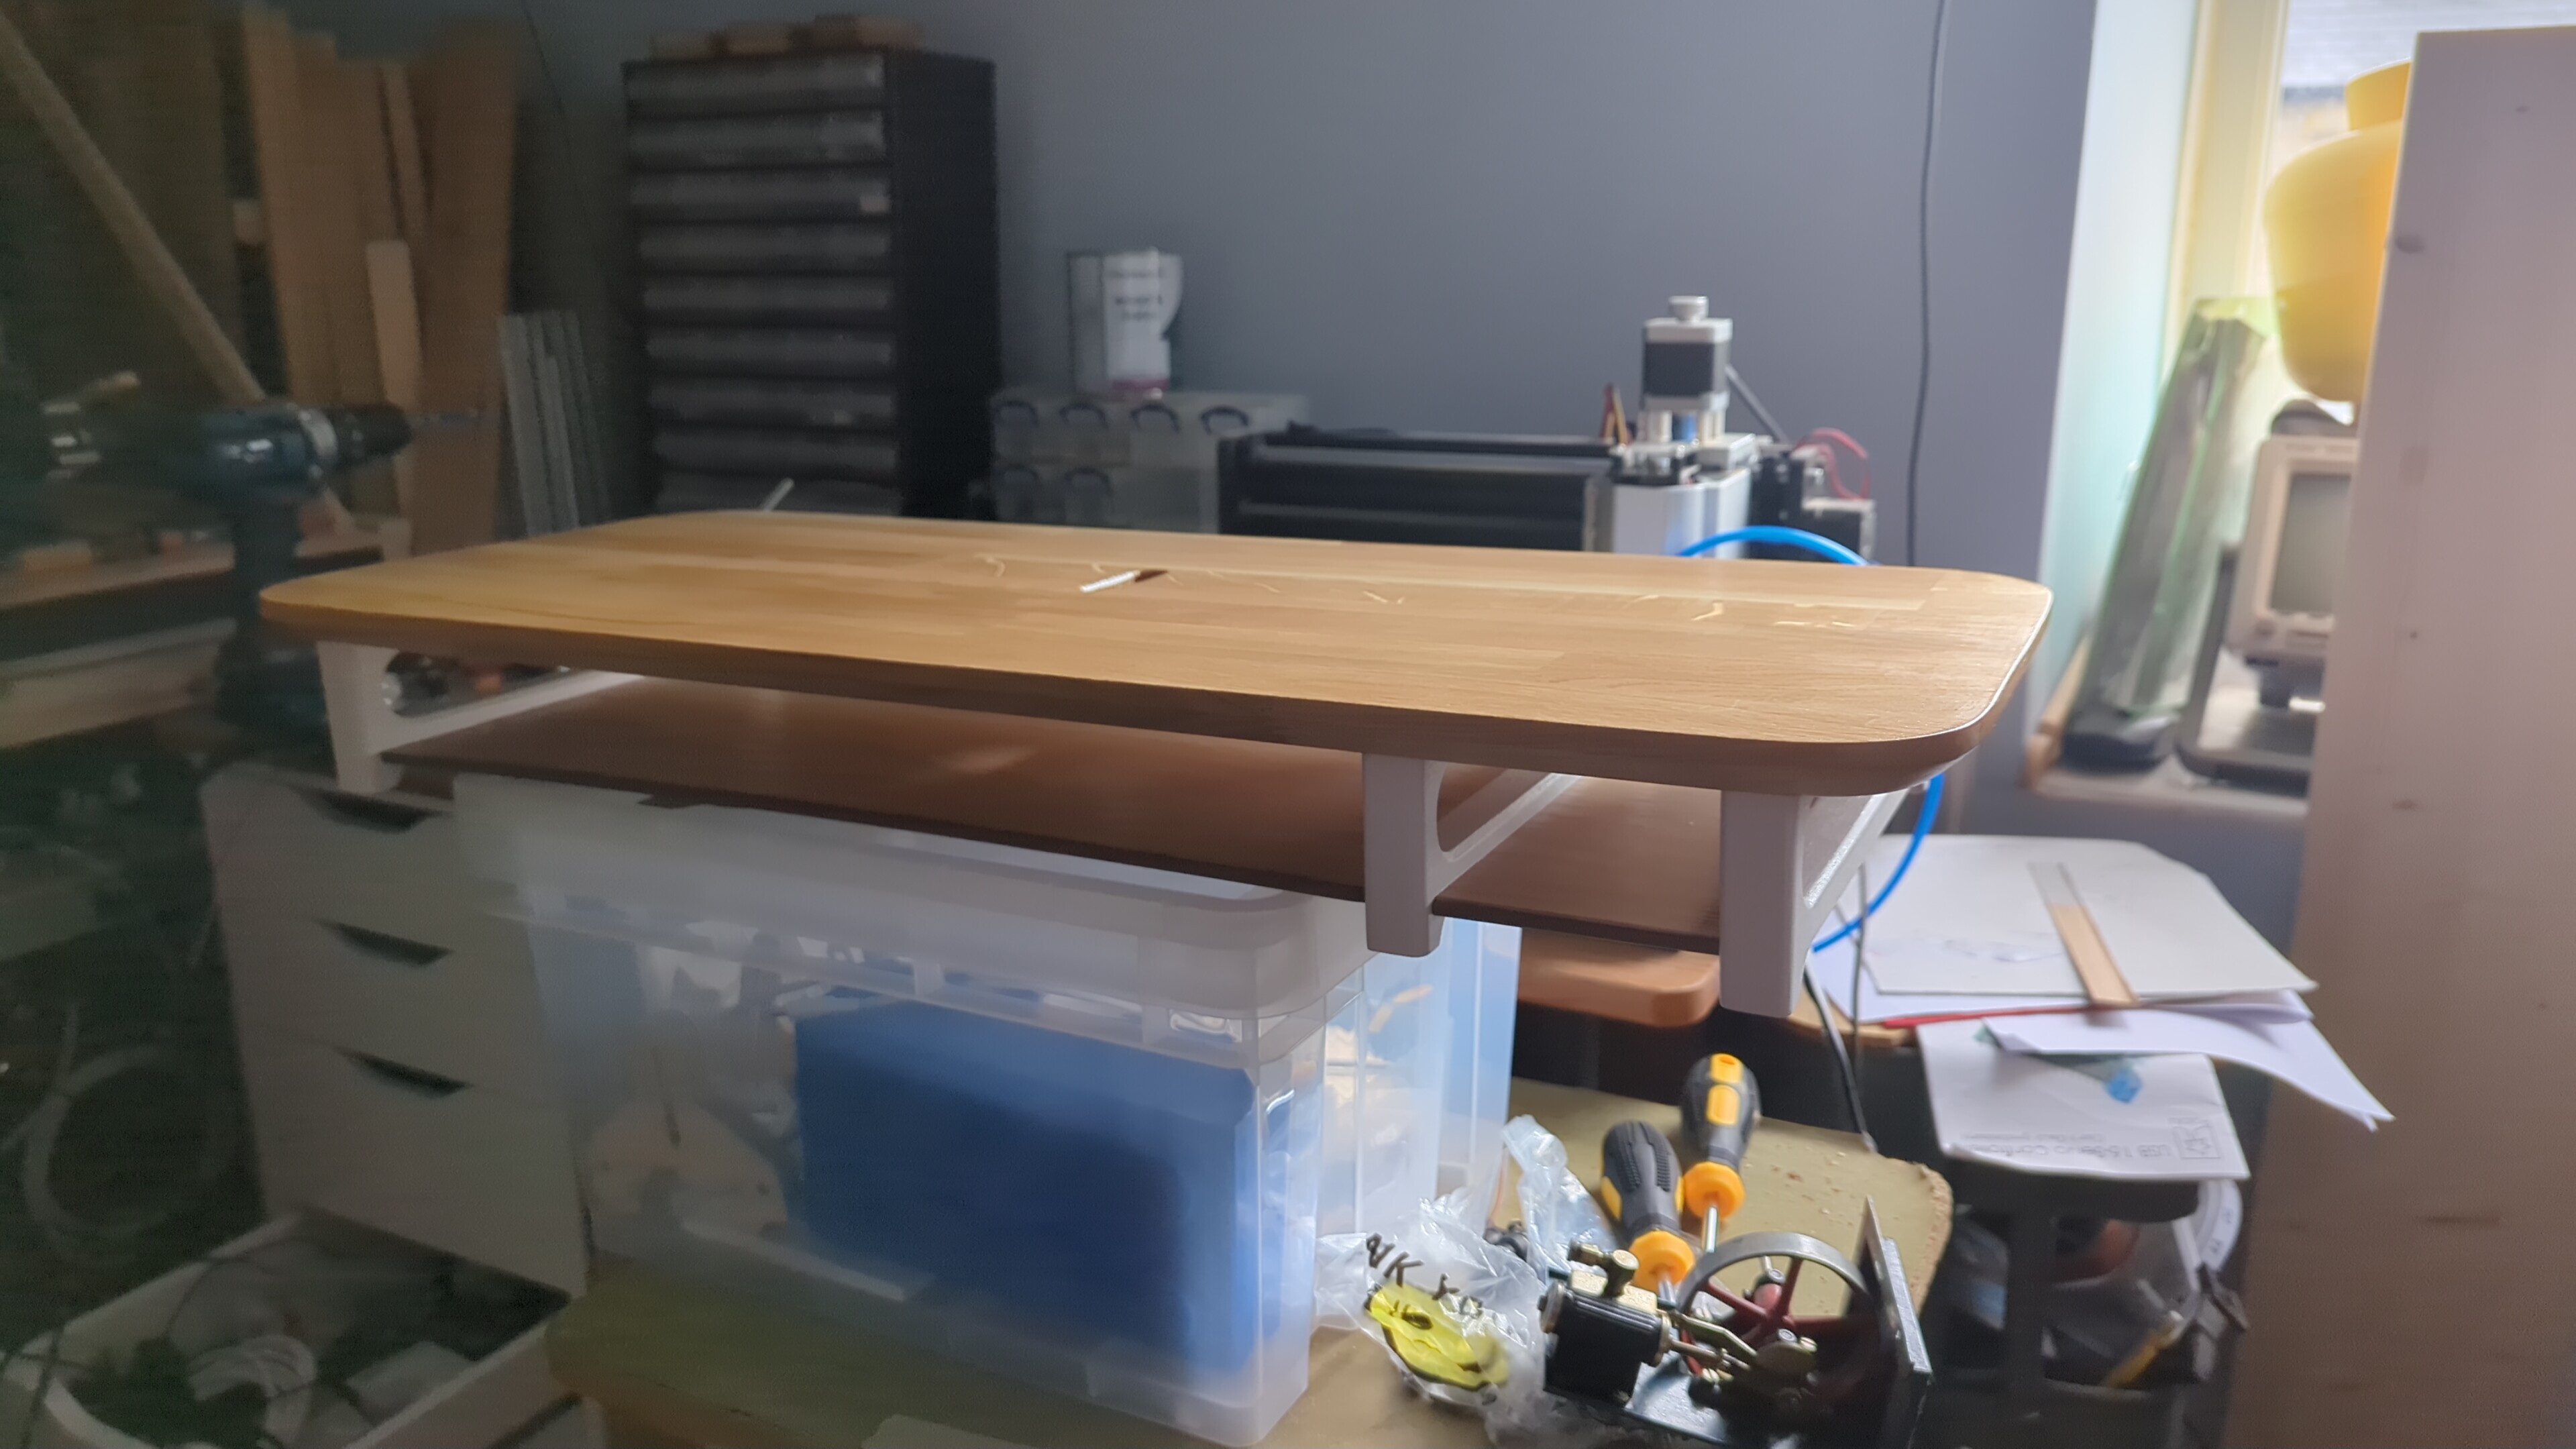
Desk riser thing I just finished for a comish, really happy with it and now I get to never see it again yay!
(startrek.website)
Oak top, oak faced ply shelf with walnut edge, and sides made of something from an old table

9
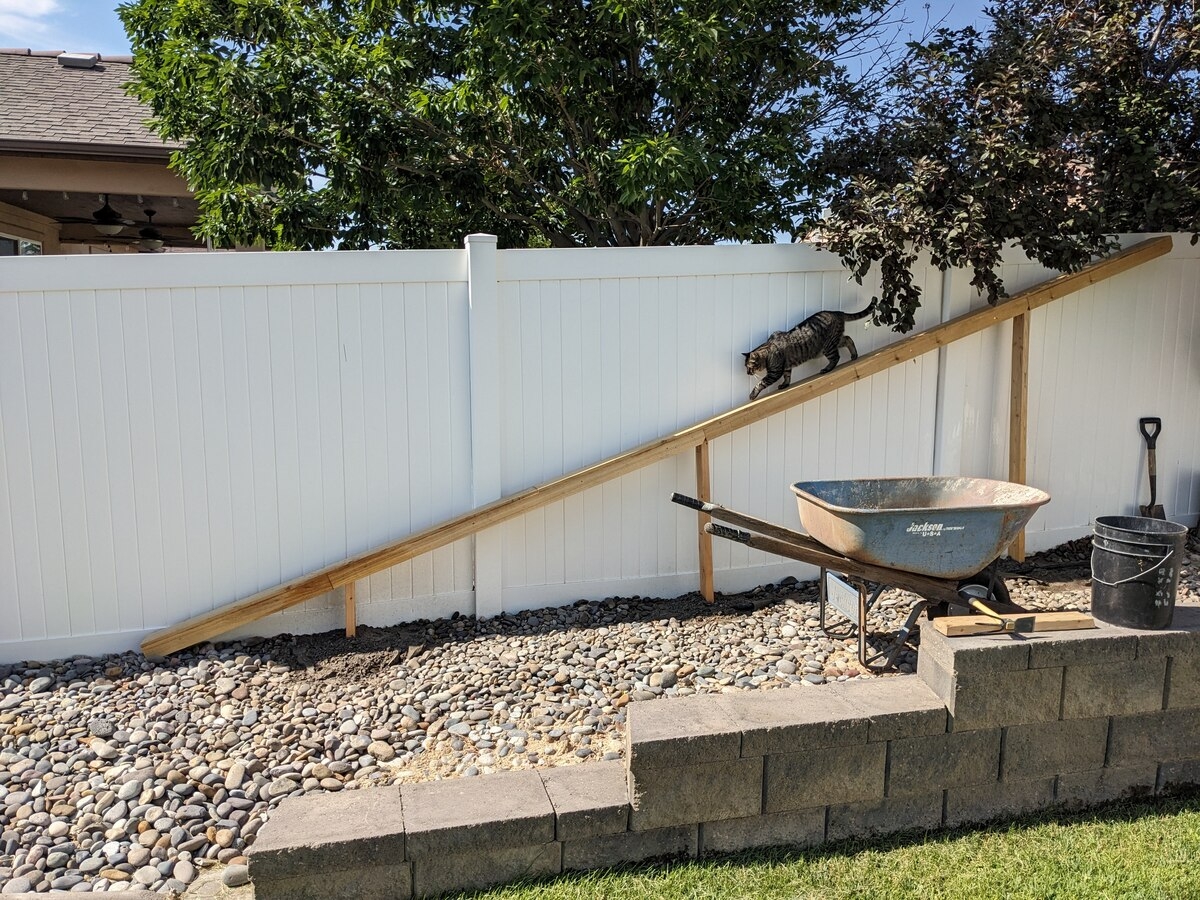
So our neighbor's cat has been visiting us for a while, so I decided to build this ramp so that she could more easily get into and out of our yard. I'm not much of a woodworker, but was happy with how this turned out.
It's made almost entirely from cedar fence posts. Nearly 18 feet long (3 fence posts end to end with the dog ear tip cut off). Ripped cedar planks into 3 for a frame/support to prevent flexing. Posts are pine 2x4, and go 18 inches into the ground, which was the majority of the effort, since our ground is like cement...
10
11
12
41
Thank you technomad and dubyakay for inspiring our third woodworking contest here. This contest will be to build a planter box or I guess a plant pot would work too.
Submit your work as a post in this community by August 1 at the latest, and the post with the most votes will win. The image will be our new thumbnail picture and the user will be credited on our sidebar.
I’ve noticed that posts often collect votes for up to like 3 days so I will wait until August 4 or something to announce the winner just to make sure everyone has had a chance to vote.
Good luck everyone!
13
I’m not active enough of an internet guy to remember to actually post stuff - so we’re going back 6 months…
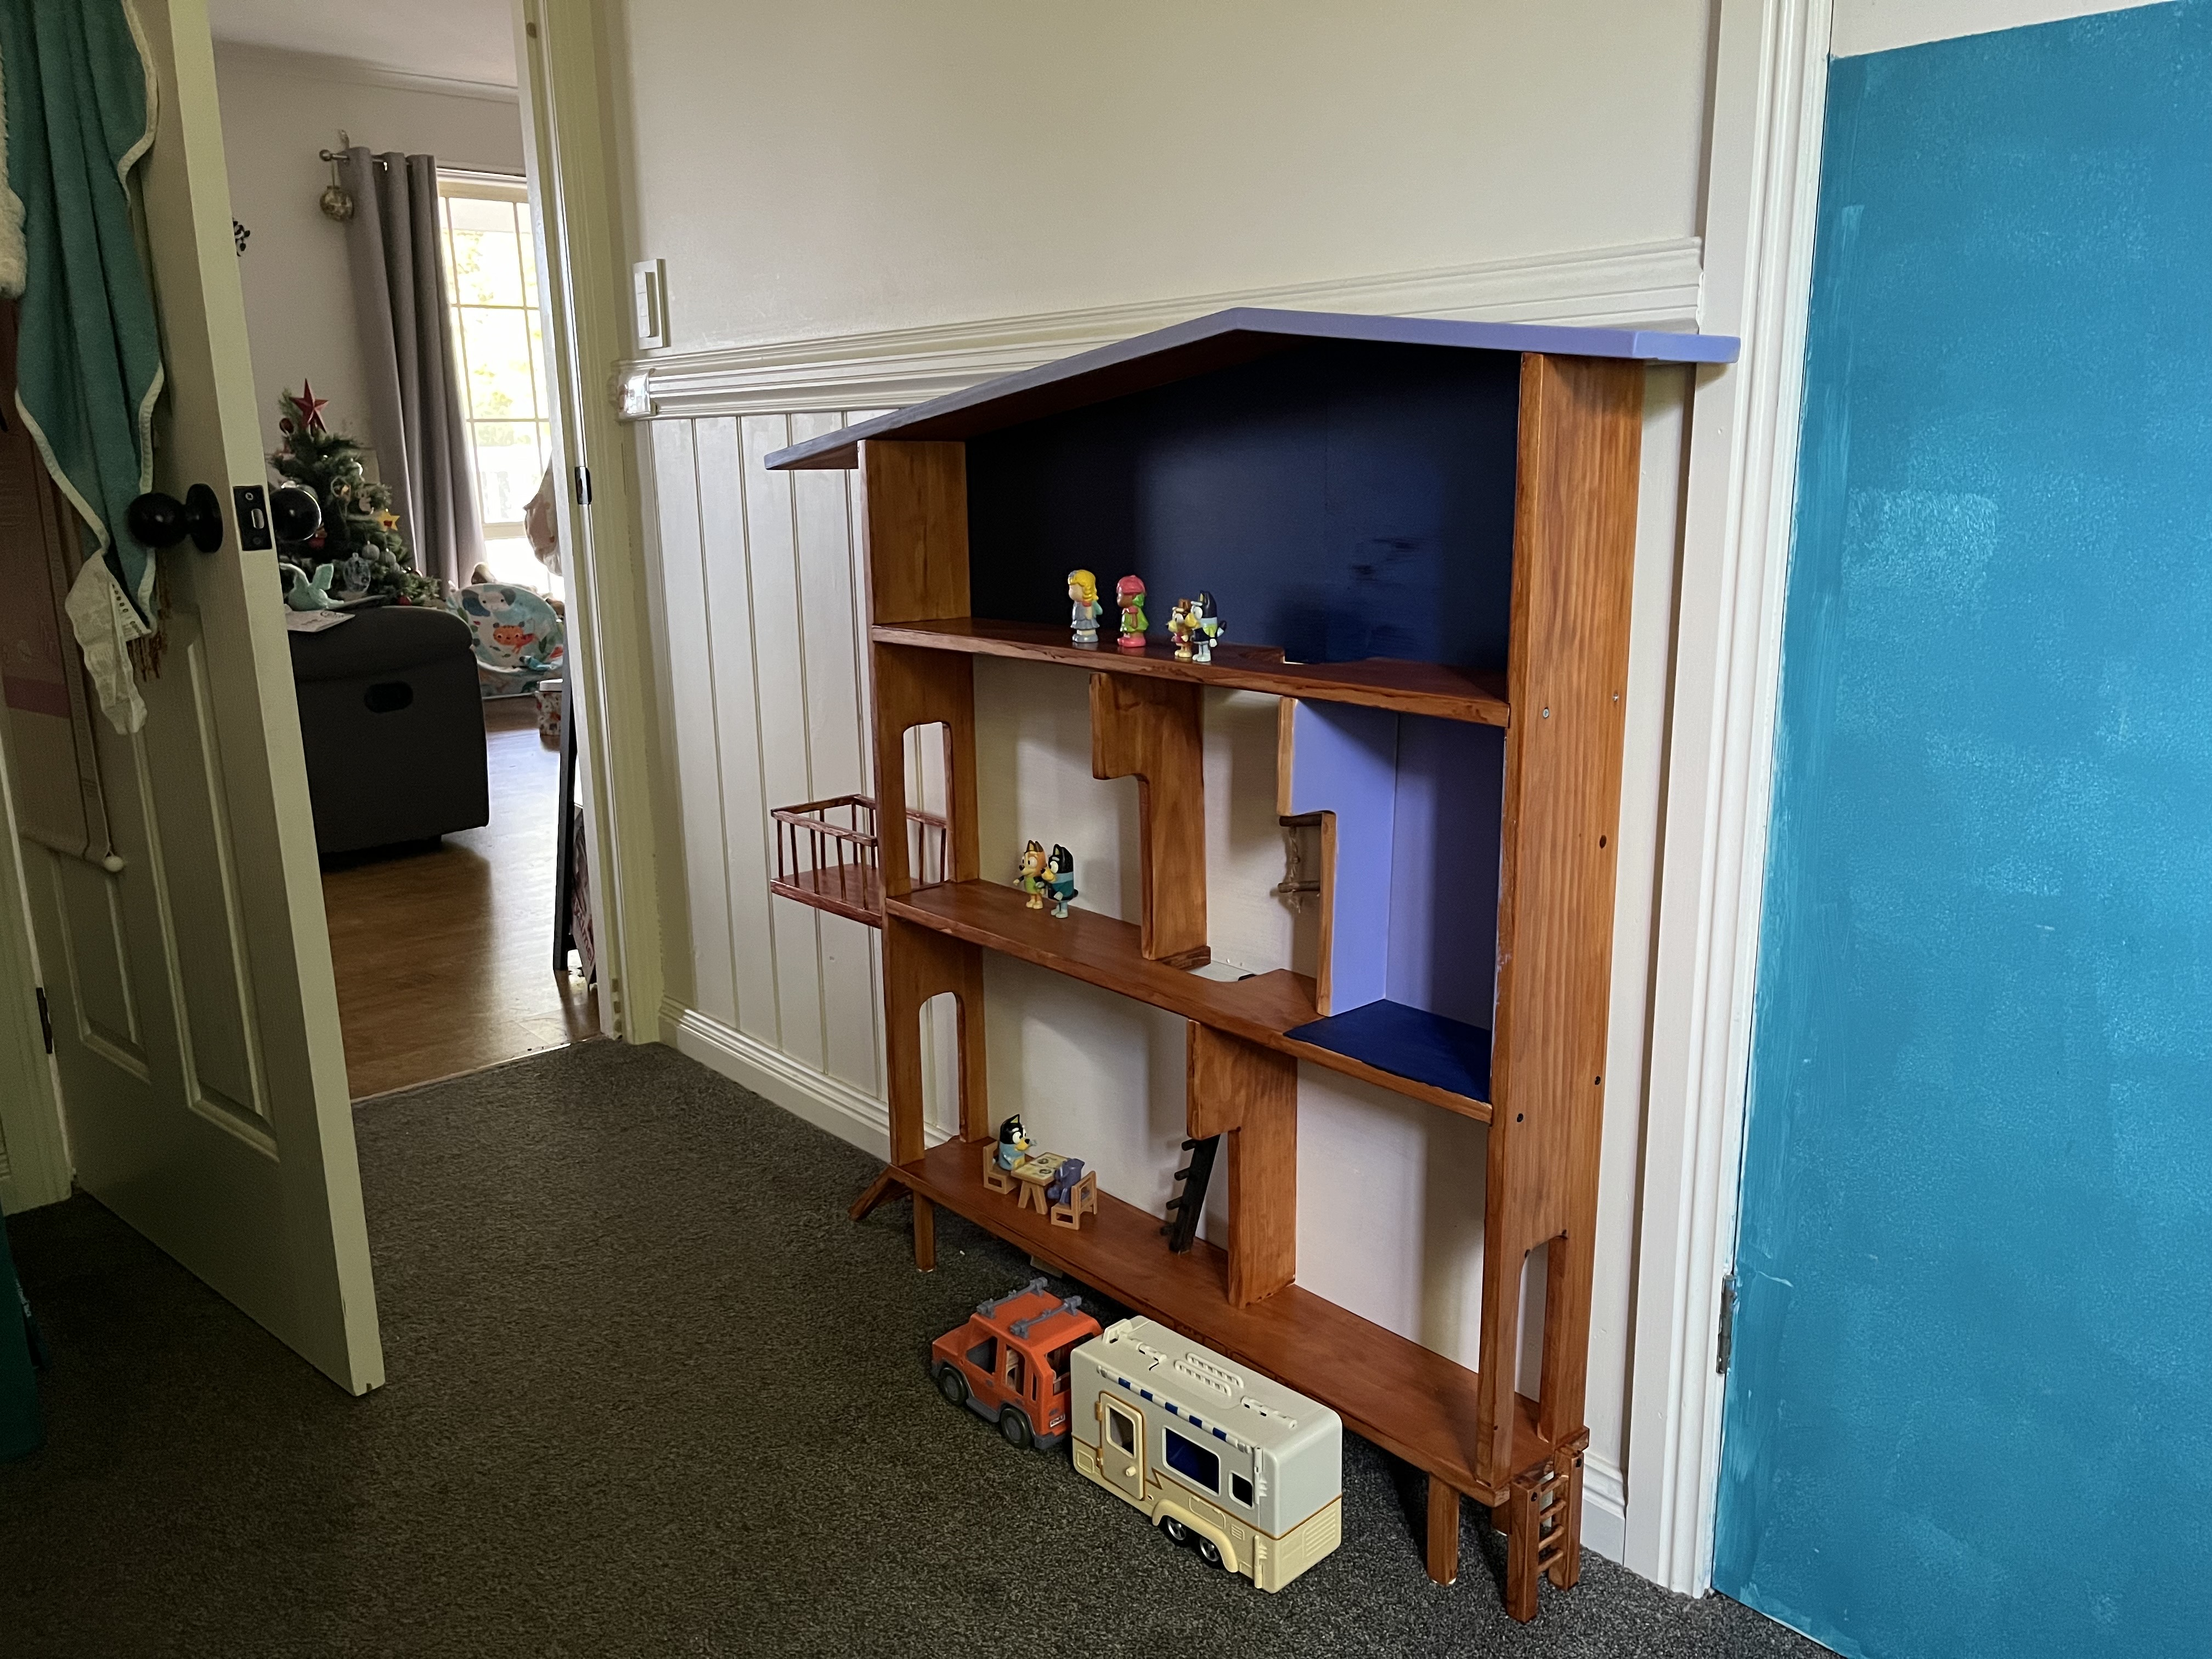
I surprised my daughter (and the entire family) on Christmas morning when they found this waiting in the living room. I hadn’t told my partner I’d been working on anything, kept it quiet.
It’s all just pine, dressed all round. Had to go buy a cheap and nasty jigsaw to cut the doors and opening between floors since my coping saw broke whilst trying to work this (handle snapped clean off, thanks Stanley)
The roof- cut at an angle, turned one piece over and glued it. Then stood like a statue holding it for half an hour pressing it against the ground until it dried enough. Couldn’t think of any other way to hold it tight at that angle -_-
The floors and balcony are all slotted into through dados. Cut, chiseled and then cleaned up a bit with trim router. And I hate so much working pine with chisels! (I’ve since got a bigger router bit that would have made this much easier)
Finished with water based Jarrah stain, with water based acrylic paint on the roof and “bathroom”. Some of that finish is really sloppy, I was still out there late on Christmas Eve trying to get the last few coats on.
A leftover sheet of mdf (think about 5mm) just painted and nailed in as the back wall.
There’s a little set of stairs on the ground floor finished with dark carnauba wax. There’s also a little rope ladder going up to the top floor - was from our pet bird who had left us recently.
A whole mish mash of different ideas here, but I just wanted to make something fun and interesting for my daughter.
For what I wanted to do for her first big Christmas (just turned 3), this turned out better than I thought I could do.

14
15
16
cross-posted from: https://pixelfed.crimedad.work/p/crimedad/705187000877520551
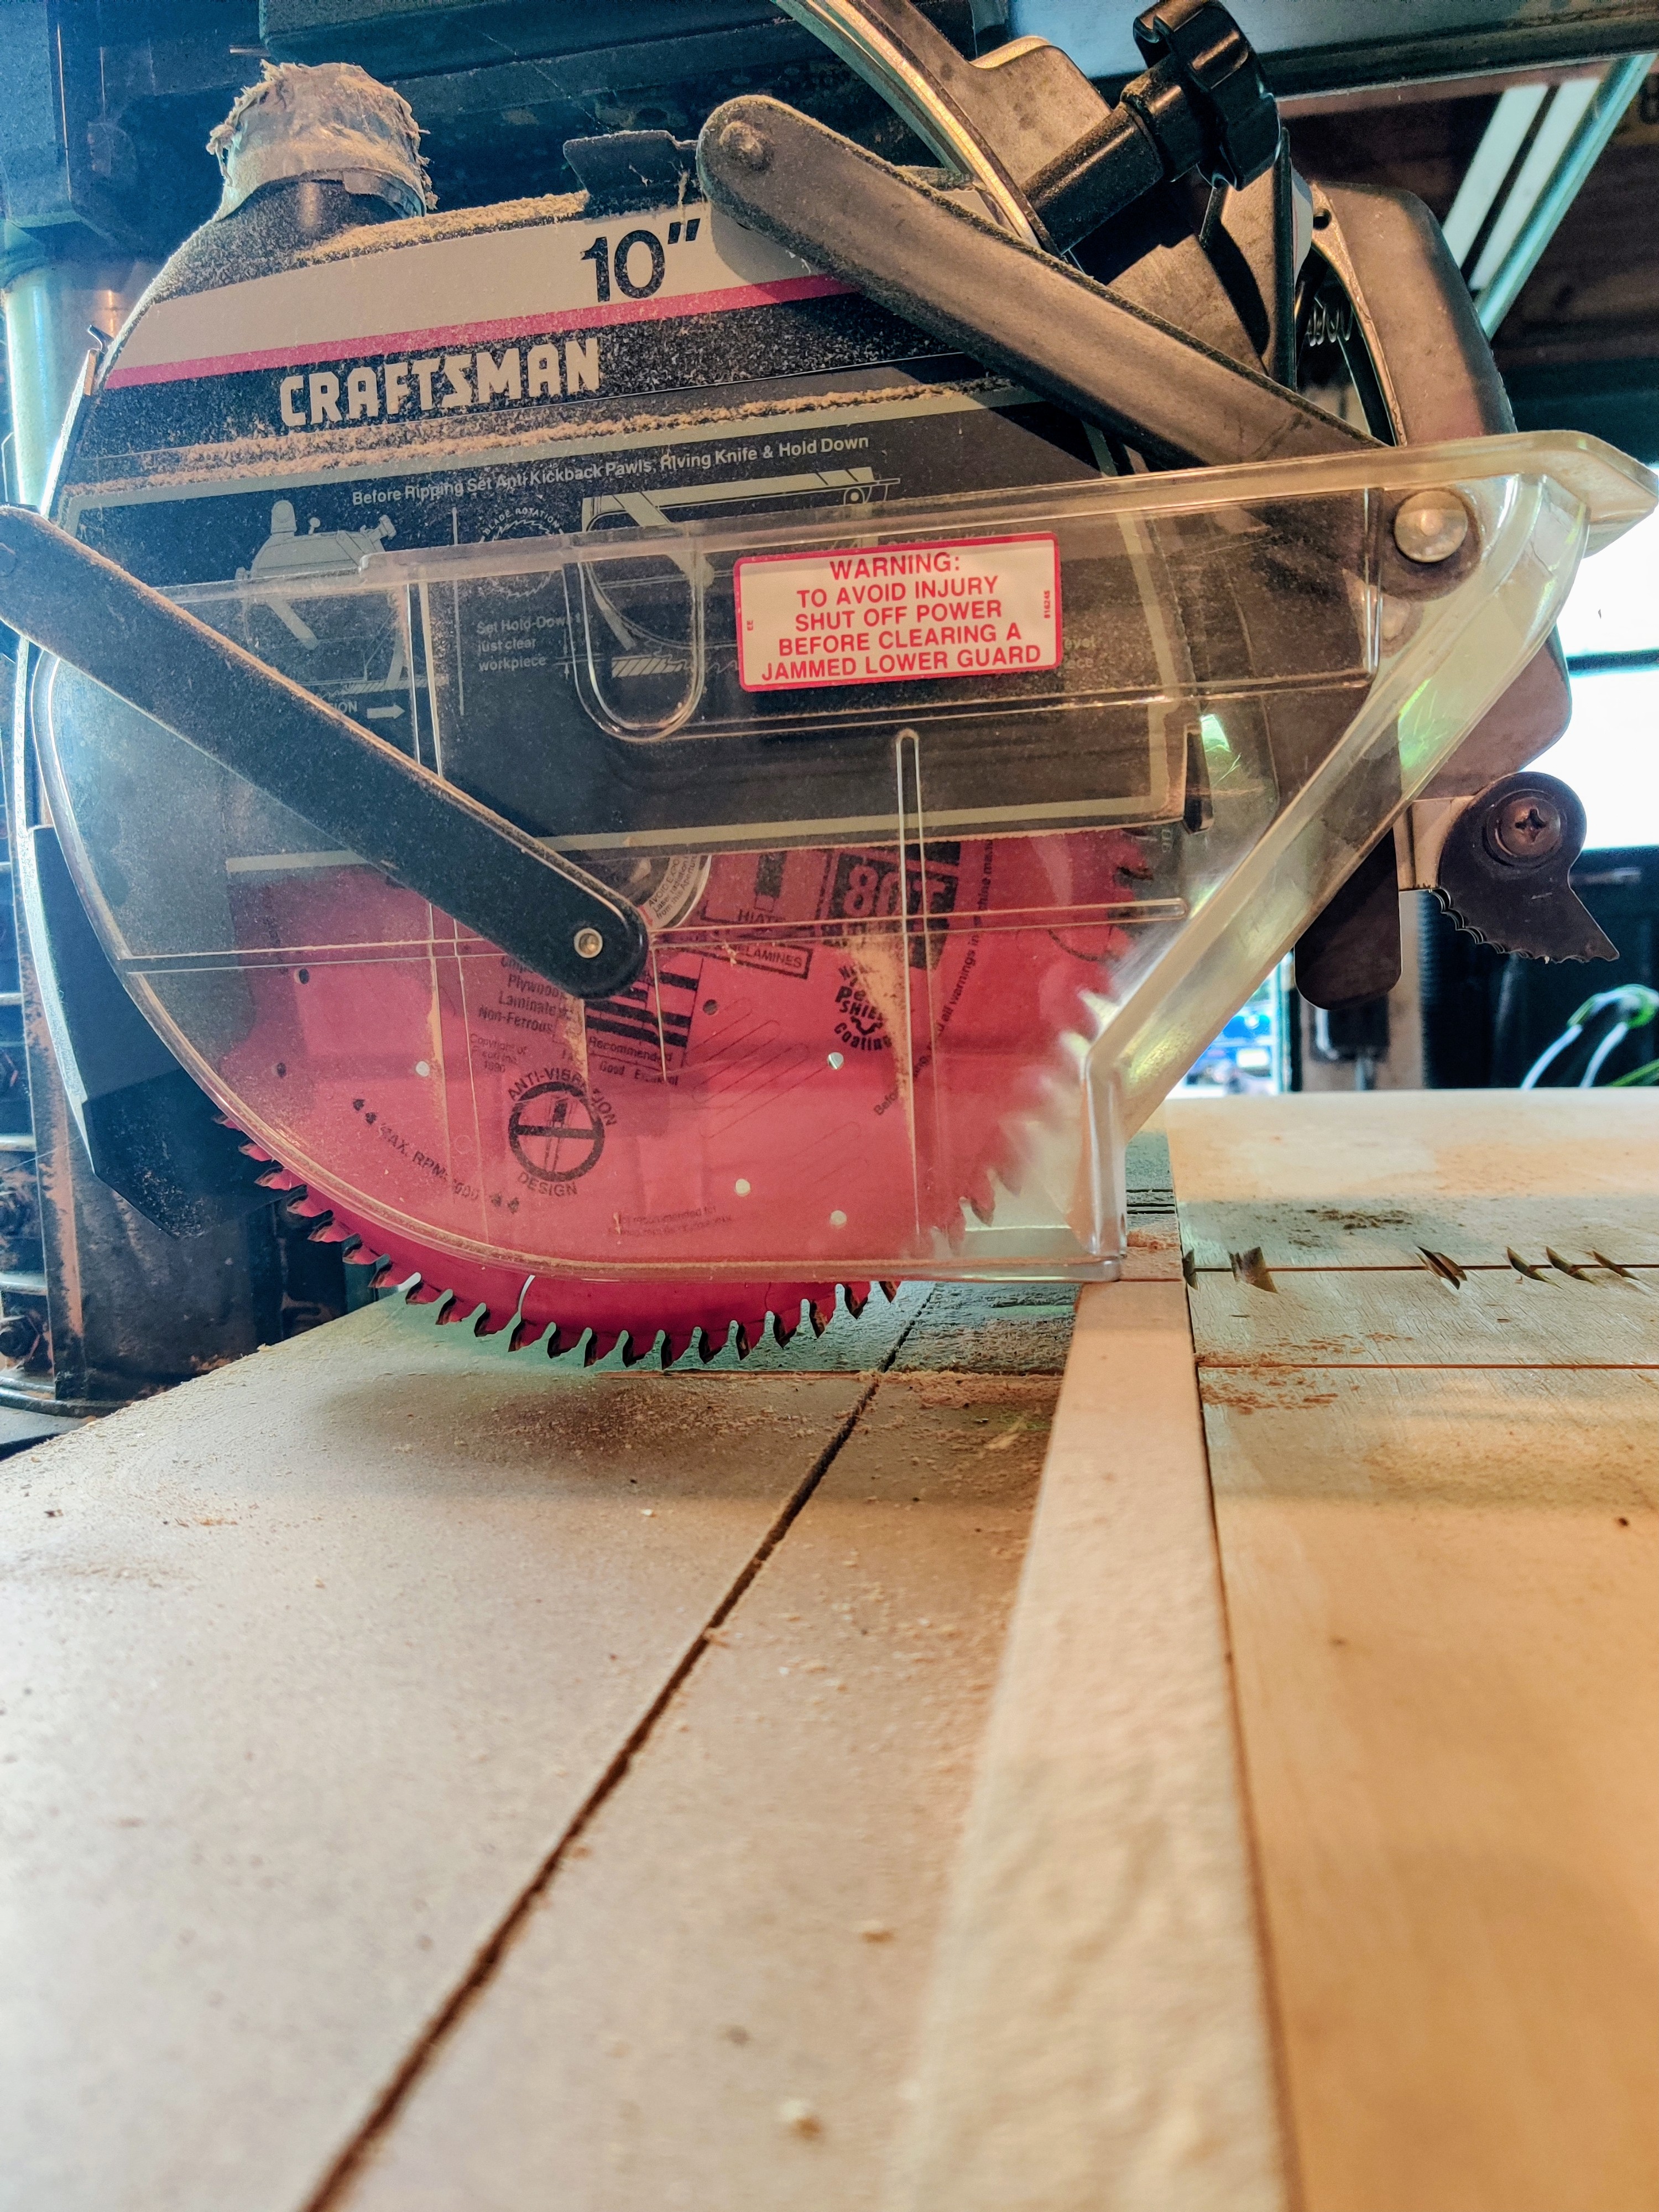
Is this correct for the updated blade guard on a radial arm saw?
The carriage doesn't go back far enough for the blade guard to fall down behind the fence. I thought the guard was supposed to keep the carriage in the home position until the user lifts it with the lever on the handle. I'm wondering if I did something wrong. Any RAS users know what I'm talking about?
17
18
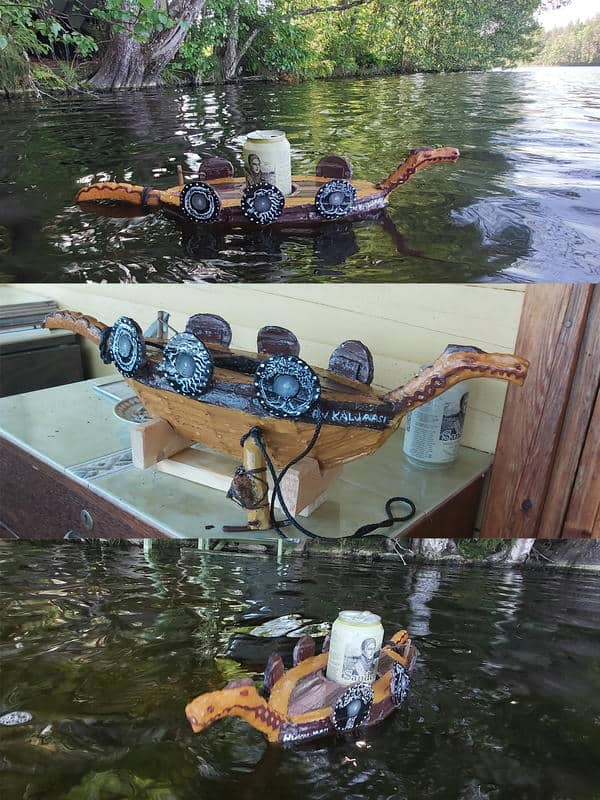
A little beer boat, HV Kaljaasi, made for the summer cottage and warm summer days, when you can sit in the lake and enjoy the sun.
Made from various little pieces of wood, sticks, glue and rocks inside the hull for steadying the boat. Swims well, even if it tilts little to the left.
19
21
I'm not sure where the right place to post this would be, but here goes.
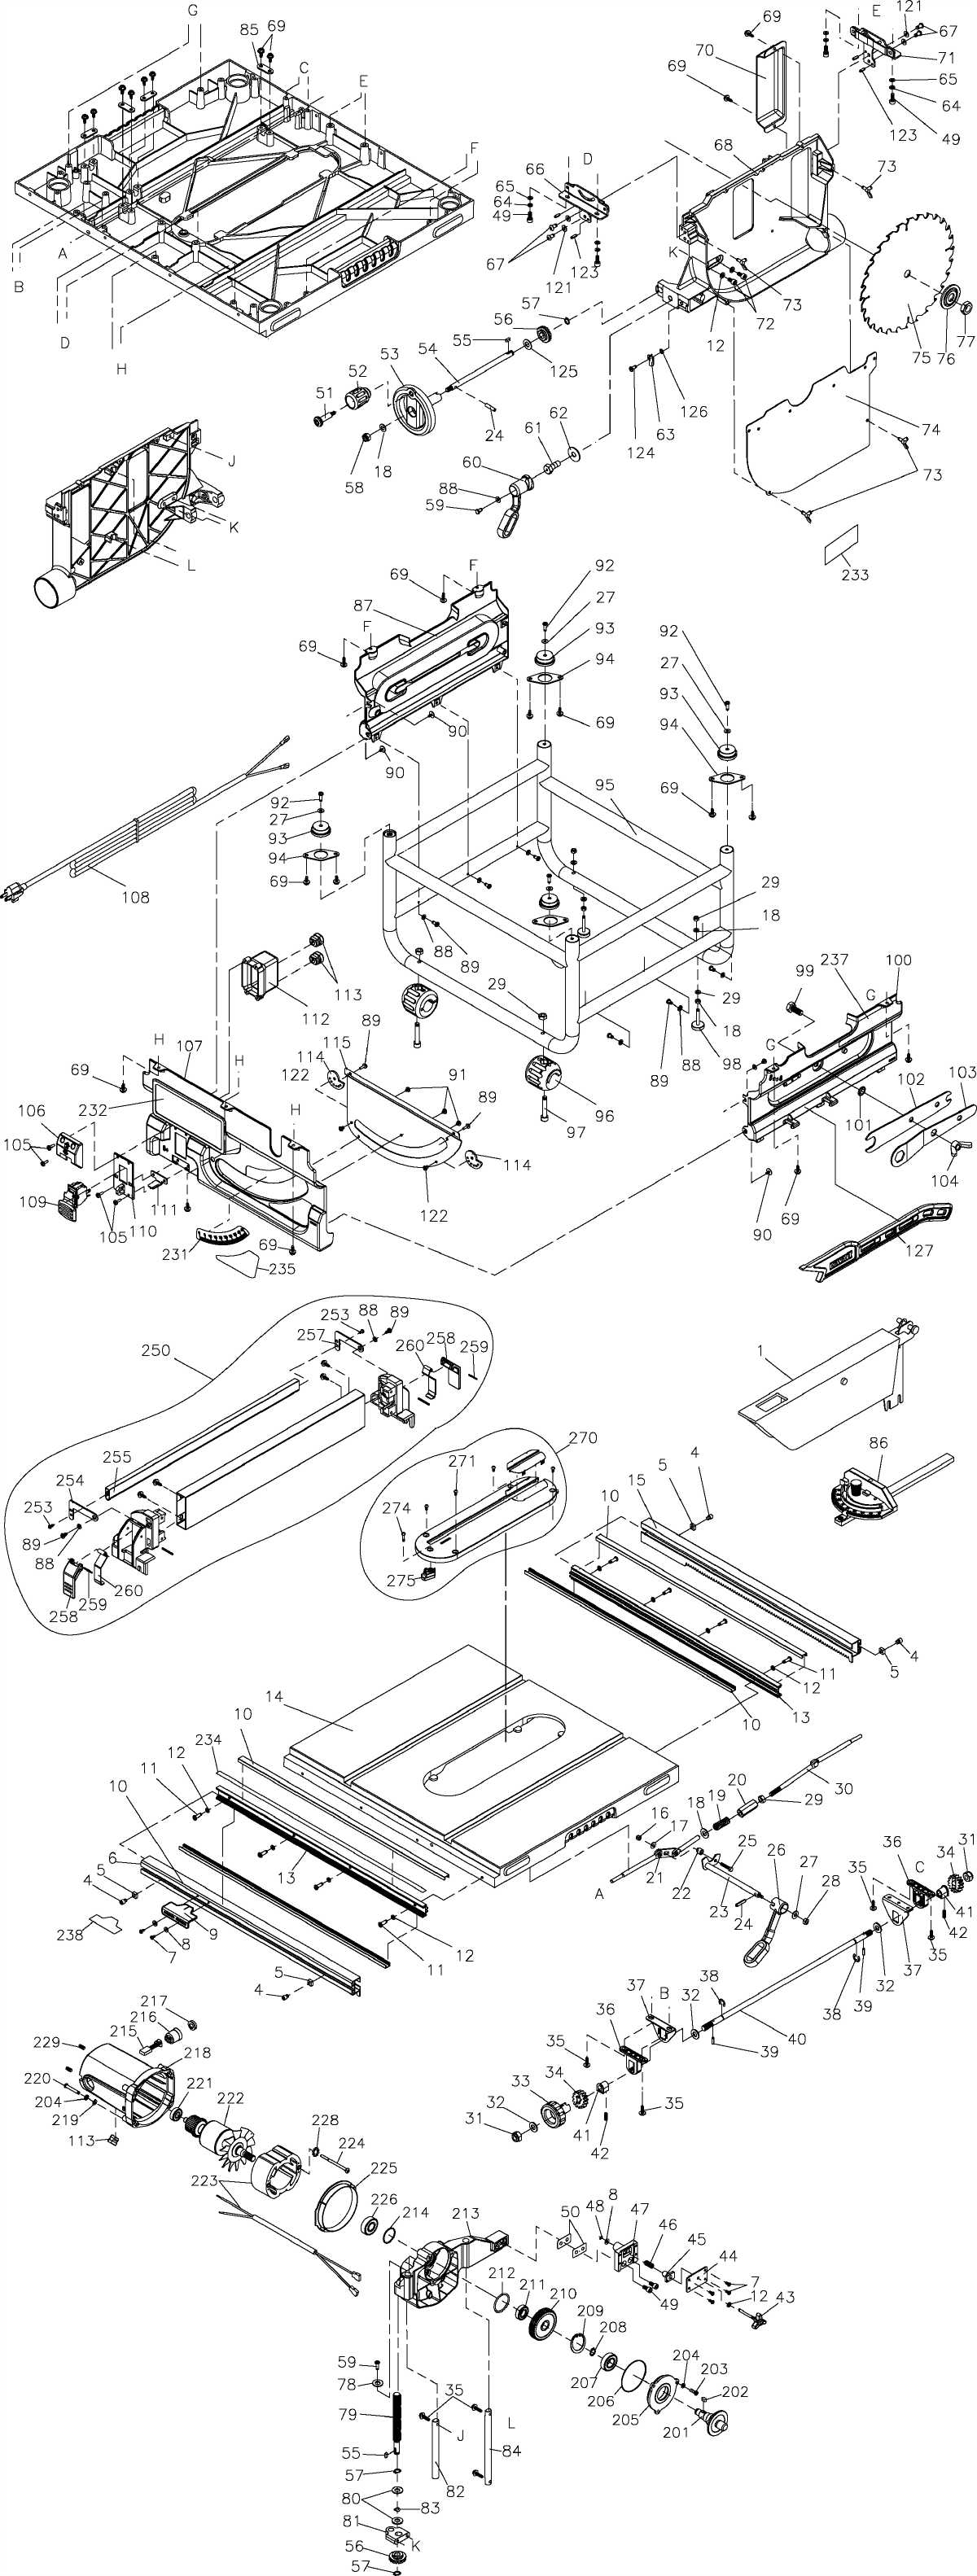
I bought this DW745 Type 2 saw off of Facebook Marketplace. I think it was abused. I replaced both of the elevating shafts (5140100-04 Diagram # 82 & 5140100-05 Diagram # 84). I also had to replace both of the bevel gears (5140061-65 Diagram # 56).
The aluminum housing seems to be okay and the lifting shafts move in and out without much resistance. I'm still getting this chunky movement when I raise and lower the blade.
I'm looking for advice before I go though the whole process of replacing the entire aluminum housing (Gear Case A25607 Diagram # 213) on the motor.
22
23
74


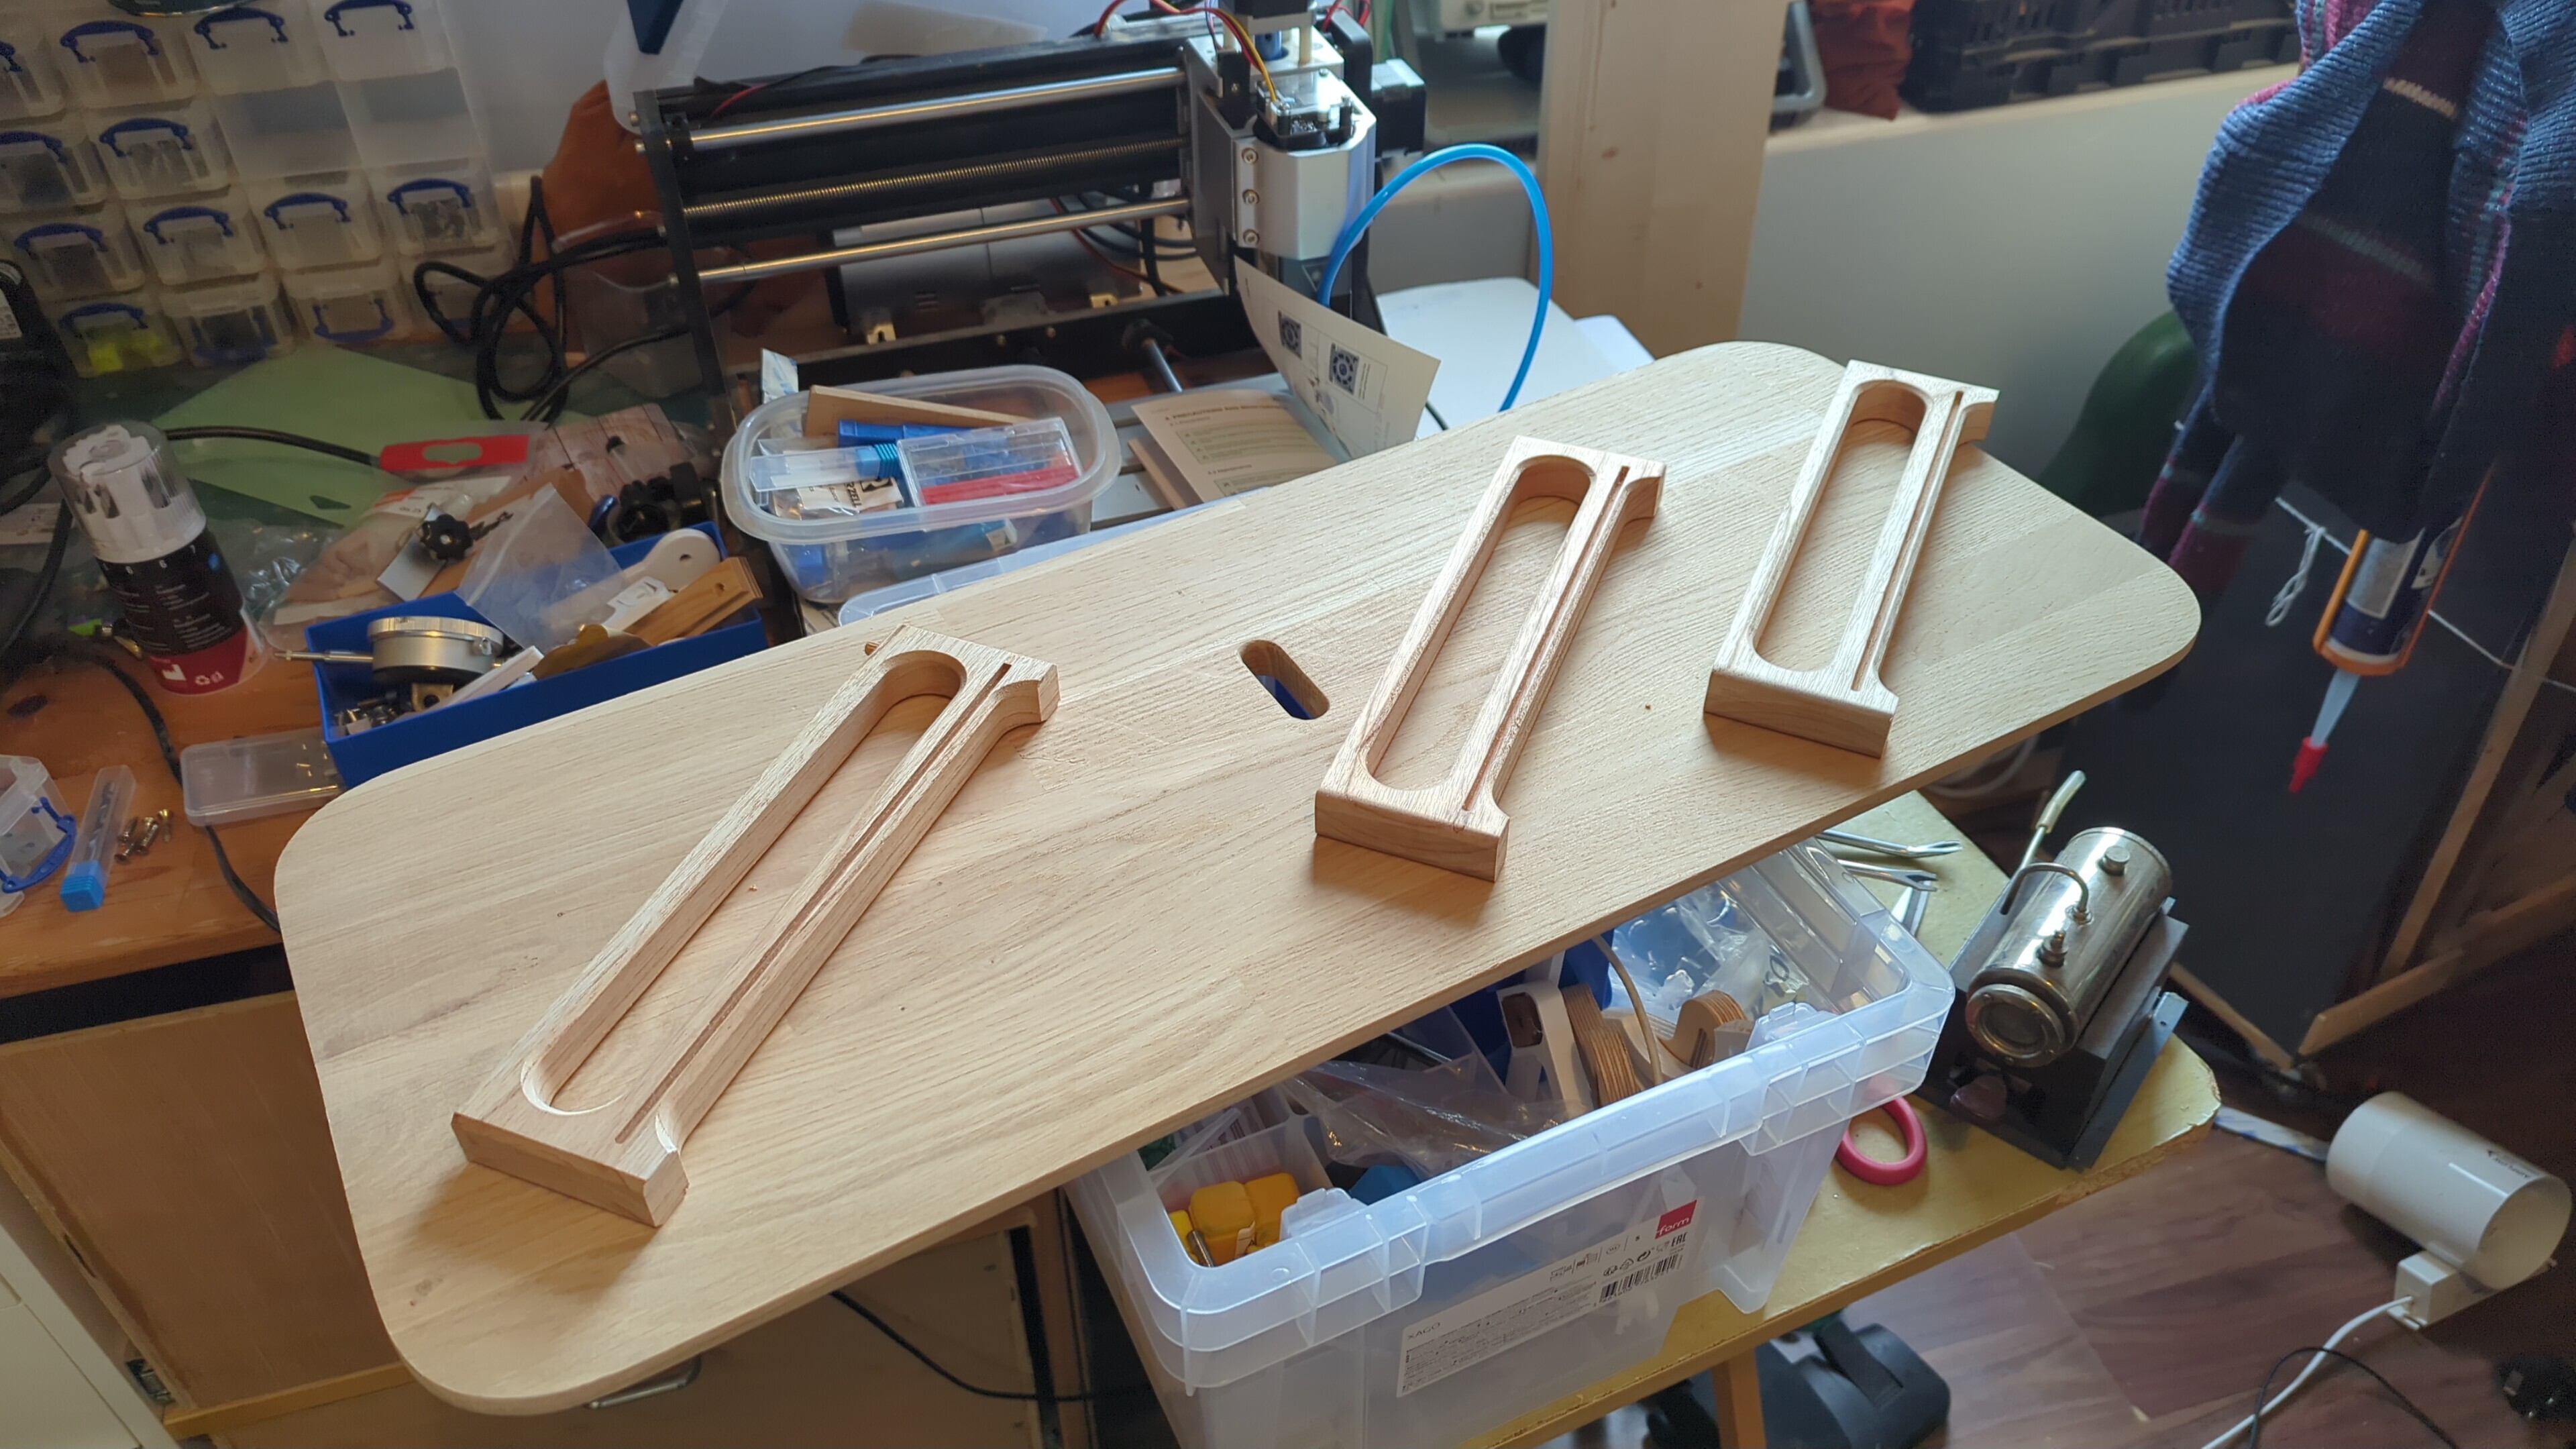
24


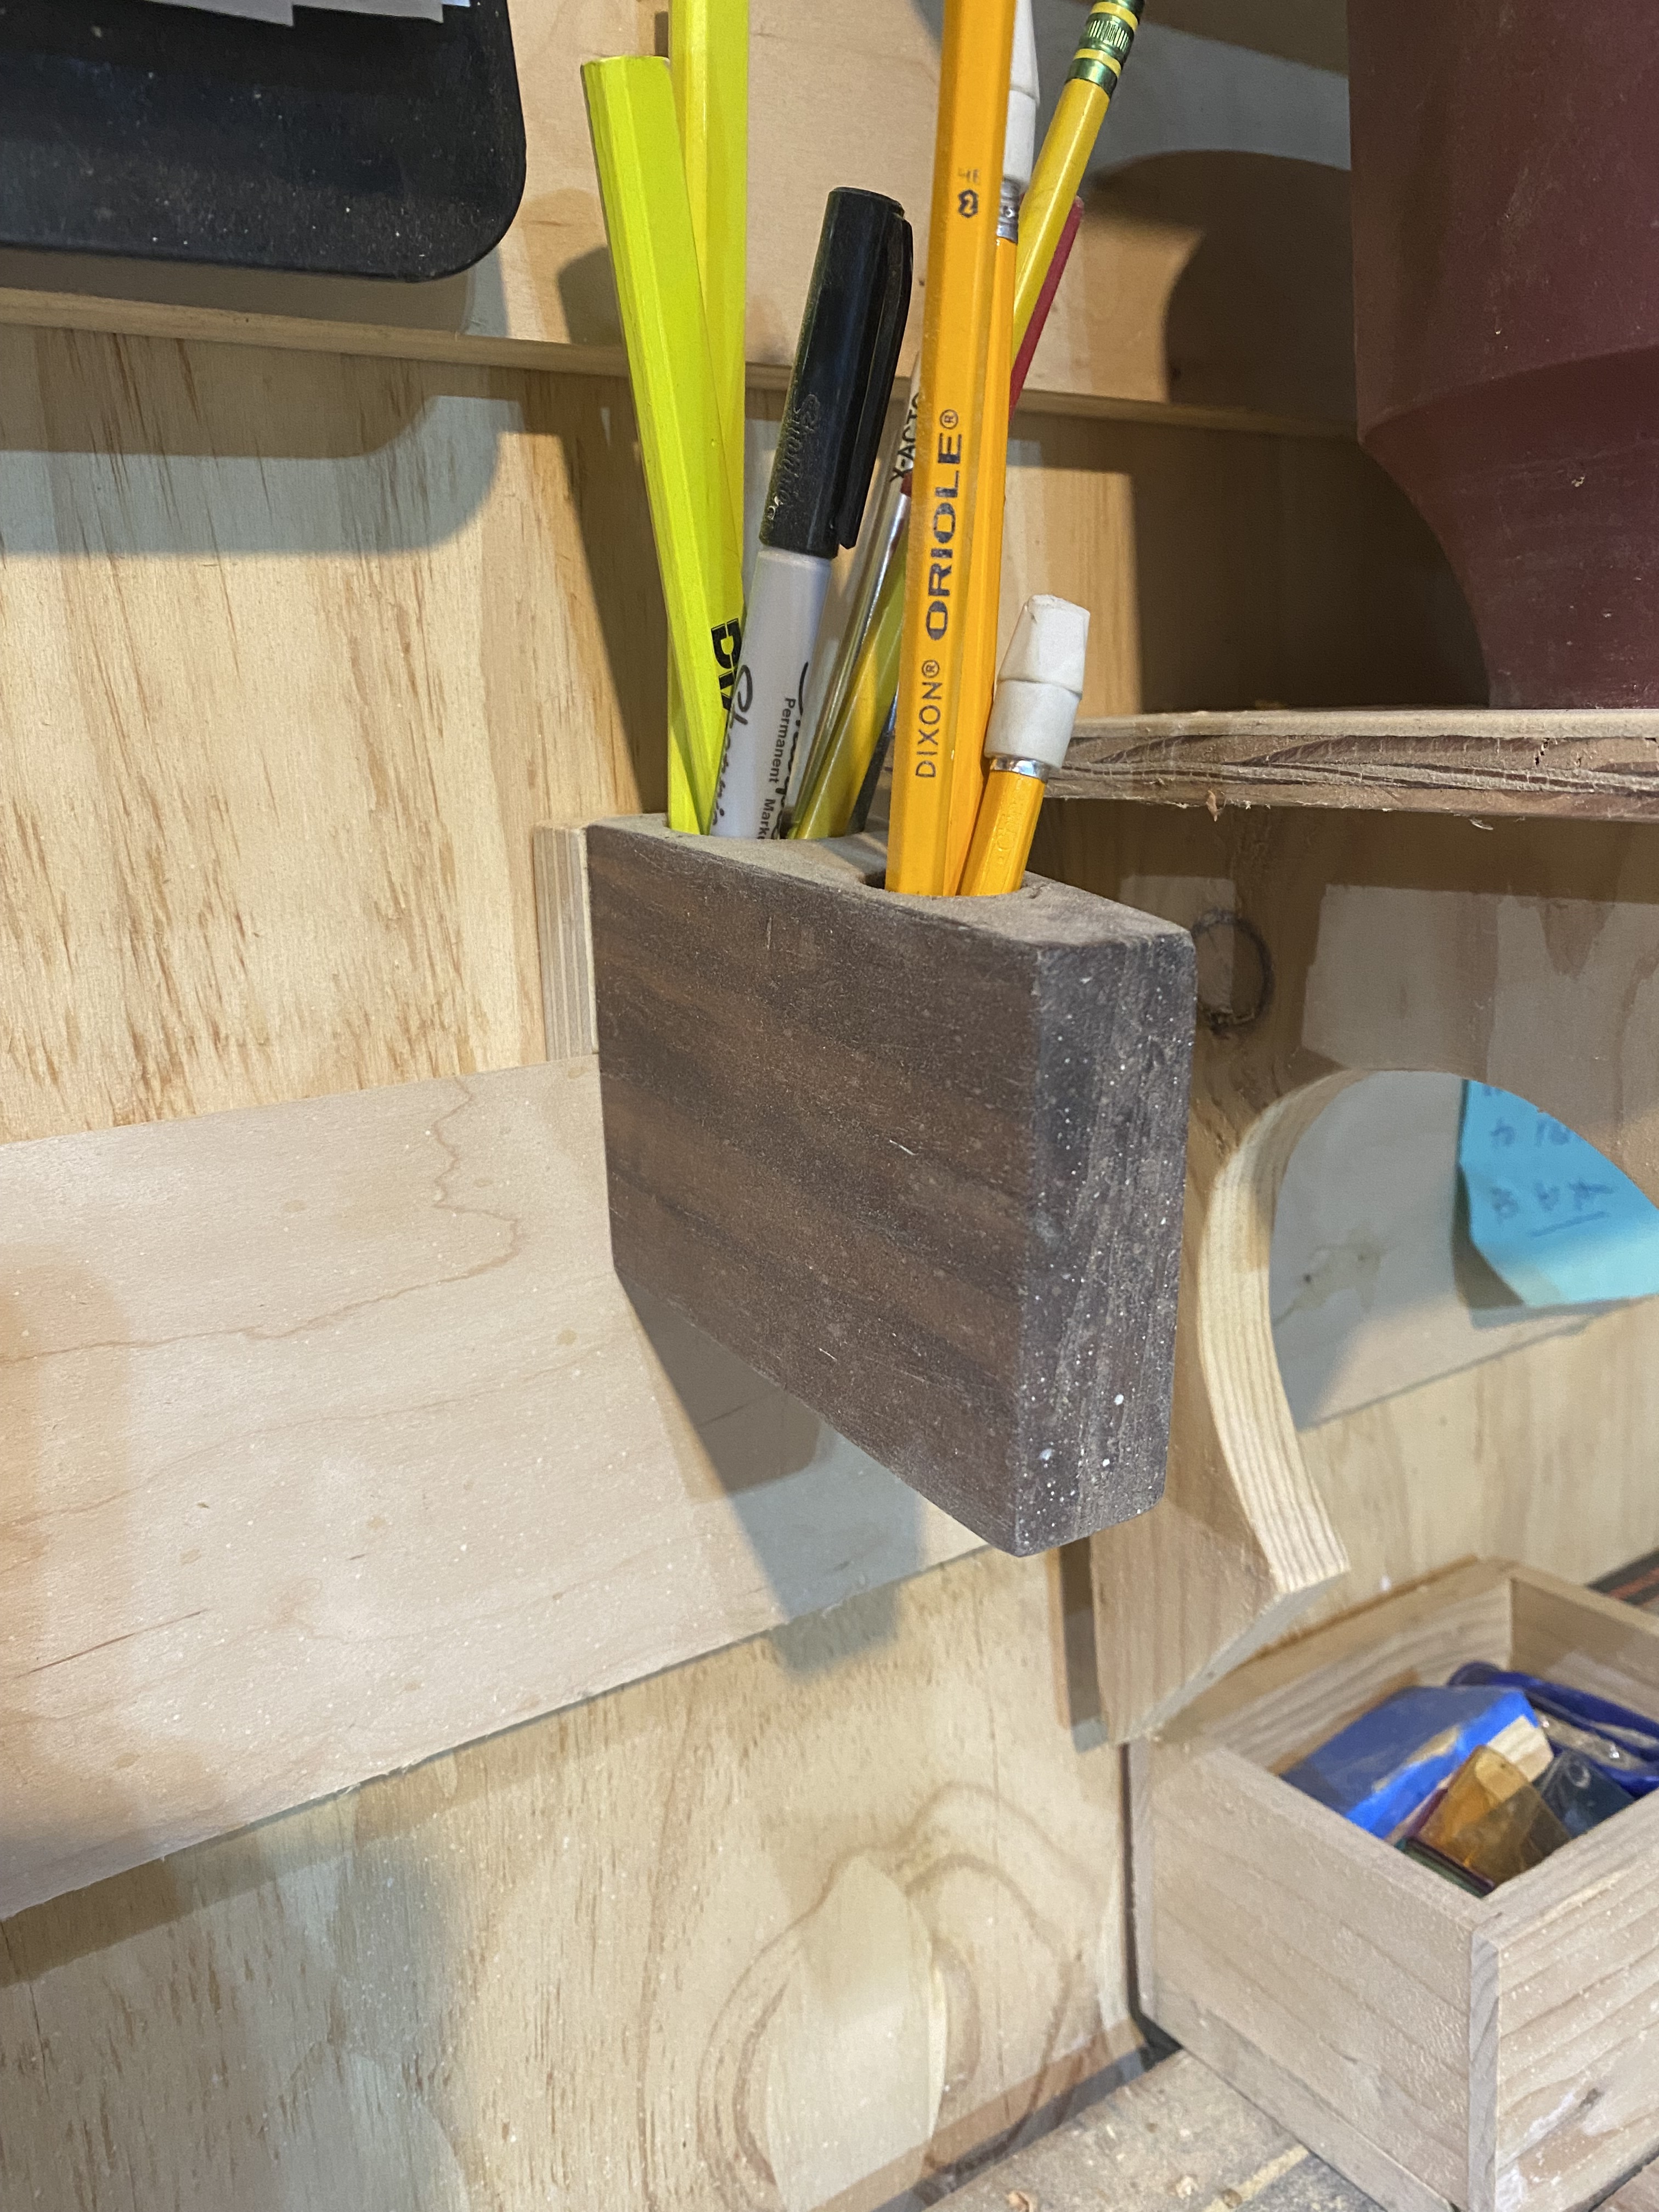


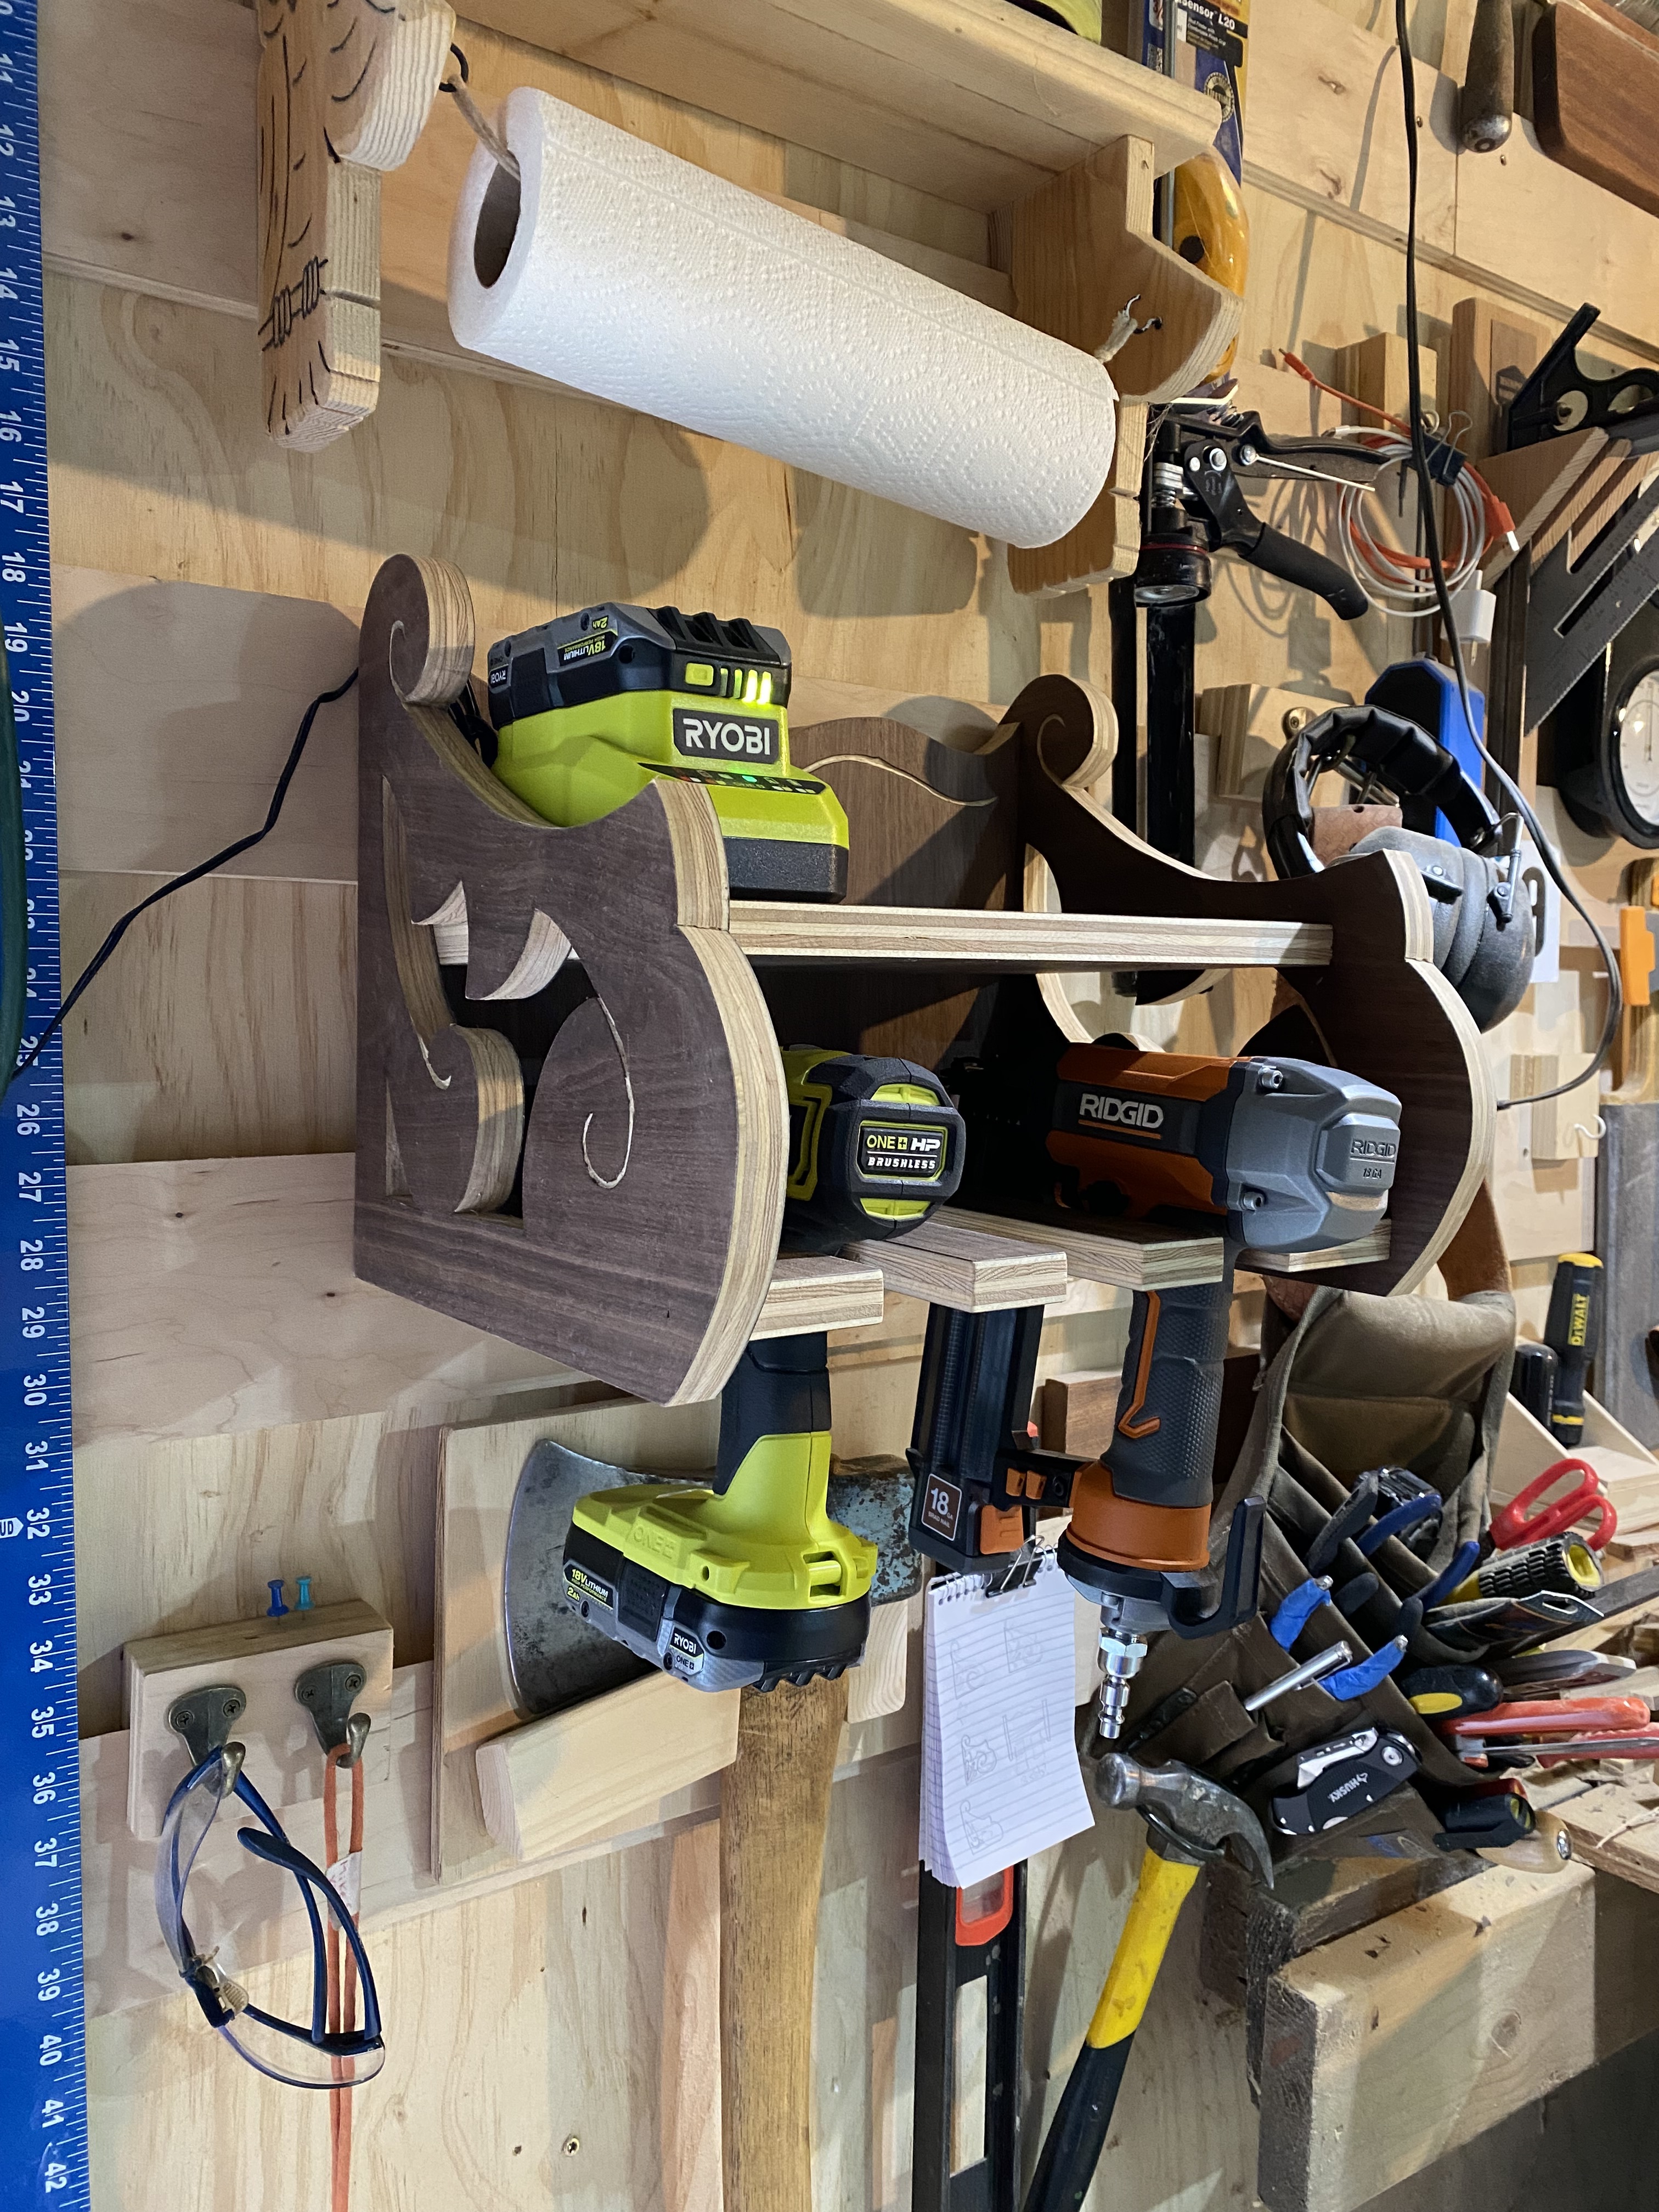
There are also some decorations of course. And a phone holder in cherry wood (but I’m using the phone). Got a salmon push stick, and the most important thing is a lid to keep dust out of my beverages.
25
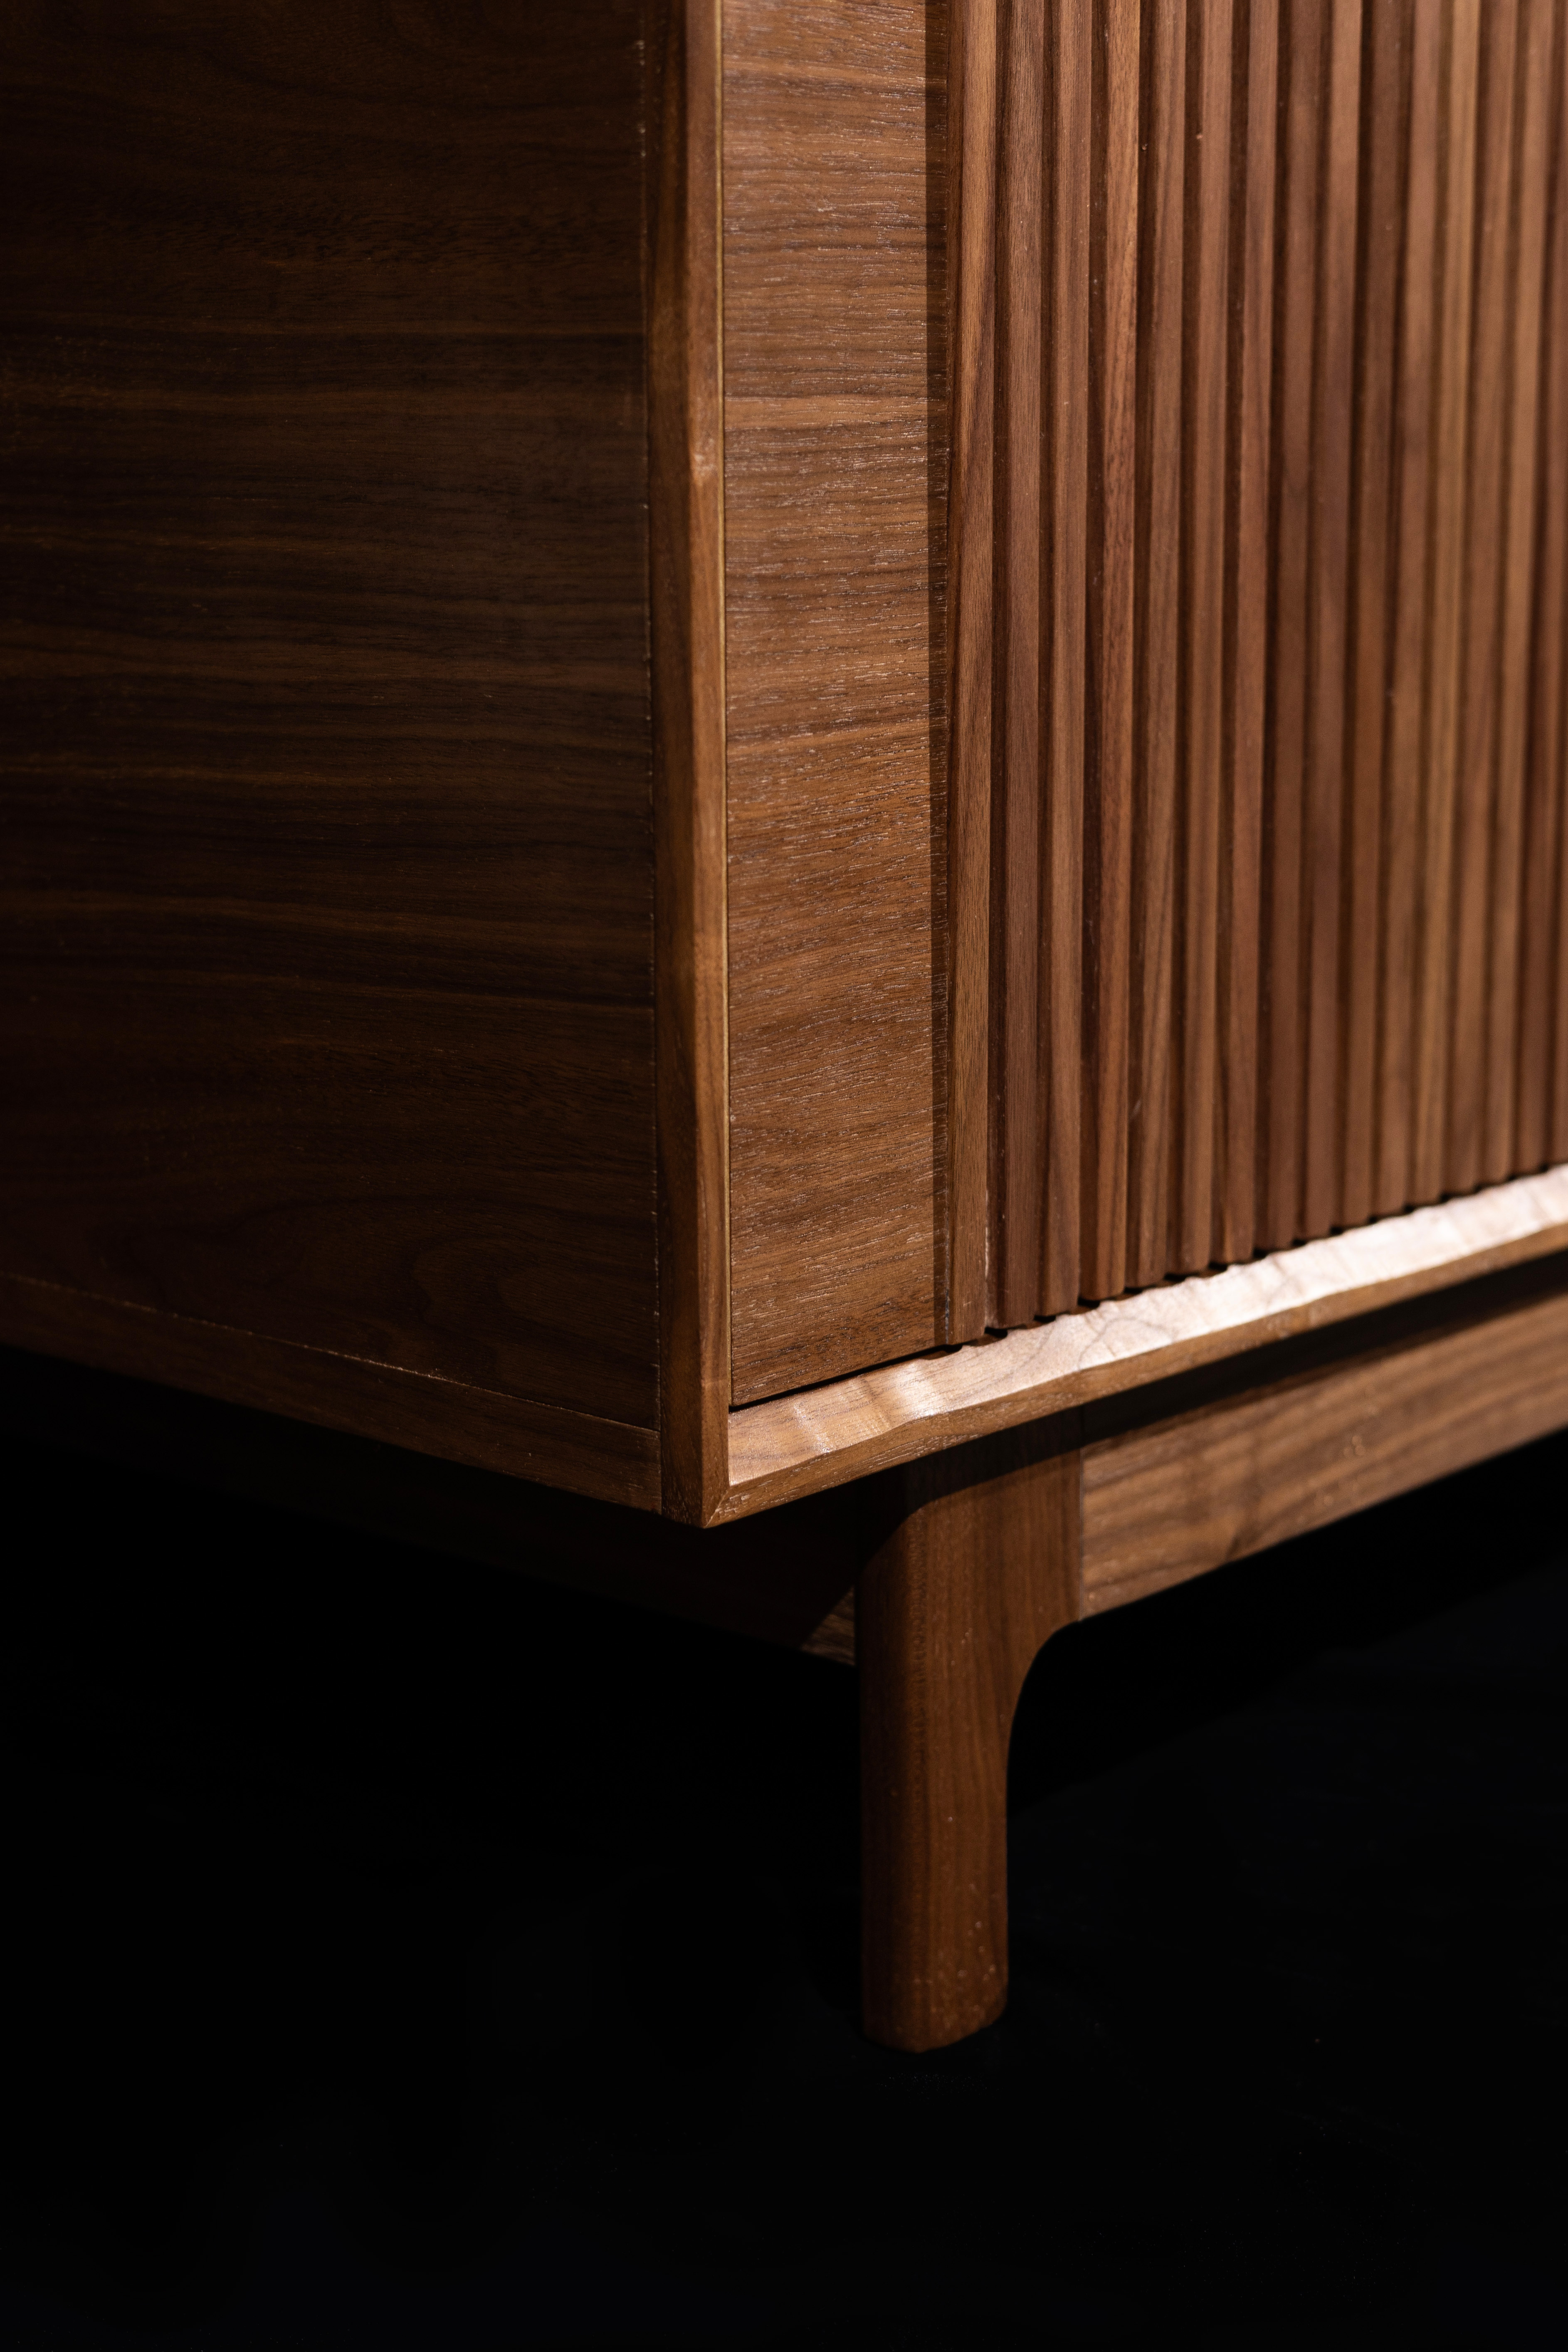
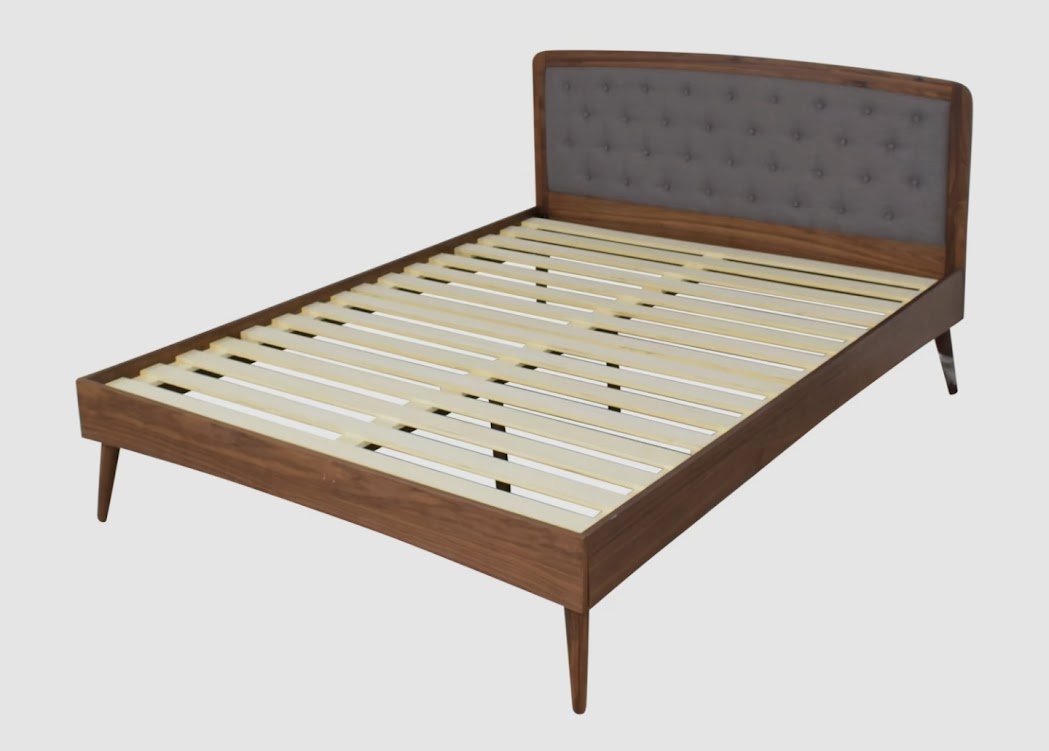
I want to make my own bed, and have several example pictures. Where do people find plans for their furniture?
view more: next ›